> ## Documentation Index
> Fetch the complete documentation index at: https://docs.servflow.io/llms.txt
> Use this file to discover all available pages before exploring further.
# Dashboard Quickstart
> Create your first Hello World API with the ServFlow dashboard in under 5 minutes
ServFlow is a visual backend engine that lets you build APIs through an intuitive dashboard interface. This guide walks you through creating a simple "Hello World" API endpoint using the dashboard. By the end, you'll have a working API that responds to HTTP requests.
Prefer writing configuration files directly? See the [YAML Quickstart](/quickstart-yaml) for a code-first approach, or learn about [Running Modes](/running-modes) to understand when to use each.
### Prerequisites
Before starting, make sure you have ServFlow Pro running with the dashboard enabled:
```docs/quickstart.mdx#L13-L14 theme={null}
servflow-pro start --config config.toml --dashboard
```
See the [Installation Guide](/installation) if you haven't set up ServFlow Pro yet.
### Step 1: Open the Dashboard
Open your browser and navigate to the ServFlow dashboard:
```docs/quickstart.mdx#L24-L25 theme={null}
http://localhost:3000
```
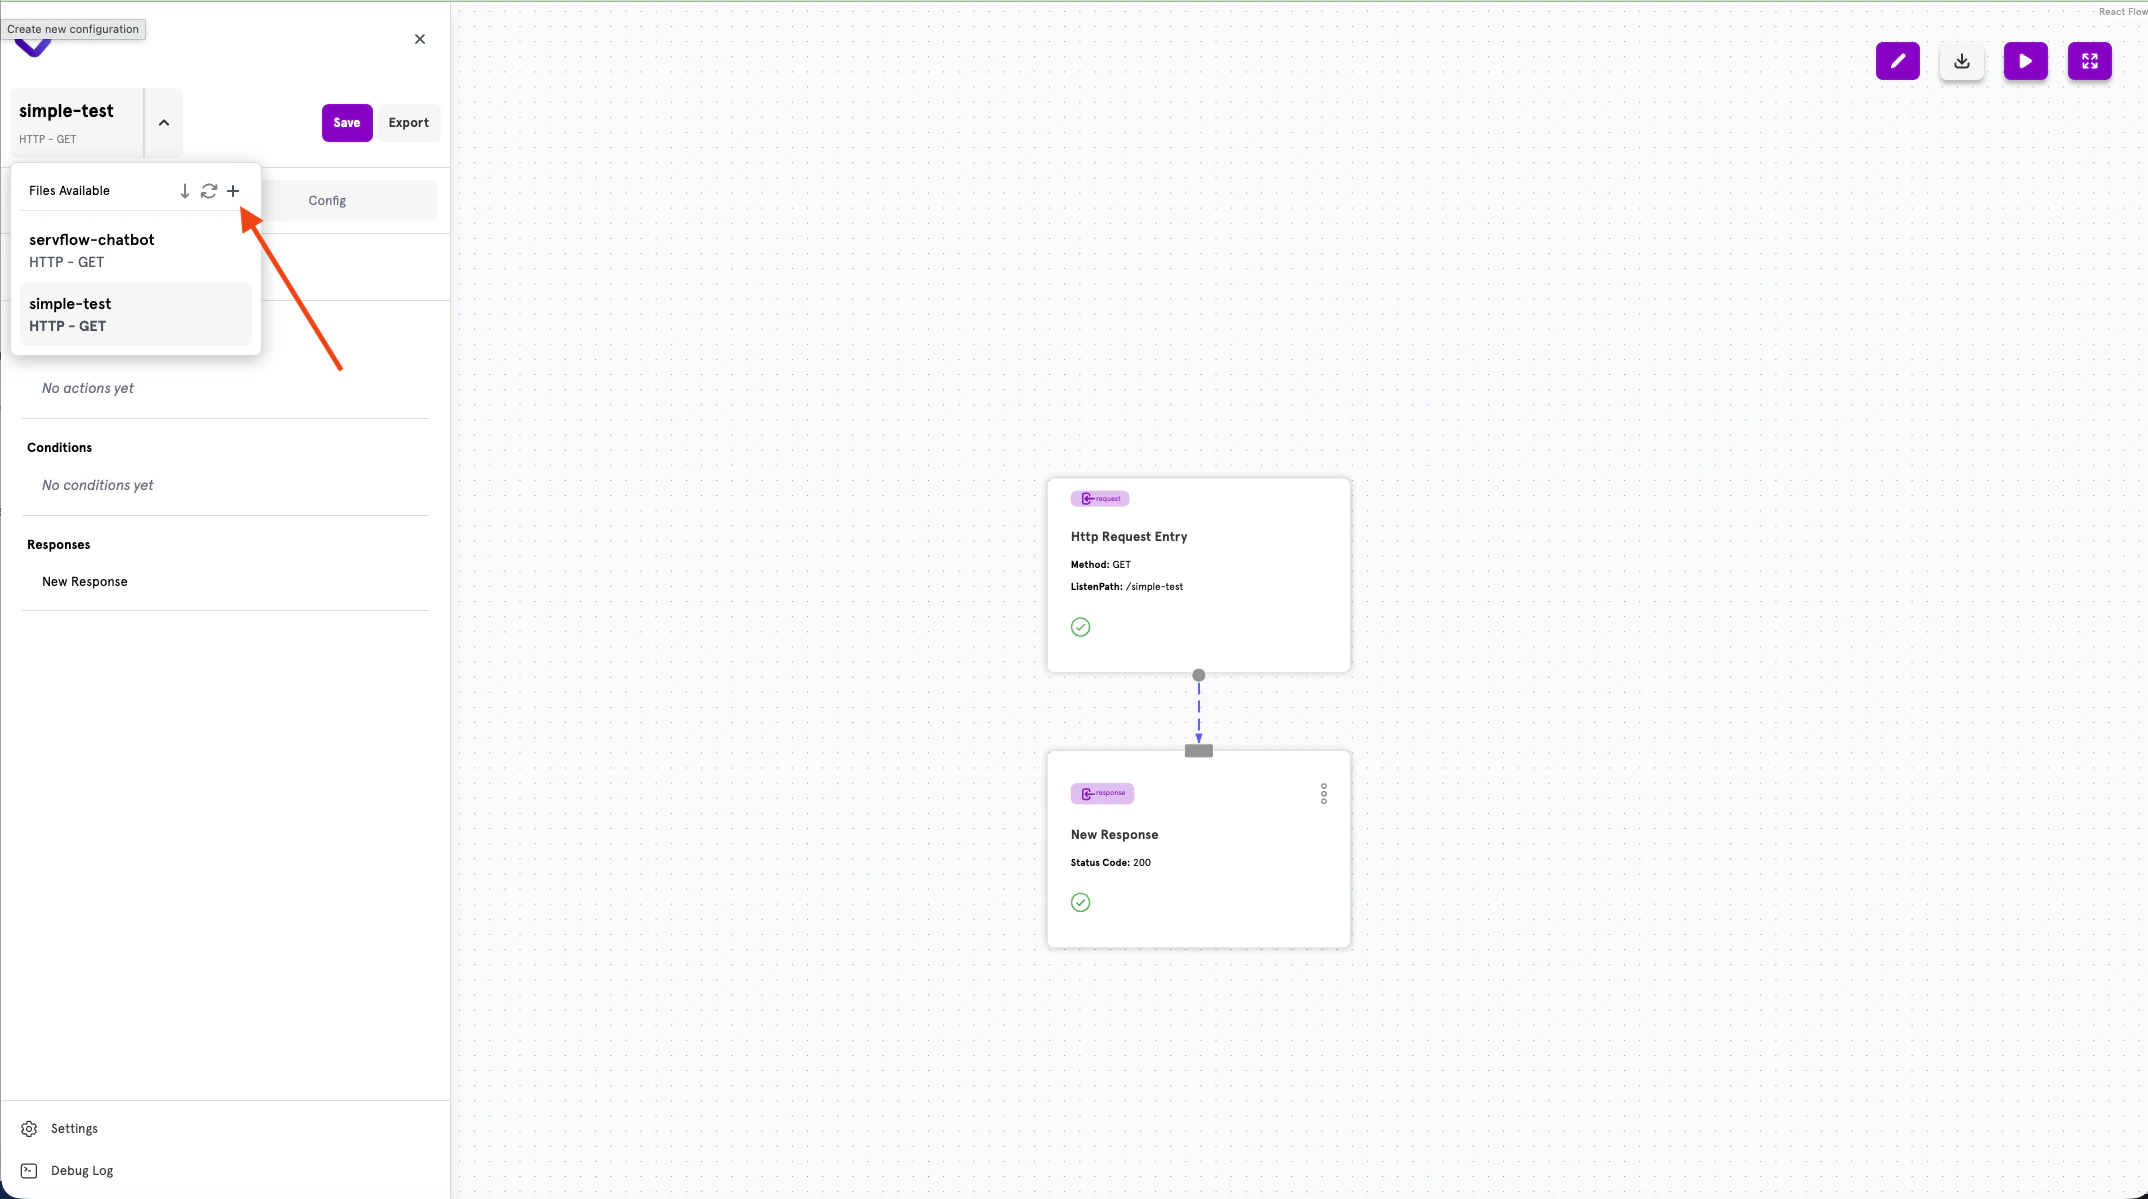
You'll see the ServFlow builder interface with the **Files Available** panel on the left side.
 ### Step 2: Create a New API Configuration
Click the **+** button in the **Files Available** panel header to create a new API configuration.
### Step 2: Create a New API Configuration
Click the **+** button in the **Files Available** panel header to create a new API configuration.
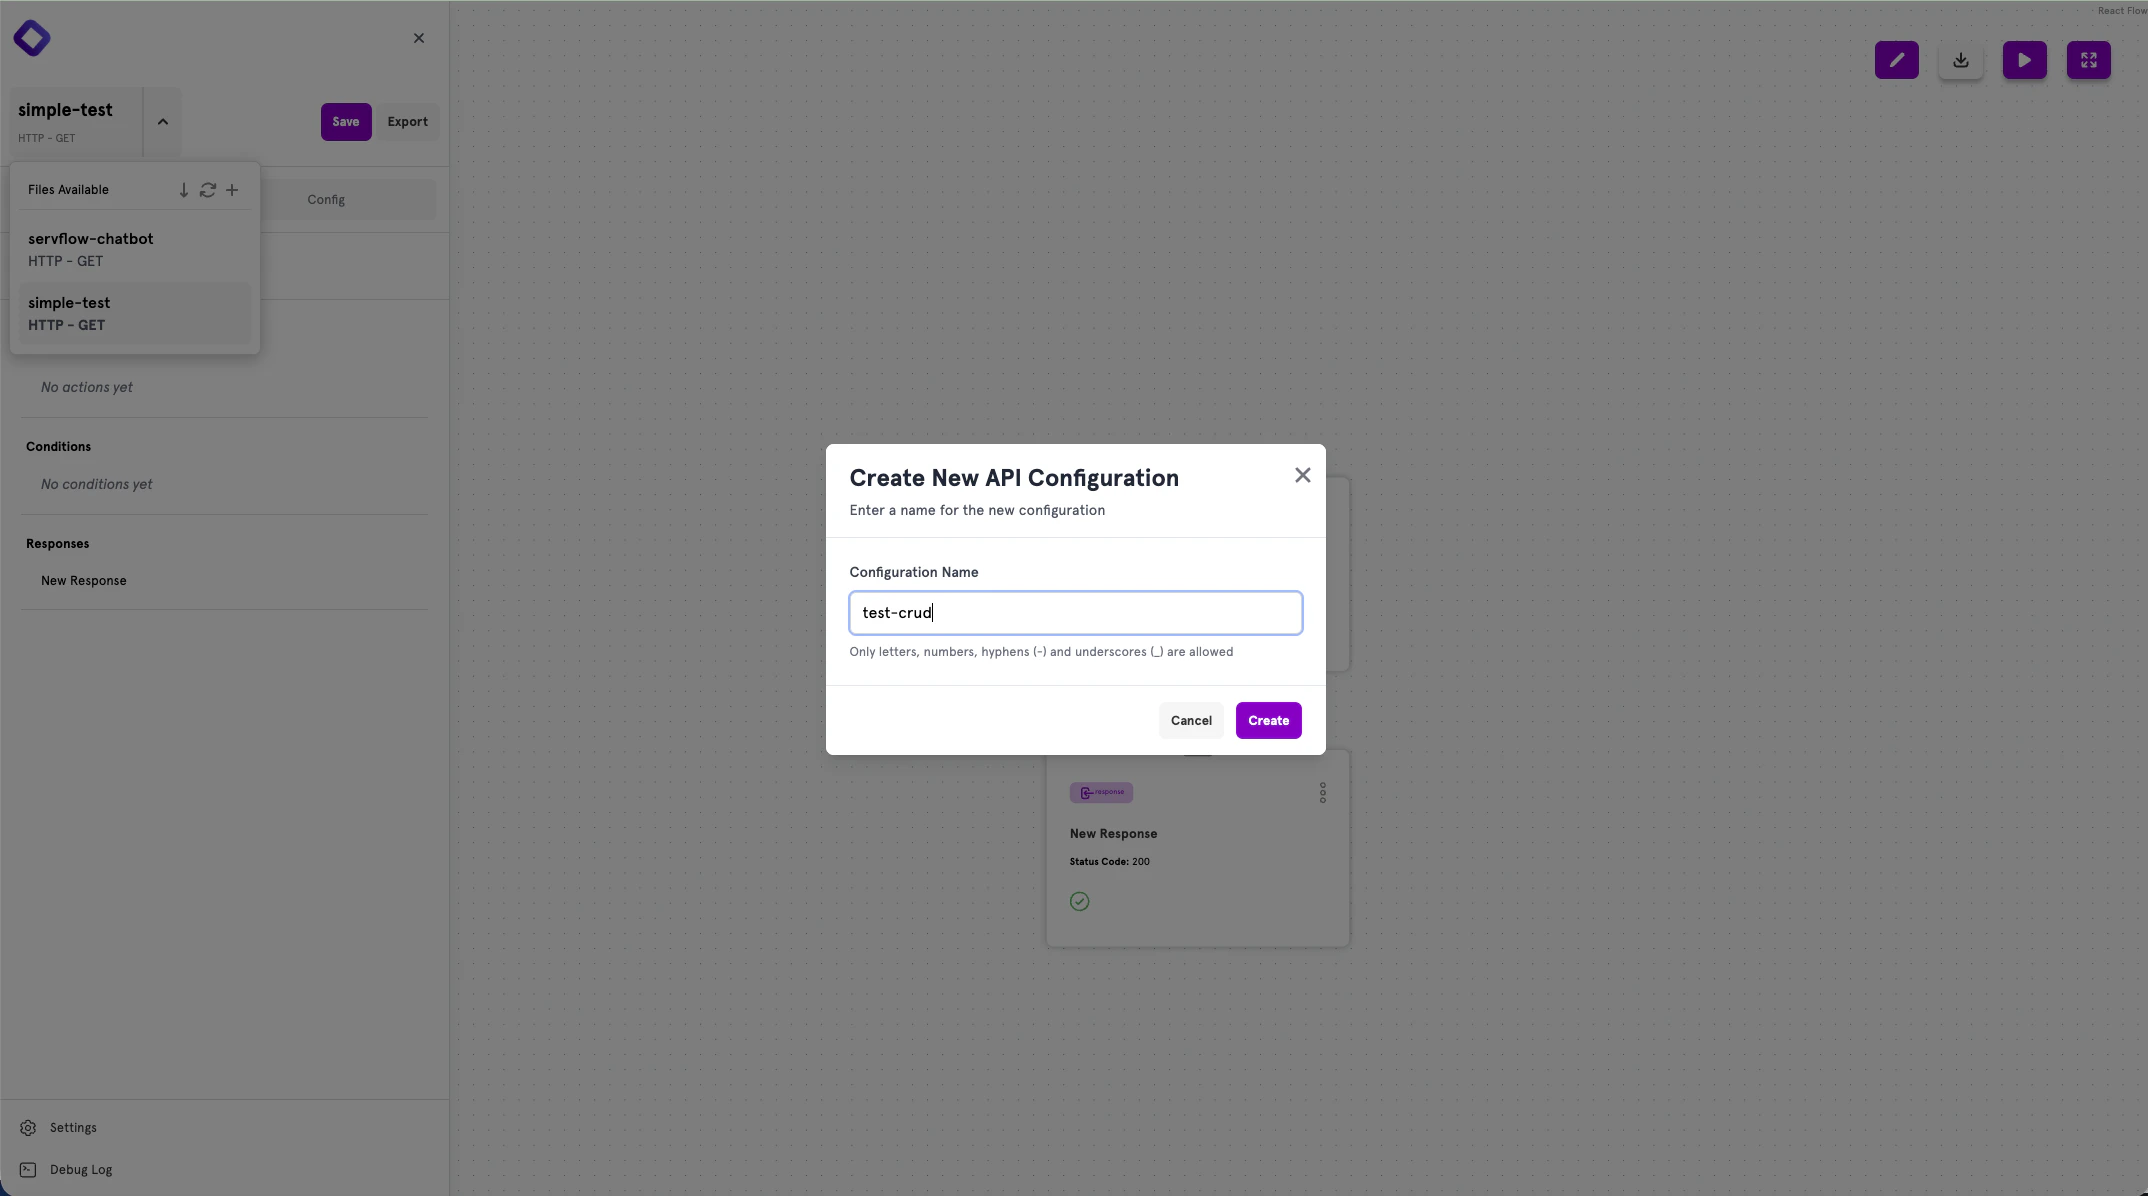 In the dialog that appears:
1. Enter a name for your configuration (e.g., `hello-world`)
2. Click **Create**
Configuration names can only contain letters, numbers, hyphens (-), and underscores (\_).
### Step 3: Configure Your HTTP Entry Point
After creating the configuration, you'll see a visual workflow editor with an **Http Request Entry** node automatically created.
In the dialog that appears:
1. Enter a name for your configuration (e.g., `hello-world`)
2. Click **Create**
Configuration names can only contain letters, numbers, hyphens (-), and underscores (\_).
### Step 3: Configure Your HTTP Entry Point
After creating the configuration, you'll see a visual workflow editor with an **Http Request Entry** node automatically created.
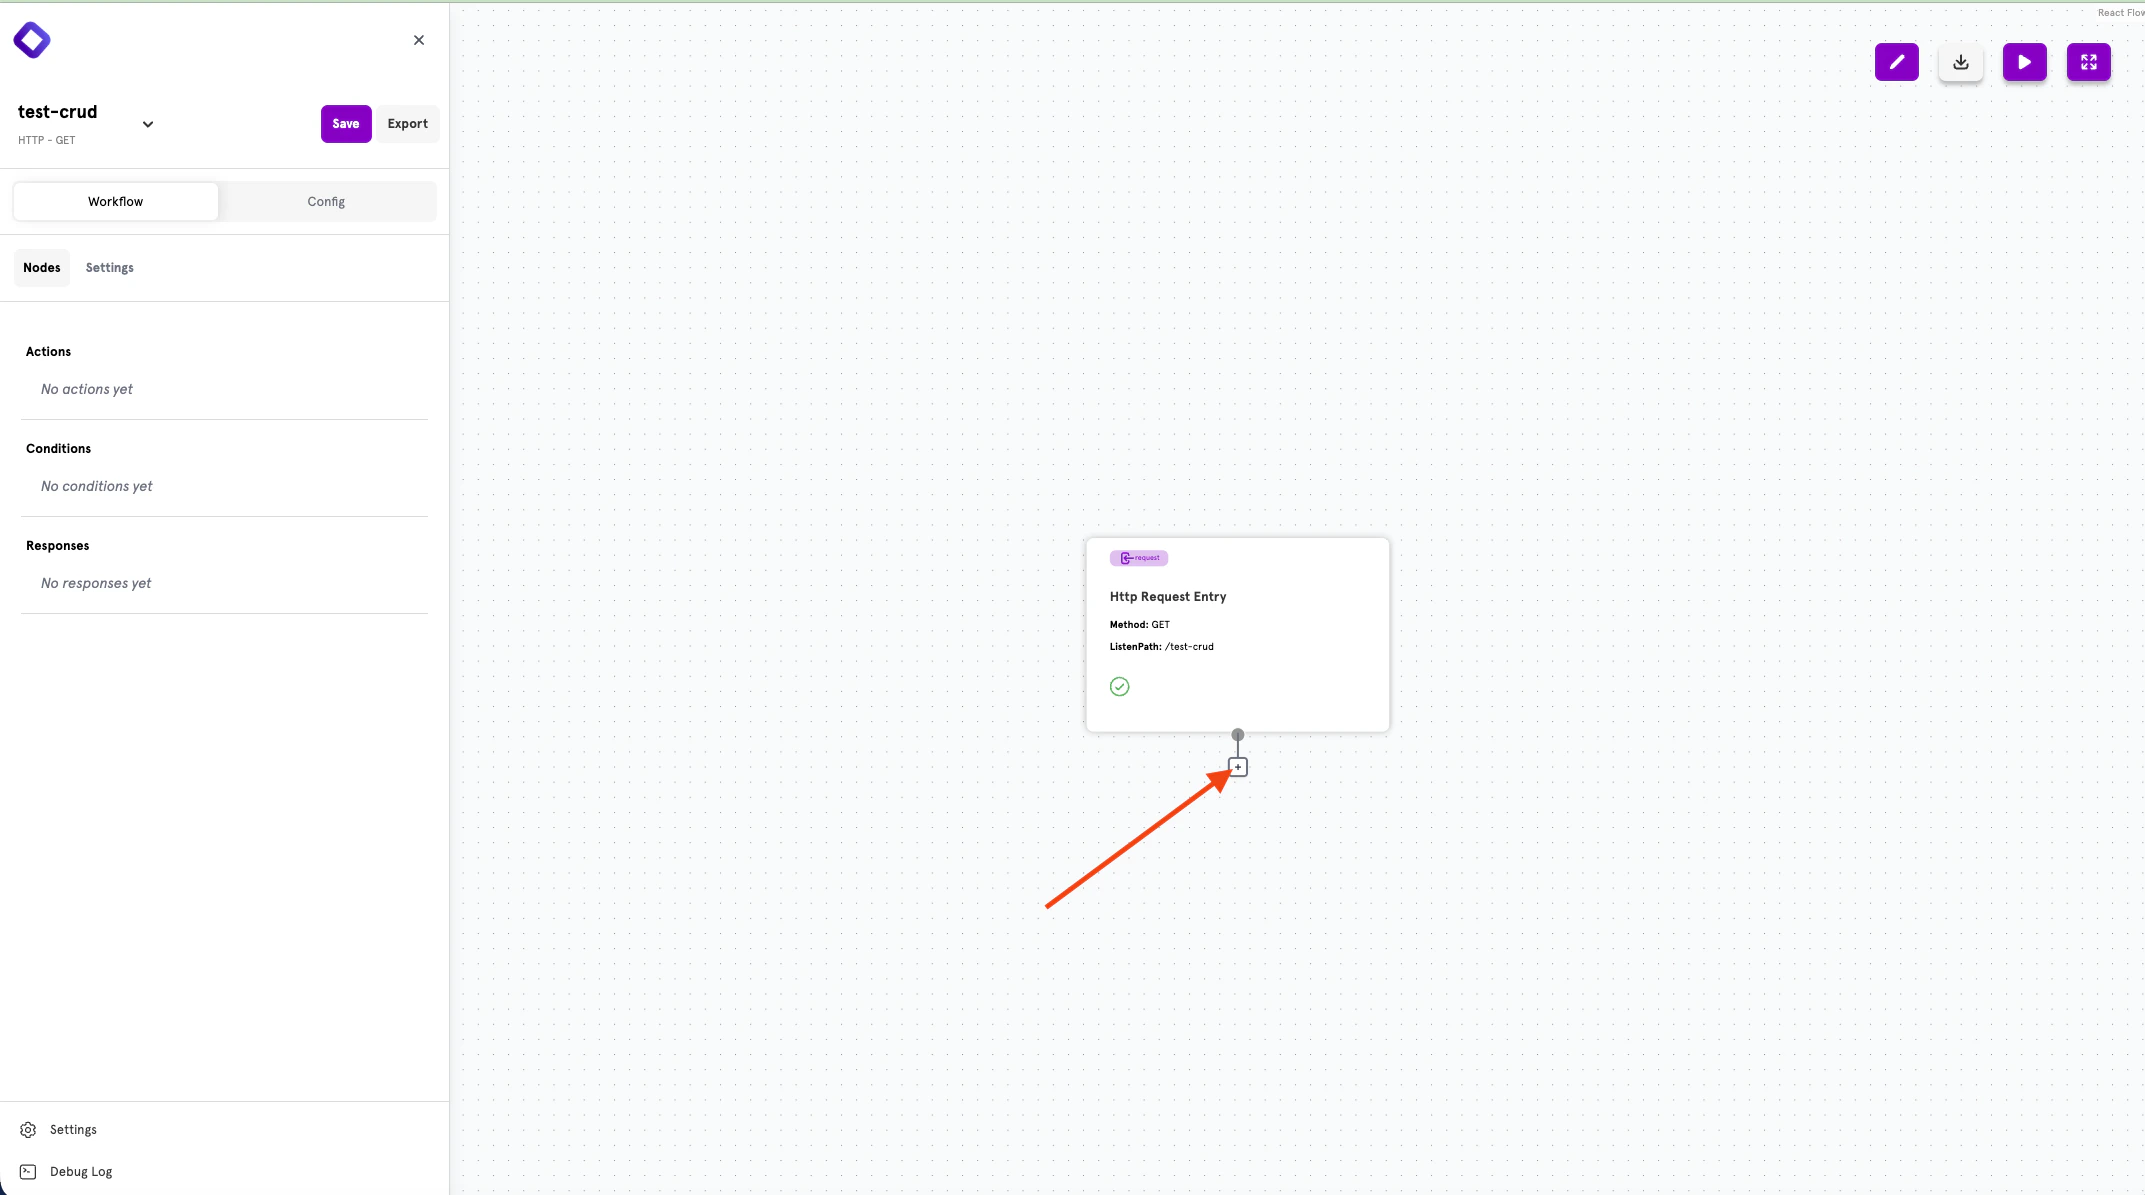 The entry node is pre-configured with:
* **Method**: GET
* **ListenPath**: /hello-world (based on your configuration name)
Click on the entry node to modify these settings if needed.
### Step 4: Add a Response
Click the **+** button below the Http Request Entry node to add a new node.
The entry node is pre-configured with:
* **Method**: GET
* **ListenPath**: /hello-world (based on your configuration name)
Click on the entry node to modify these settings if needed.
### Step 4: Add a Response
Click the **+** button below the Http Request Entry node to add a new node.
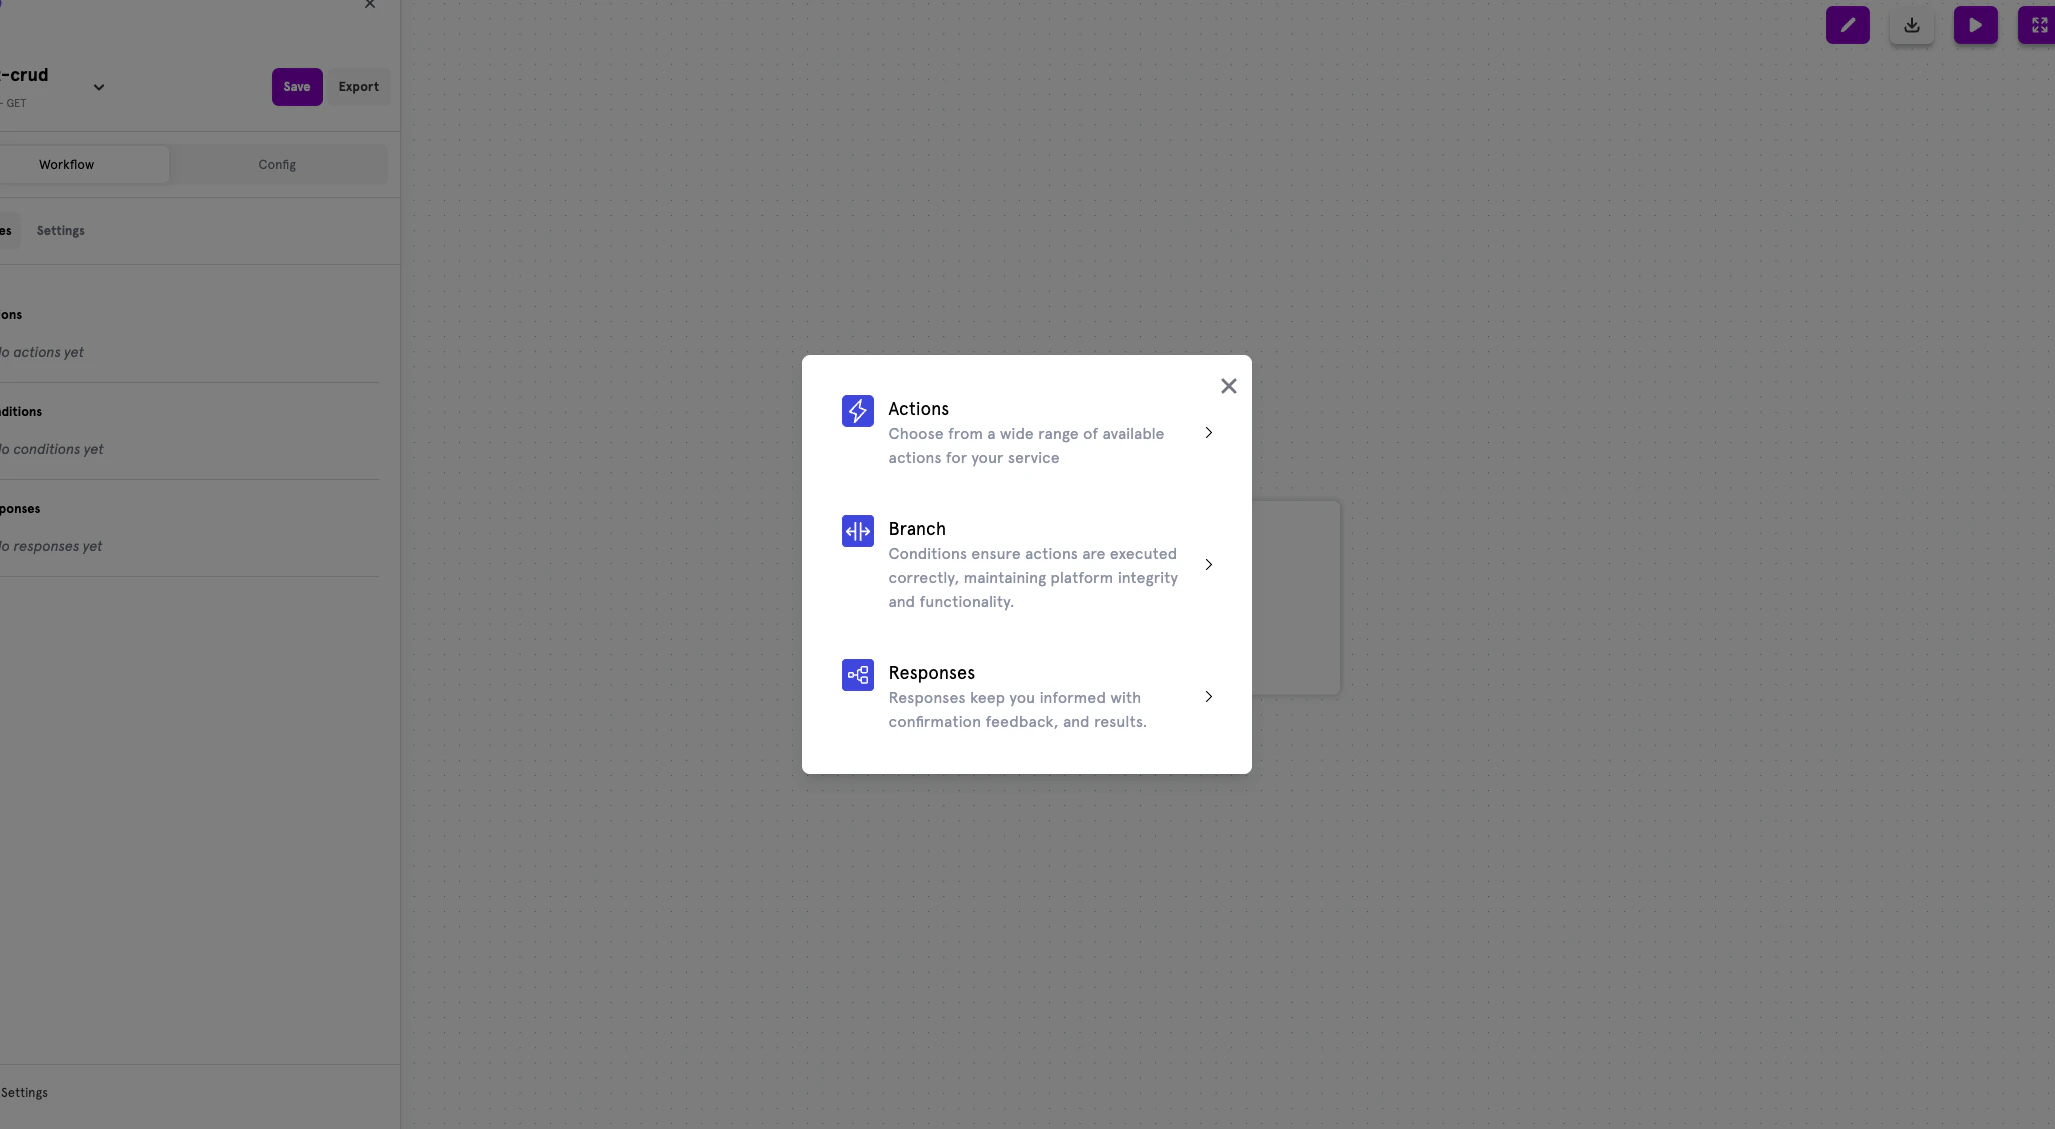 A dialog will appear with three options:
* **Actions** — Perform operations like HTTP requests, transformations, etc.
* **Branch** — Add conditional logic to your workflow
* **Responses** — Return a response to the client
Select **Responses** to add a response node to your workflow.
### Step 5: Configure the Response
Configure your response node with a simple JSON payload:
1. Set **Status Code** to `200`
2. Add a response body:
```docs/quickstart.mdx#L86-L90 theme={null}
{
"message": "Hello, World!",
"status": "success"
}
```
A dialog will appear with three options:
* **Actions** — Perform operations like HTTP requests, transformations, etc.
* **Branch** — Add conditional logic to your workflow
* **Responses** — Return a response to the client
Select **Responses** to add a response node to your workflow.
### Step 5: Configure the Response
Configure your response node with a simple JSON payload:
1. Set **Status Code** to `200`
2. Add a response body:
```docs/quickstart.mdx#L86-L90 theme={null}
{
"message": "Hello, World!",
"status": "success"
}
```
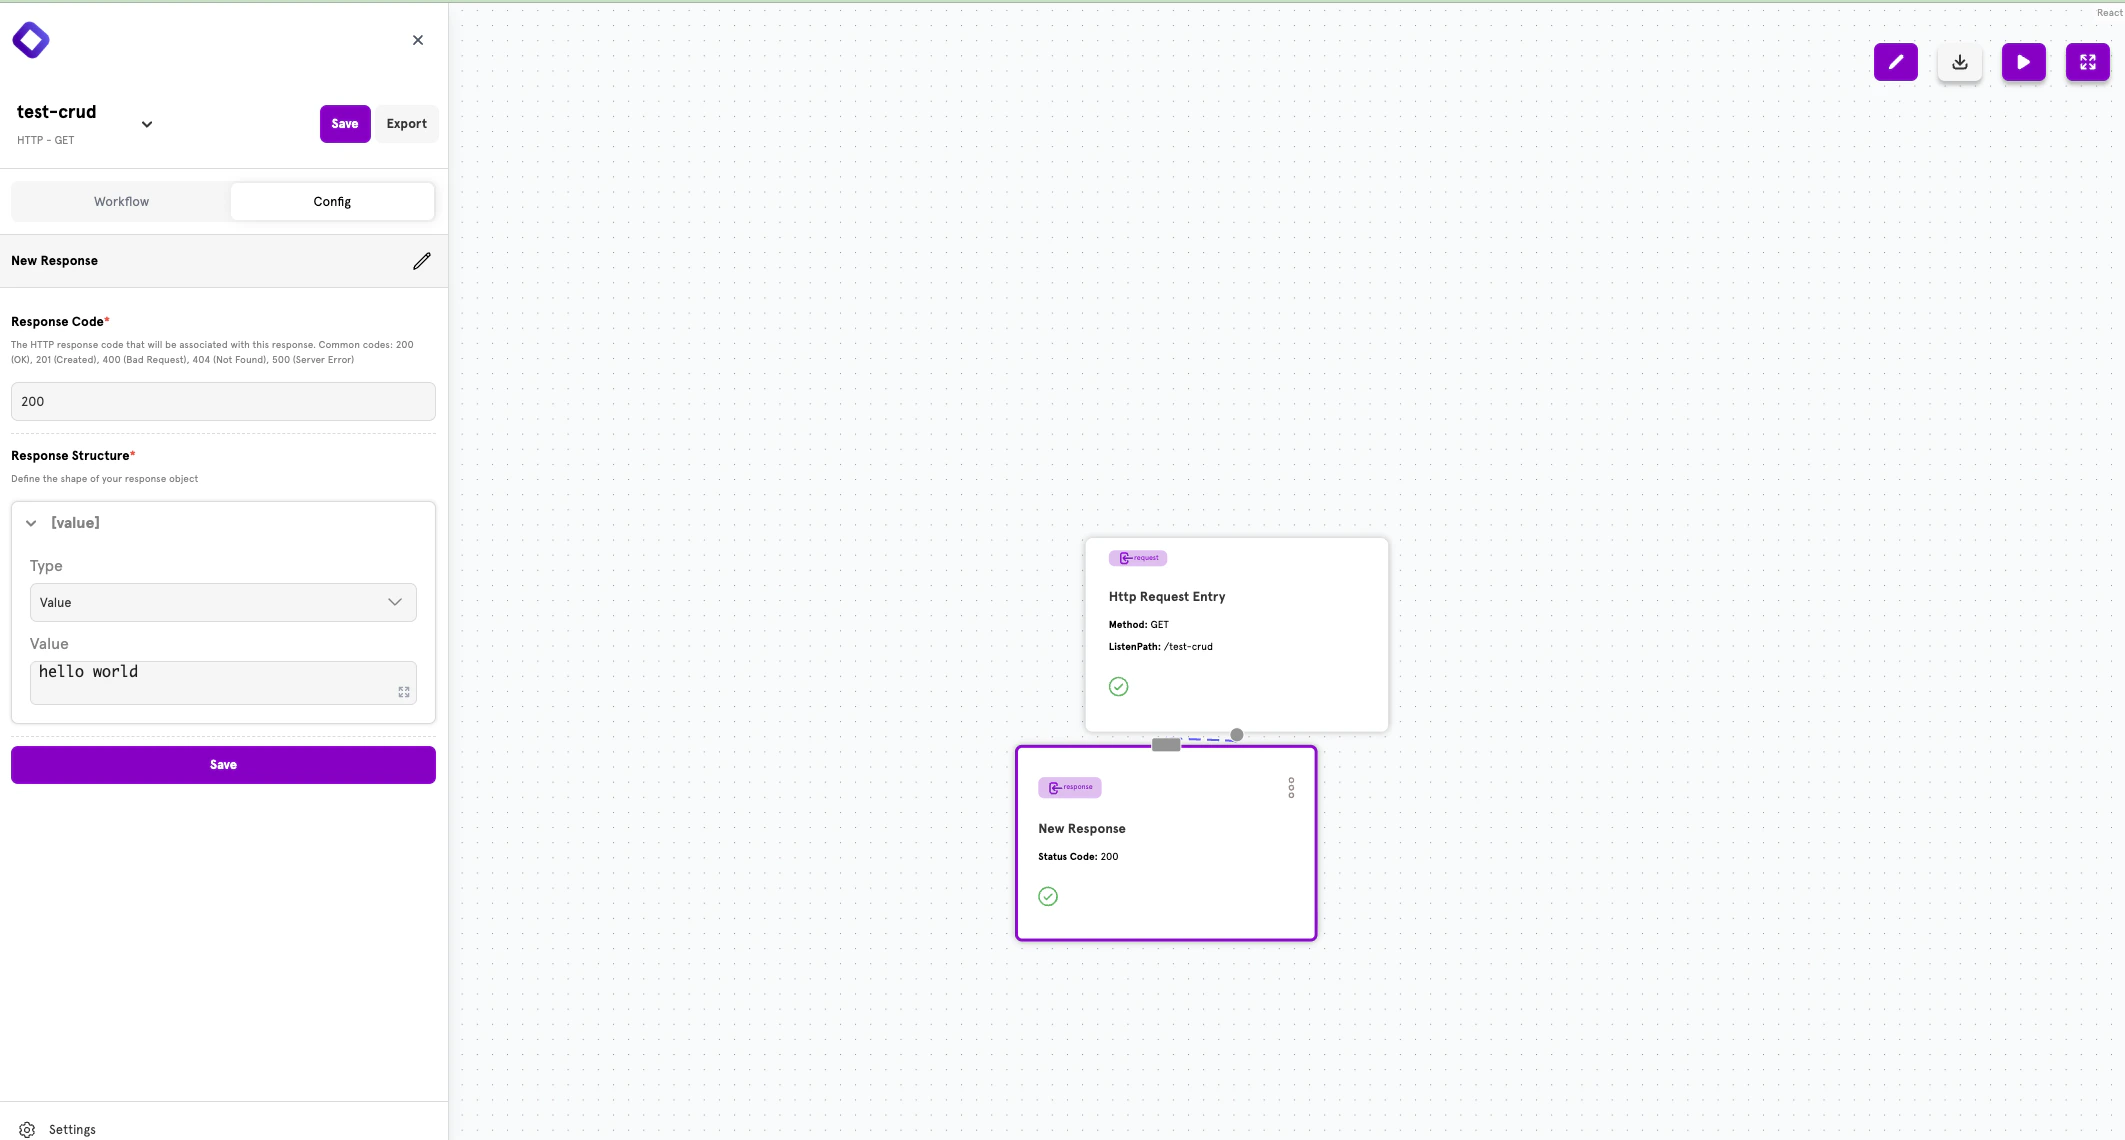 ### Step 6: Save Your Configuration
Click the **Save** button in the top-left corner to save your API configuration.
### Step 7: Test Your API
Your API is now live! Test it using curl:
```docs/quickstart.mdx#L102-L103 theme={null}
curl http://localhost:8080/hello-world
```
You should receive the response:
```docs/quickstart.mdx#L108-L112 theme={null}
{
"message": "Hello, World!",
"status": "success"
}
```
**Congratulations!** You've successfully created your first API with ServFlow.
## Next Steps
Now that you've created your first API, explore more features:
Securely store API keys and credentials for your workflows.
Explore all ServFlow configuration options.
Set up your local development environment with tracing and more.
Deploy ServFlow to your infrastructure.
### Step 6: Save Your Configuration
Click the **Save** button in the top-left corner to save your API configuration.
### Step 7: Test Your API
Your API is now live! Test it using curl:
```docs/quickstart.mdx#L102-L103 theme={null}
curl http://localhost:8080/hello-world
```
You should receive the response:
```docs/quickstart.mdx#L108-L112 theme={null}
{
"message": "Hello, World!",
"status": "success"
}
```
**Congratulations!** You've successfully created your first API with ServFlow.
## Next Steps
Now that you've created your first API, explore more features:
Securely store API keys and credentials for your workflows.
Explore all ServFlow configuration options.
Set up your local development environment with tracing and more.
Deploy ServFlow to your infrastructure.