Prerequisites
Before starting, make sure you have ServFlow Pro running with the dashboard enabled:Step 1: Open the Dashboard
Open your browser and navigate to the ServFlow dashboard: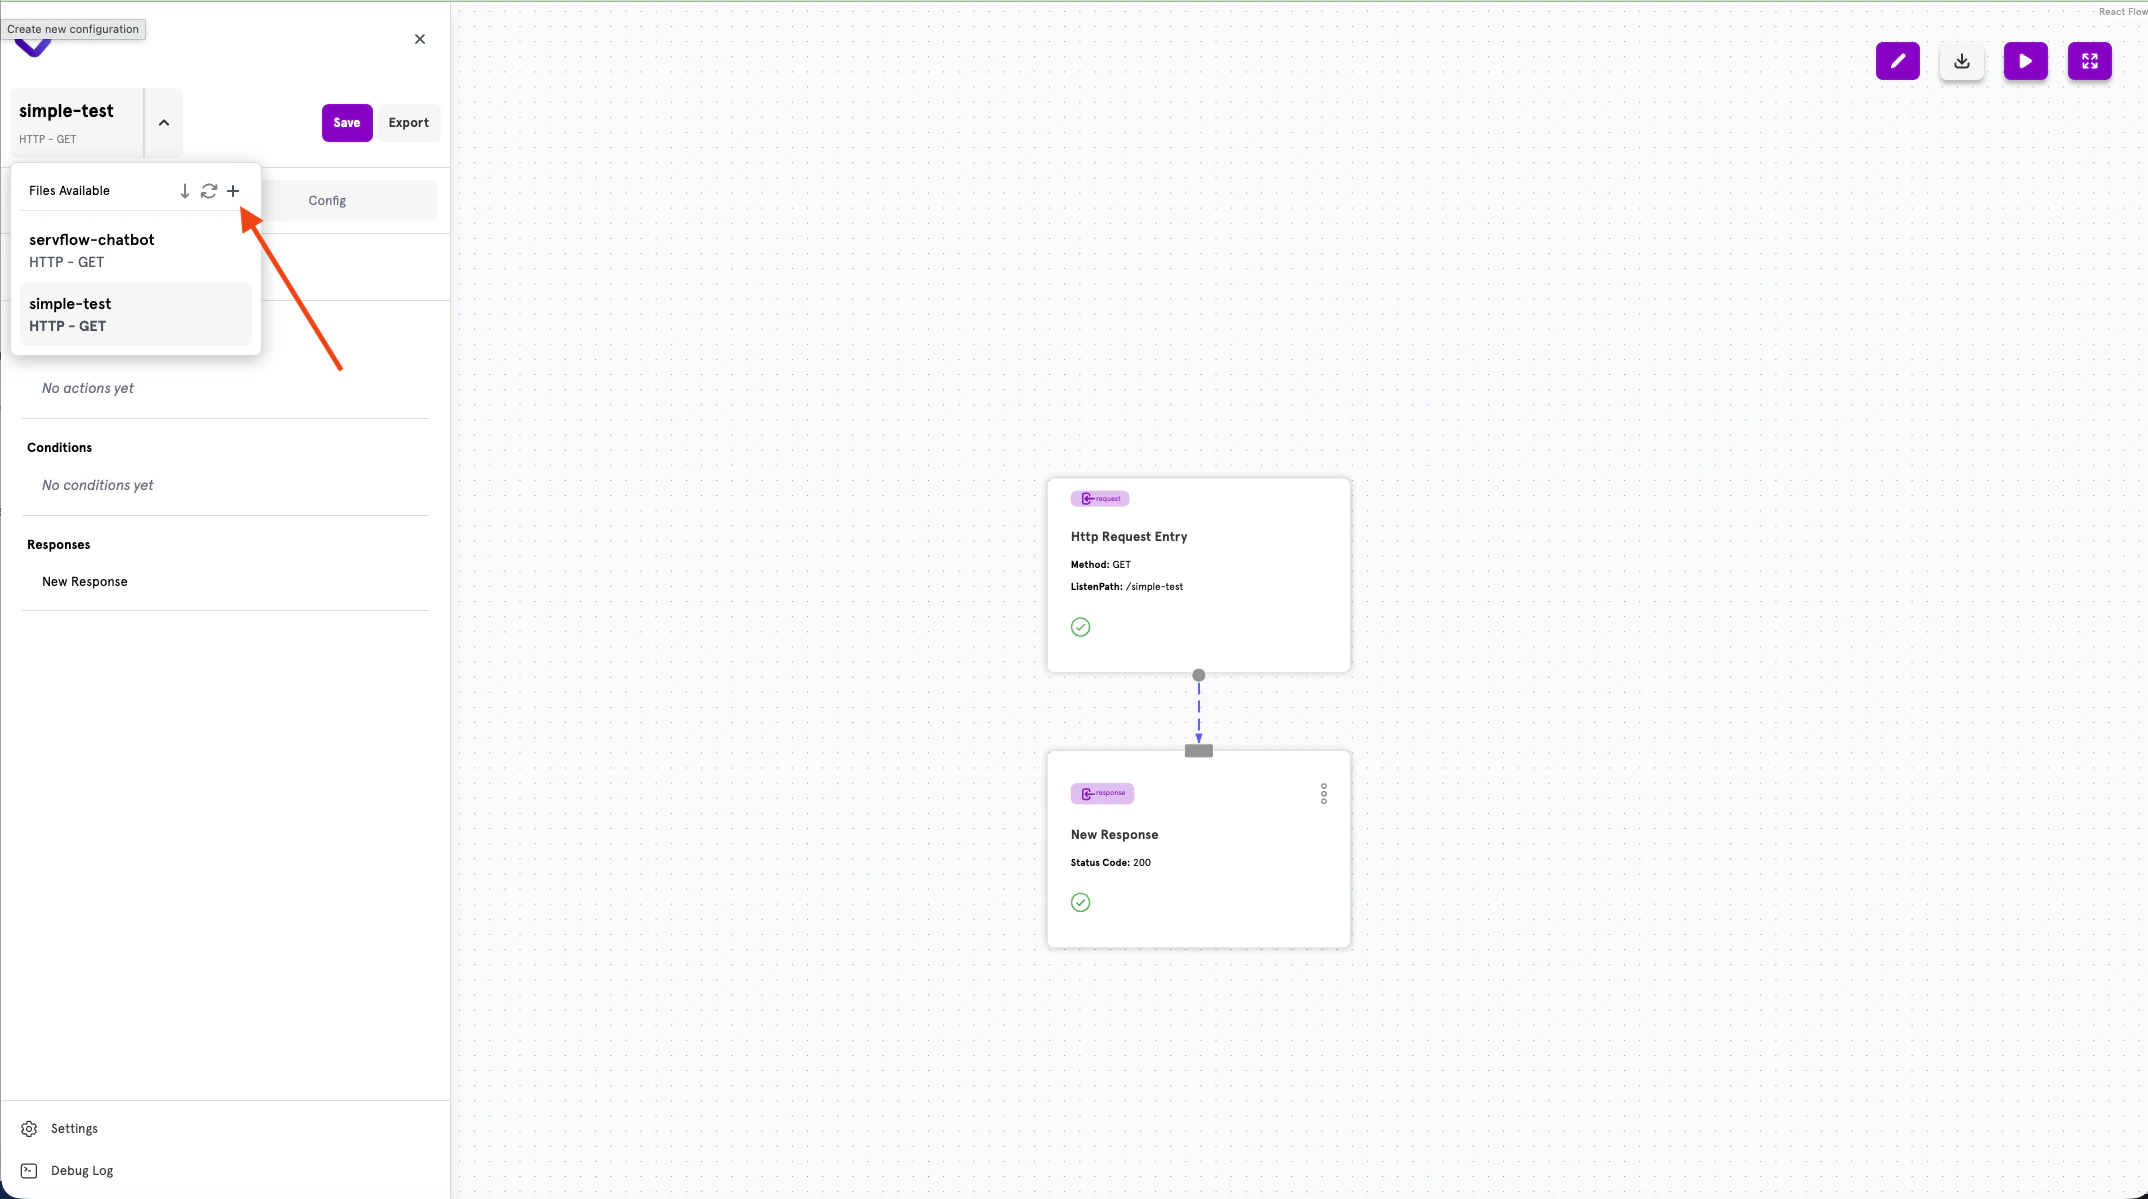
Step 2: Create a New API Configuration
Click the + button in the Files Available panel header to create a new API configuration.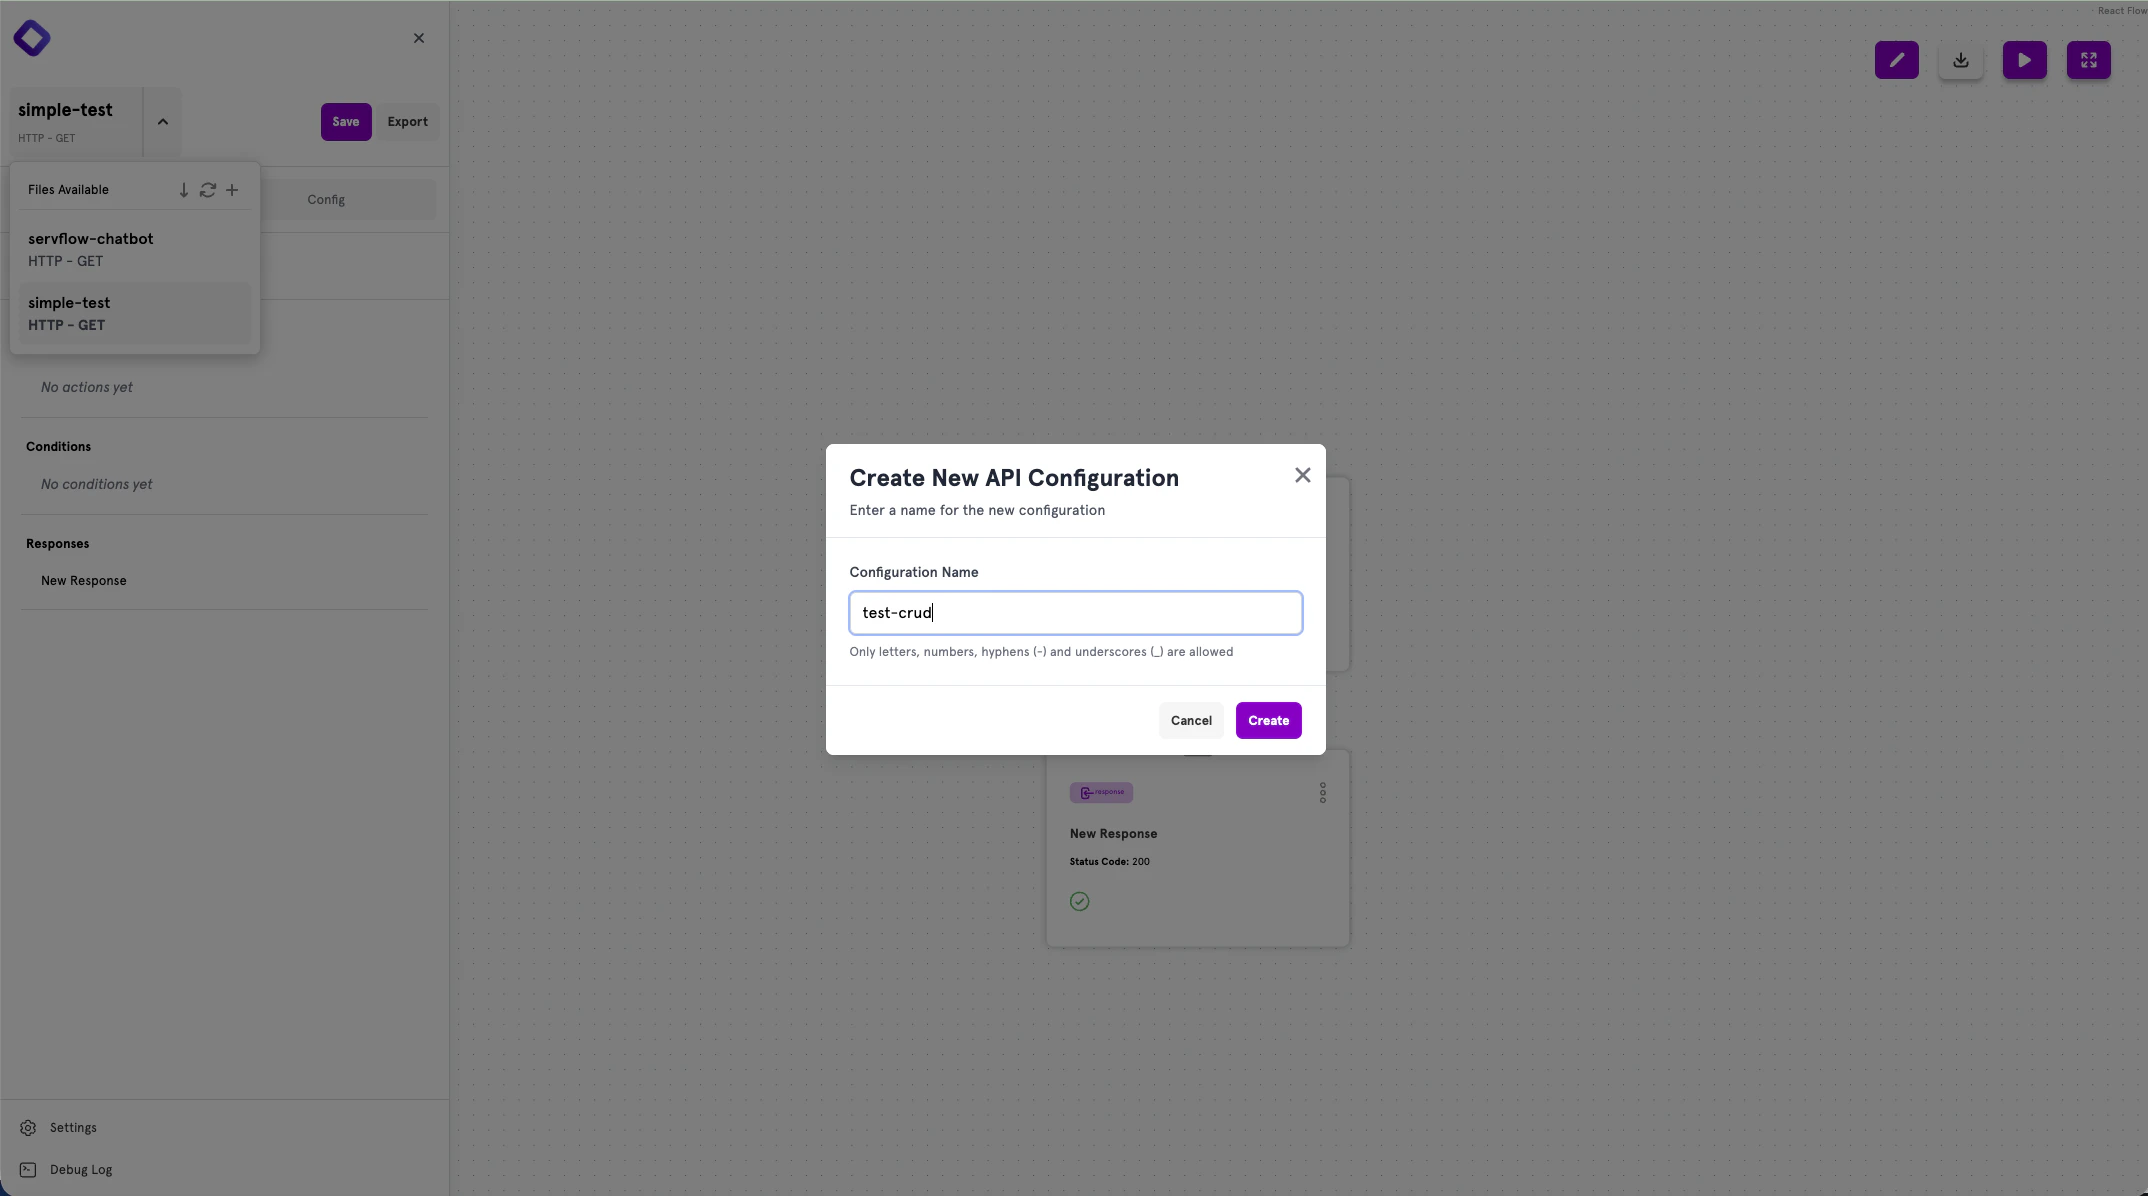
- Enter a name for your configuration (e.g.,
hello-world) - Click Create
Configuration names can only contain letters, numbers, hyphens (-), and underscores (_).
Step 3: Configure Your HTTP Entry Point
After creating the configuration, you’ll see a visual workflow editor with an Http Request Entry node automatically created.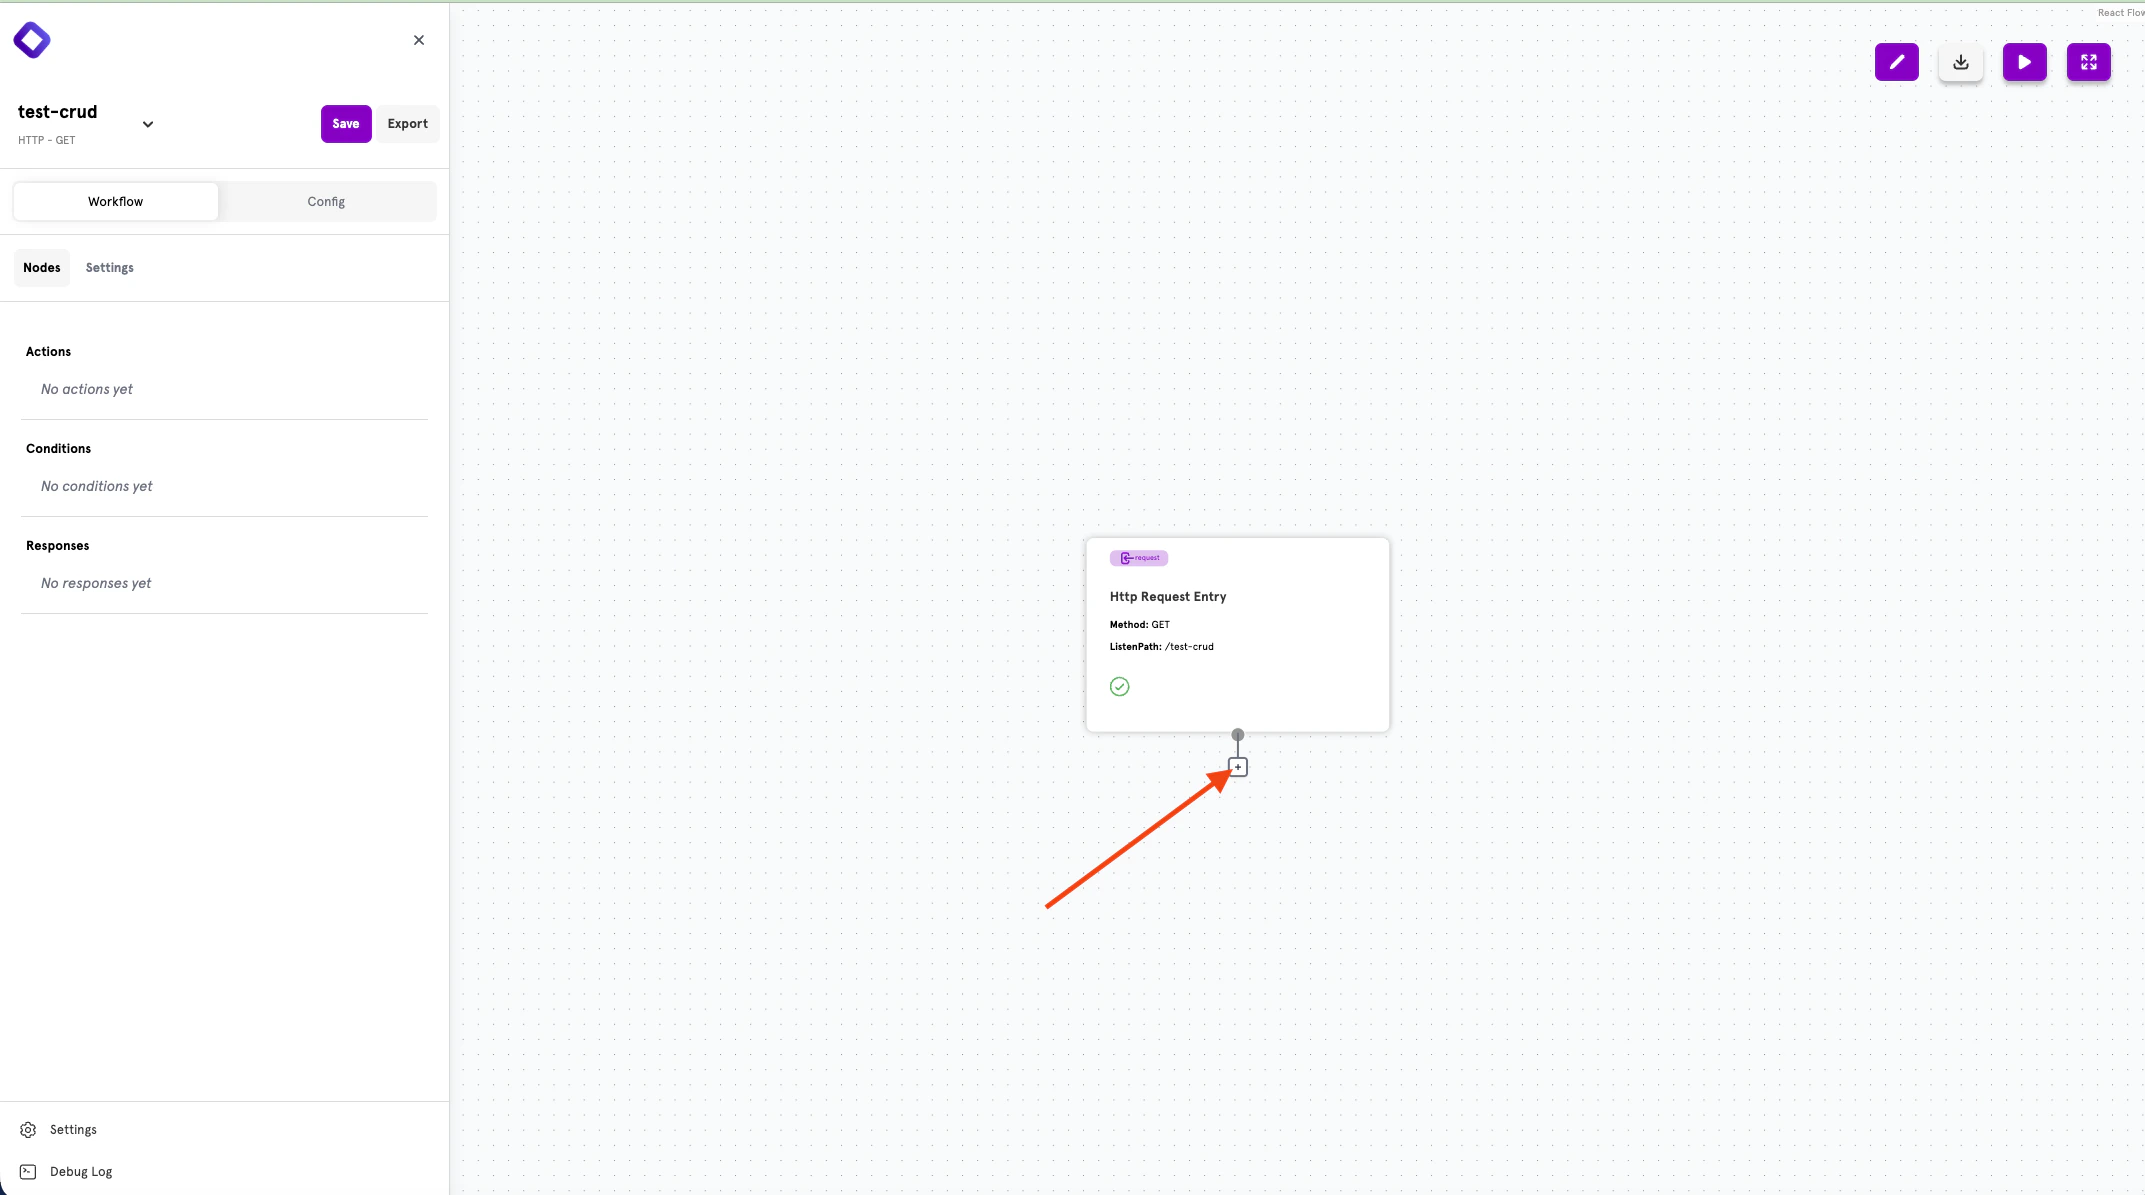
- Method: GET
- ListenPath: /hello-world (based on your configuration name)
Step 4: Add a Response
Click the + button below the Http Request Entry node to add a new node.
- Actions — Perform operations like HTTP requests, transformations, etc.
- Branch — Add conditional logic to your workflow
- Responses — Return a response to the client
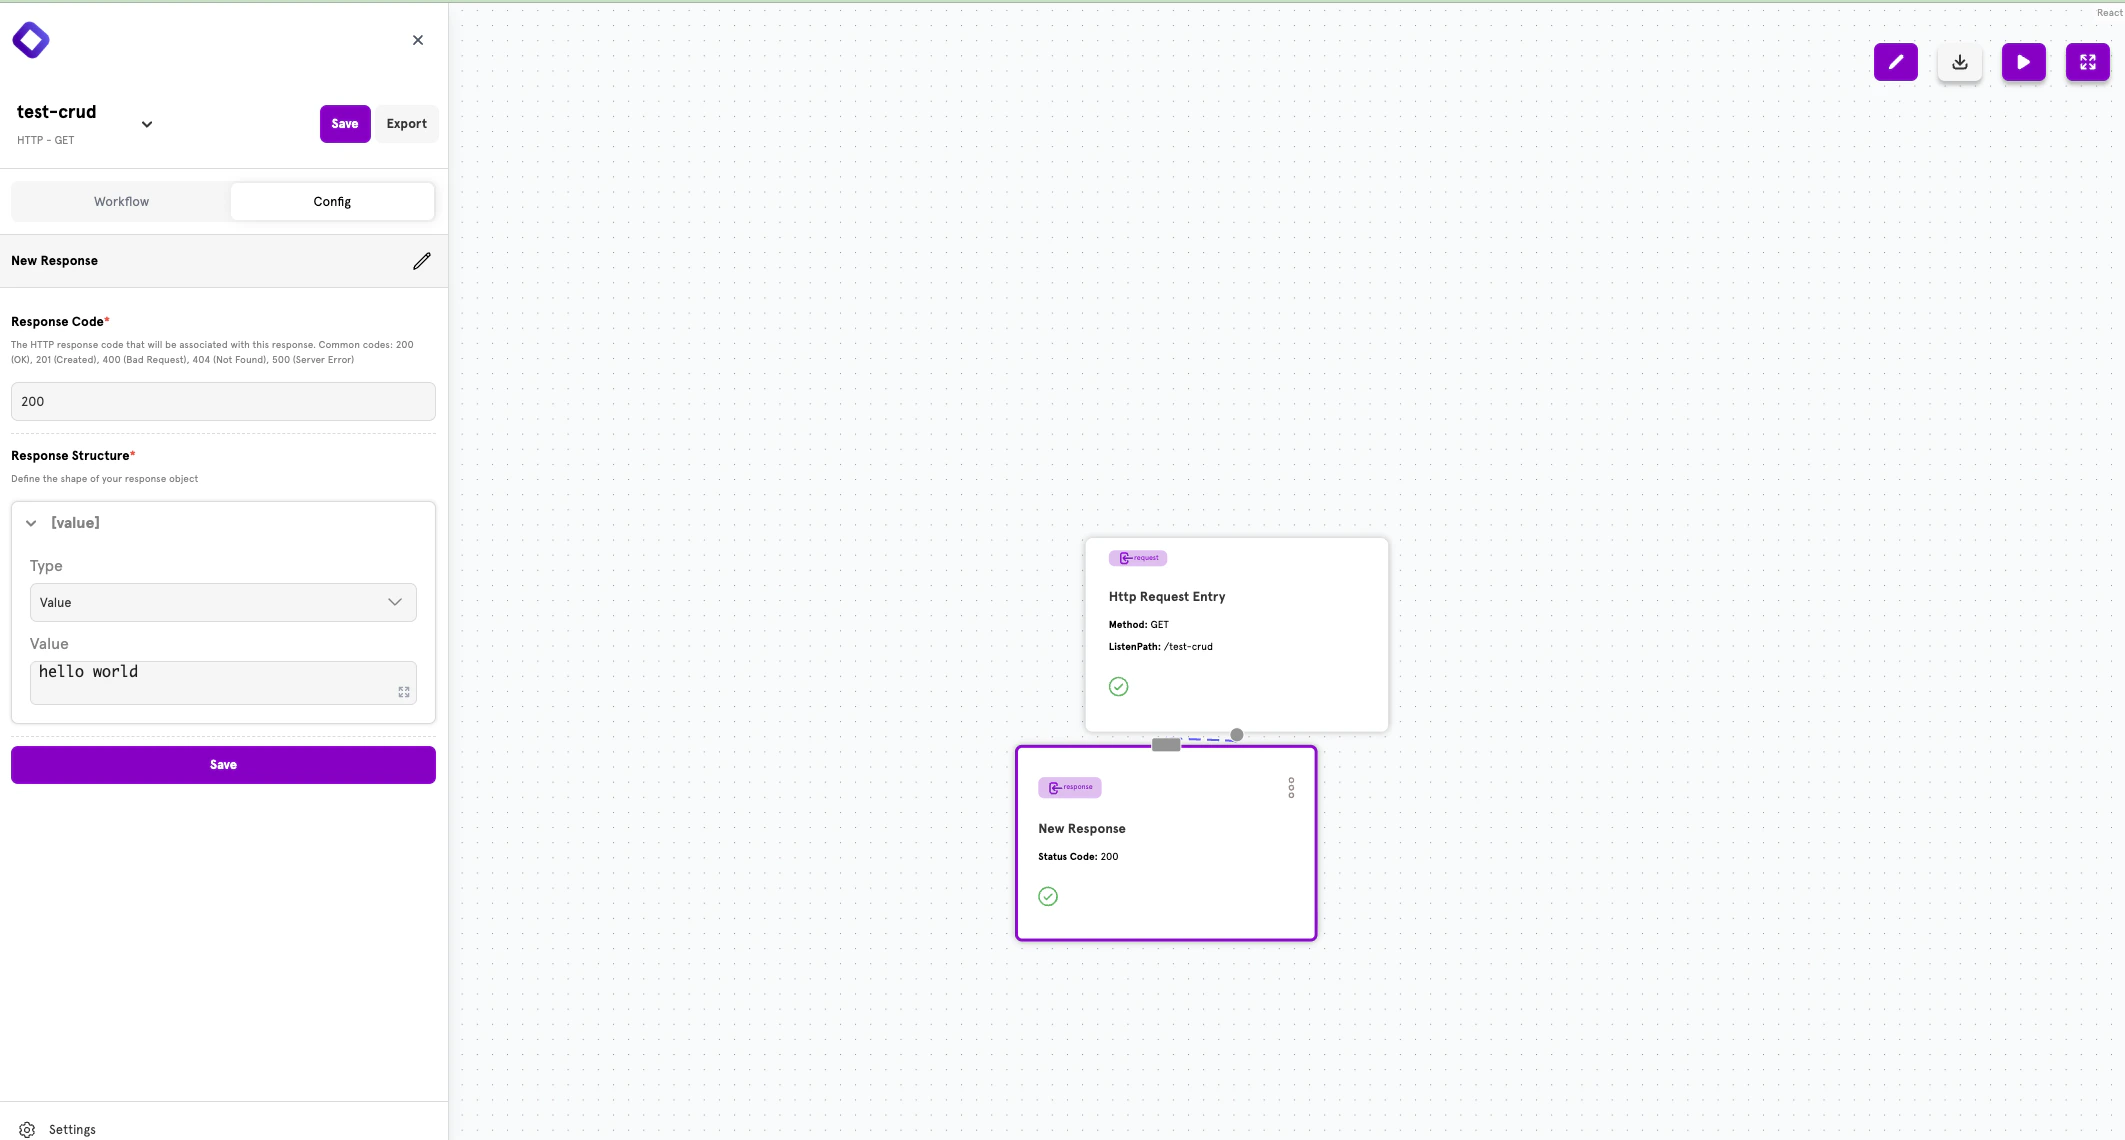
Step 5: Configure the Response
Configure your response node with a simple JSON payload:- Set Status Code to
200 - Add a response body:
Step 6: Save Your Configuration
Click the Save button in the top-left corner to save your API configuration.Step 7: Test Your API
Your API is now live! Test it using curl:Congratulations! You’ve successfully created your first API with ServFlow.
Next Steps
Now that you’ve created your first API, explore more features:Secrets Management
Securely store API keys and credentials for your workflows.
Configuration Reference
Explore all ServFlow configuration options.
Local Development
Set up your local development environment with tracing and more.
Installation
Deploy ServFlow to your infrastructure.