

github_repo that looks a repository up on the GitHub API. The model supplies the repository name and nothing else.
Before you begin
- An agent that answers a webhook and has a provider. See Creating your first agent. The screenshots show an agent named Repo lookup that answers on
/repo. - For the example, an instance that can reach
api.github.com. The request needs no credentials.
Attach an action tool
1
Open the sub-agent's Tools section
Open the agent in the editor and click the sub-agent that needs the tool. In its panel, scroll to the Tools section. With nothing attached, it reads “No tools — it answers from the prompt alone.”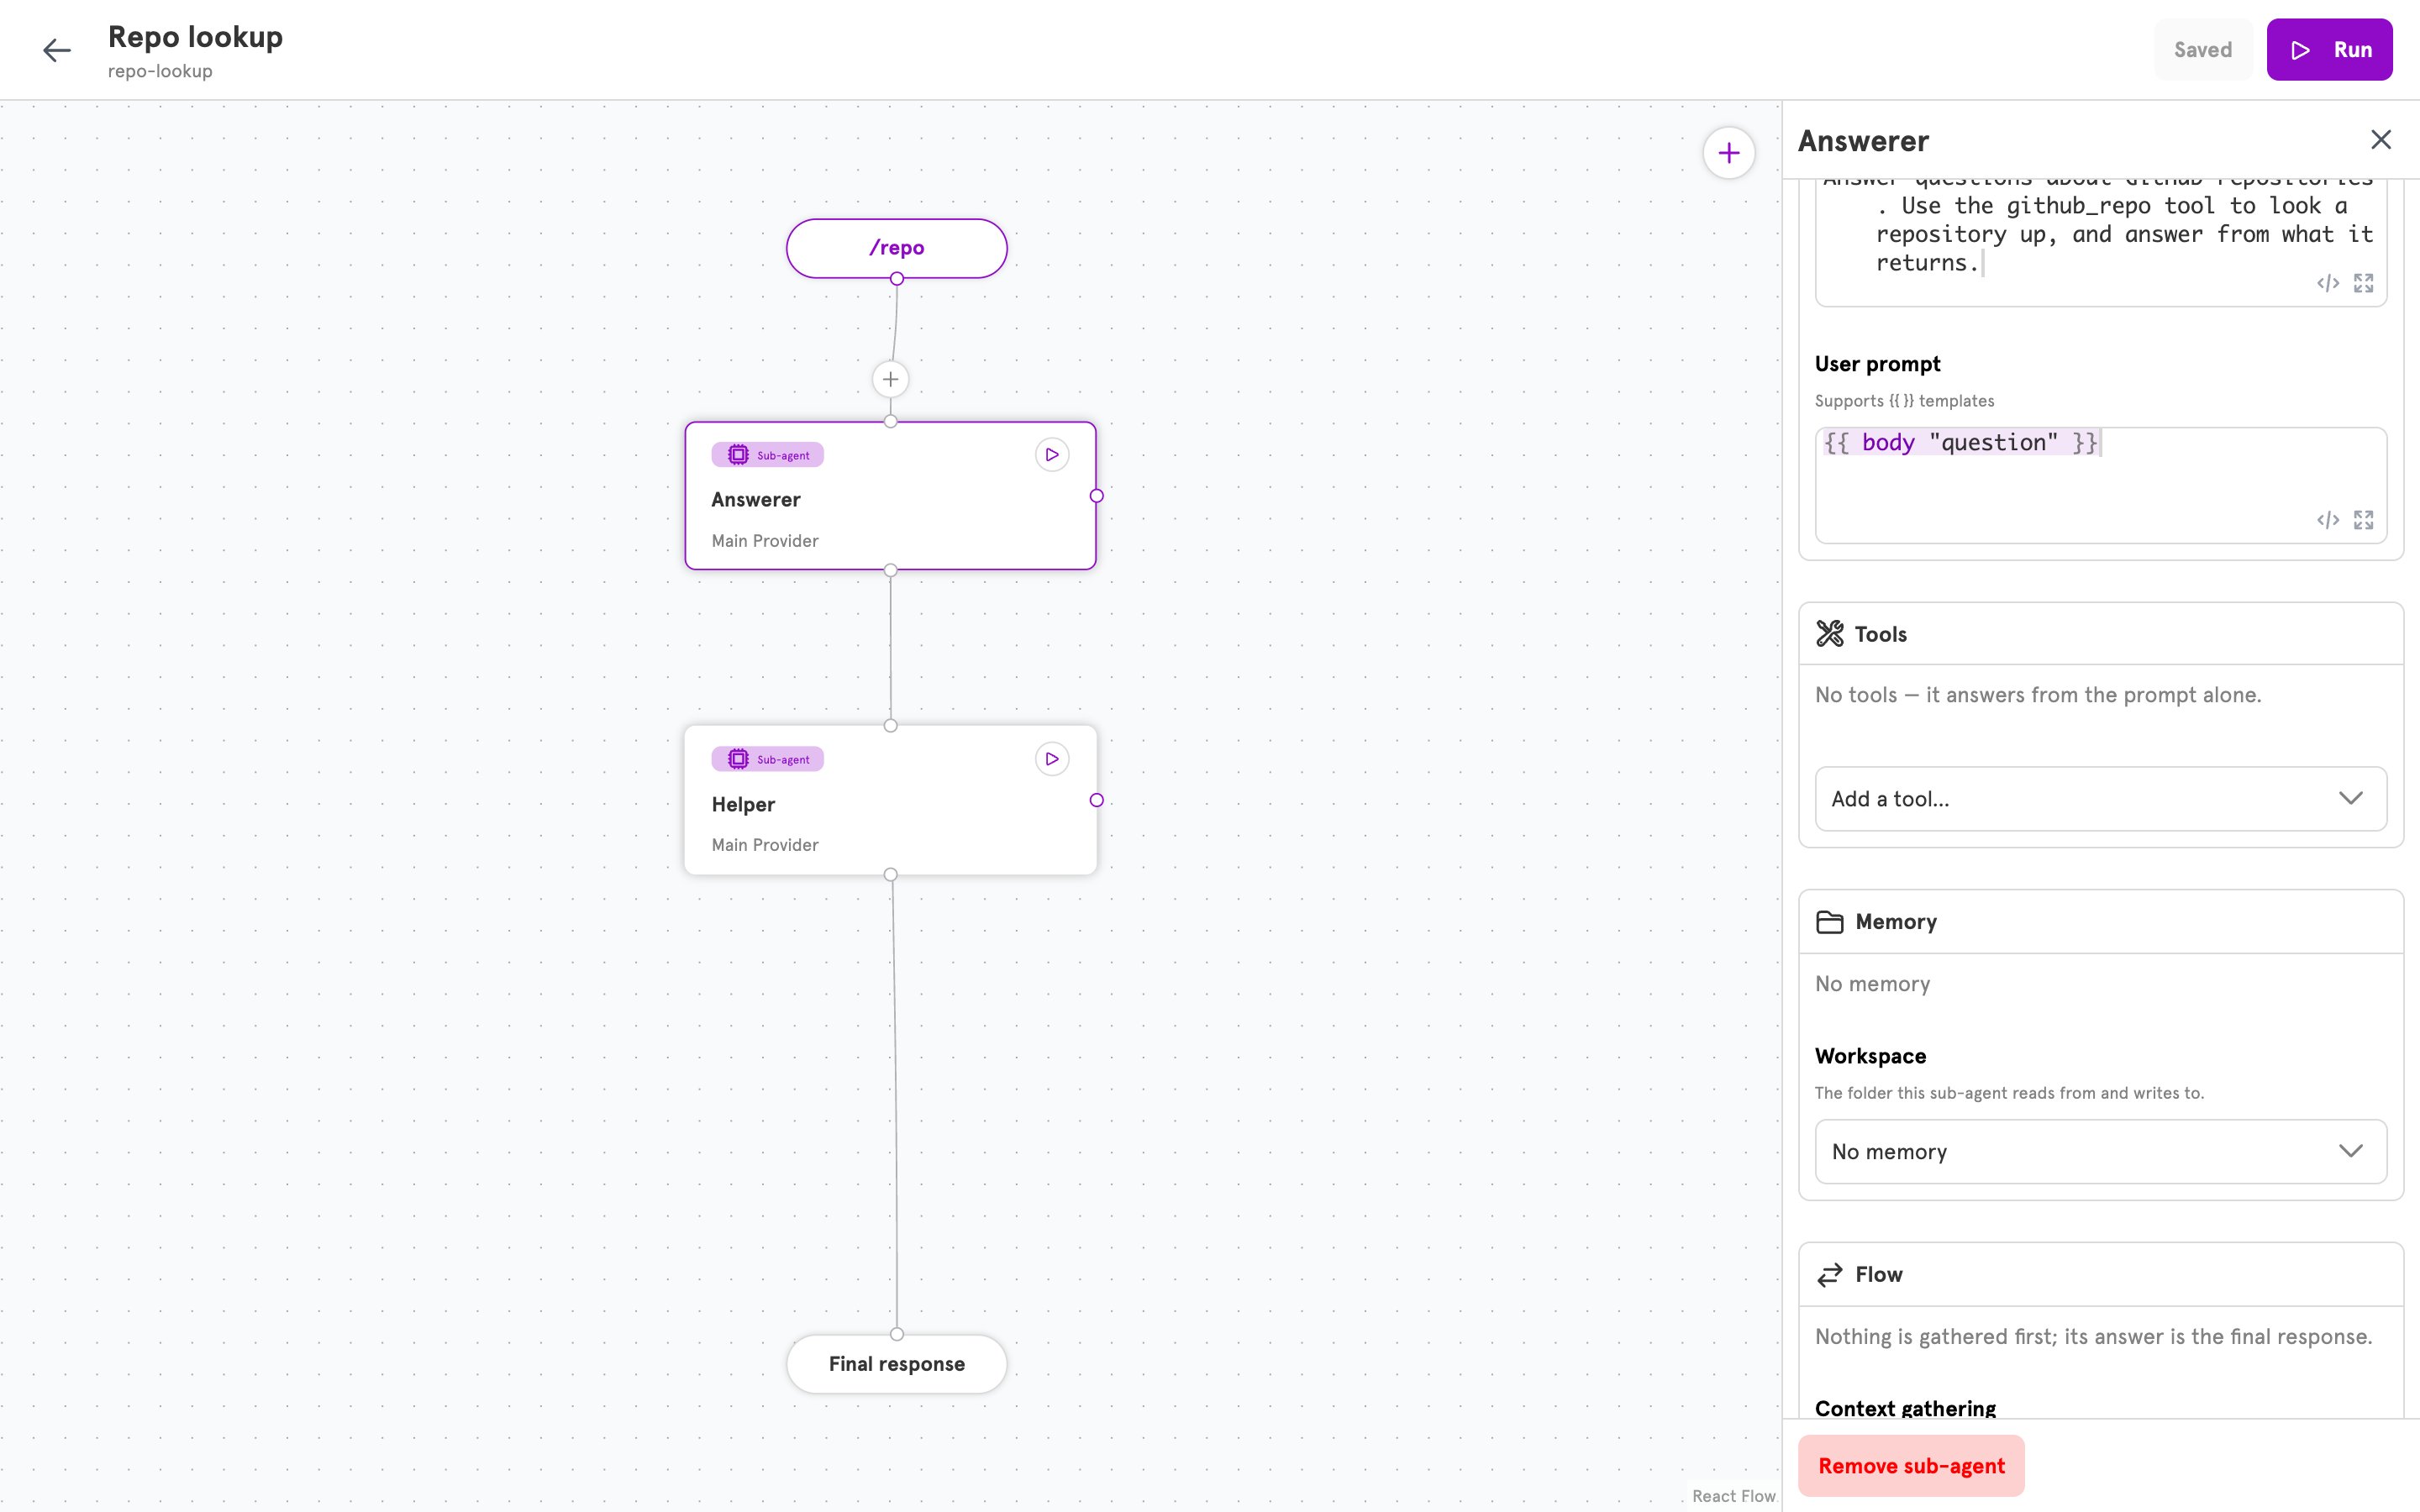
2
Choose Run action
Under Add a tool…, choose Run action…. A row appears in the section, and the Configure Run action dialog opens. The dialog has three sections, listed on its left edge: Tool, Action, and Guards.
3
Name the tool and say when to use it
In the Tool section, enter a Display name, for example 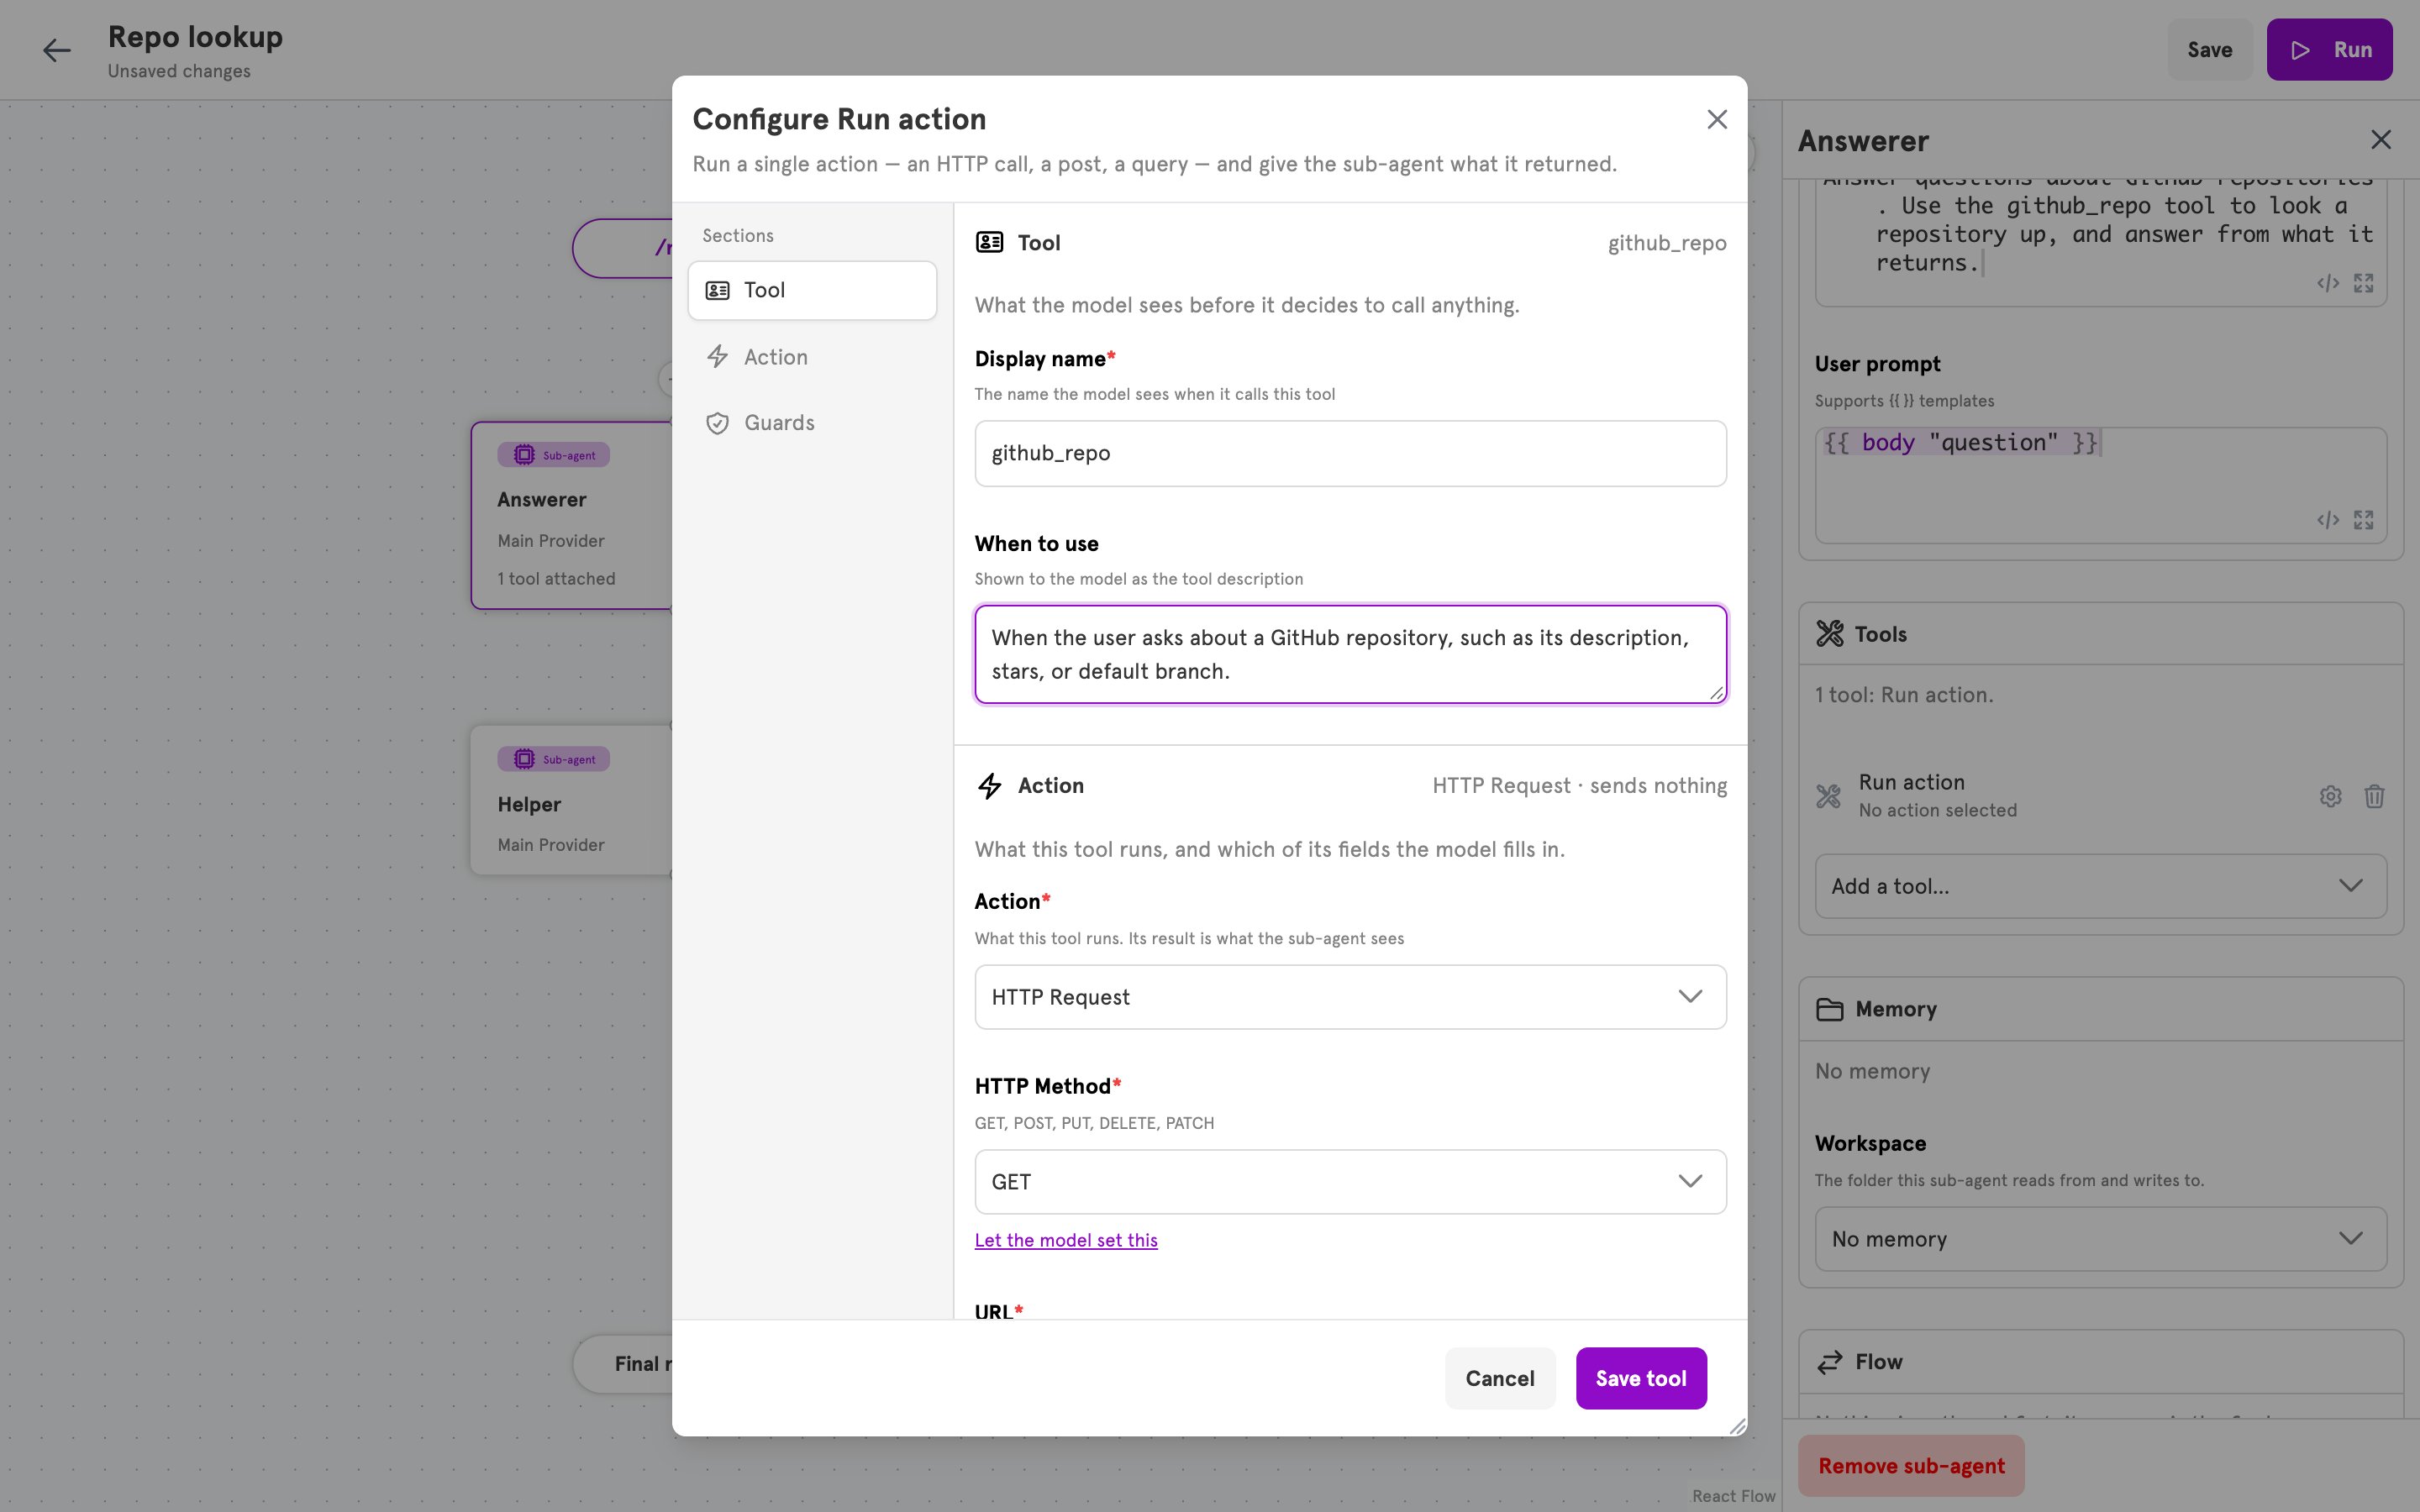
github_repo. The model calls the tool by this name, so use letters, digits, and underscores.Under When to use, describe the situation the tool is for. The model reads this to decide whether to call it:4
Choose the action
In the Action section, under Action, choose HTTP Request. The action’s fields appear below it. Each field holds a value you set, and most have a Let the model set this link under them.
5
Set the fields and the model's input
Leave HTTP Method at The 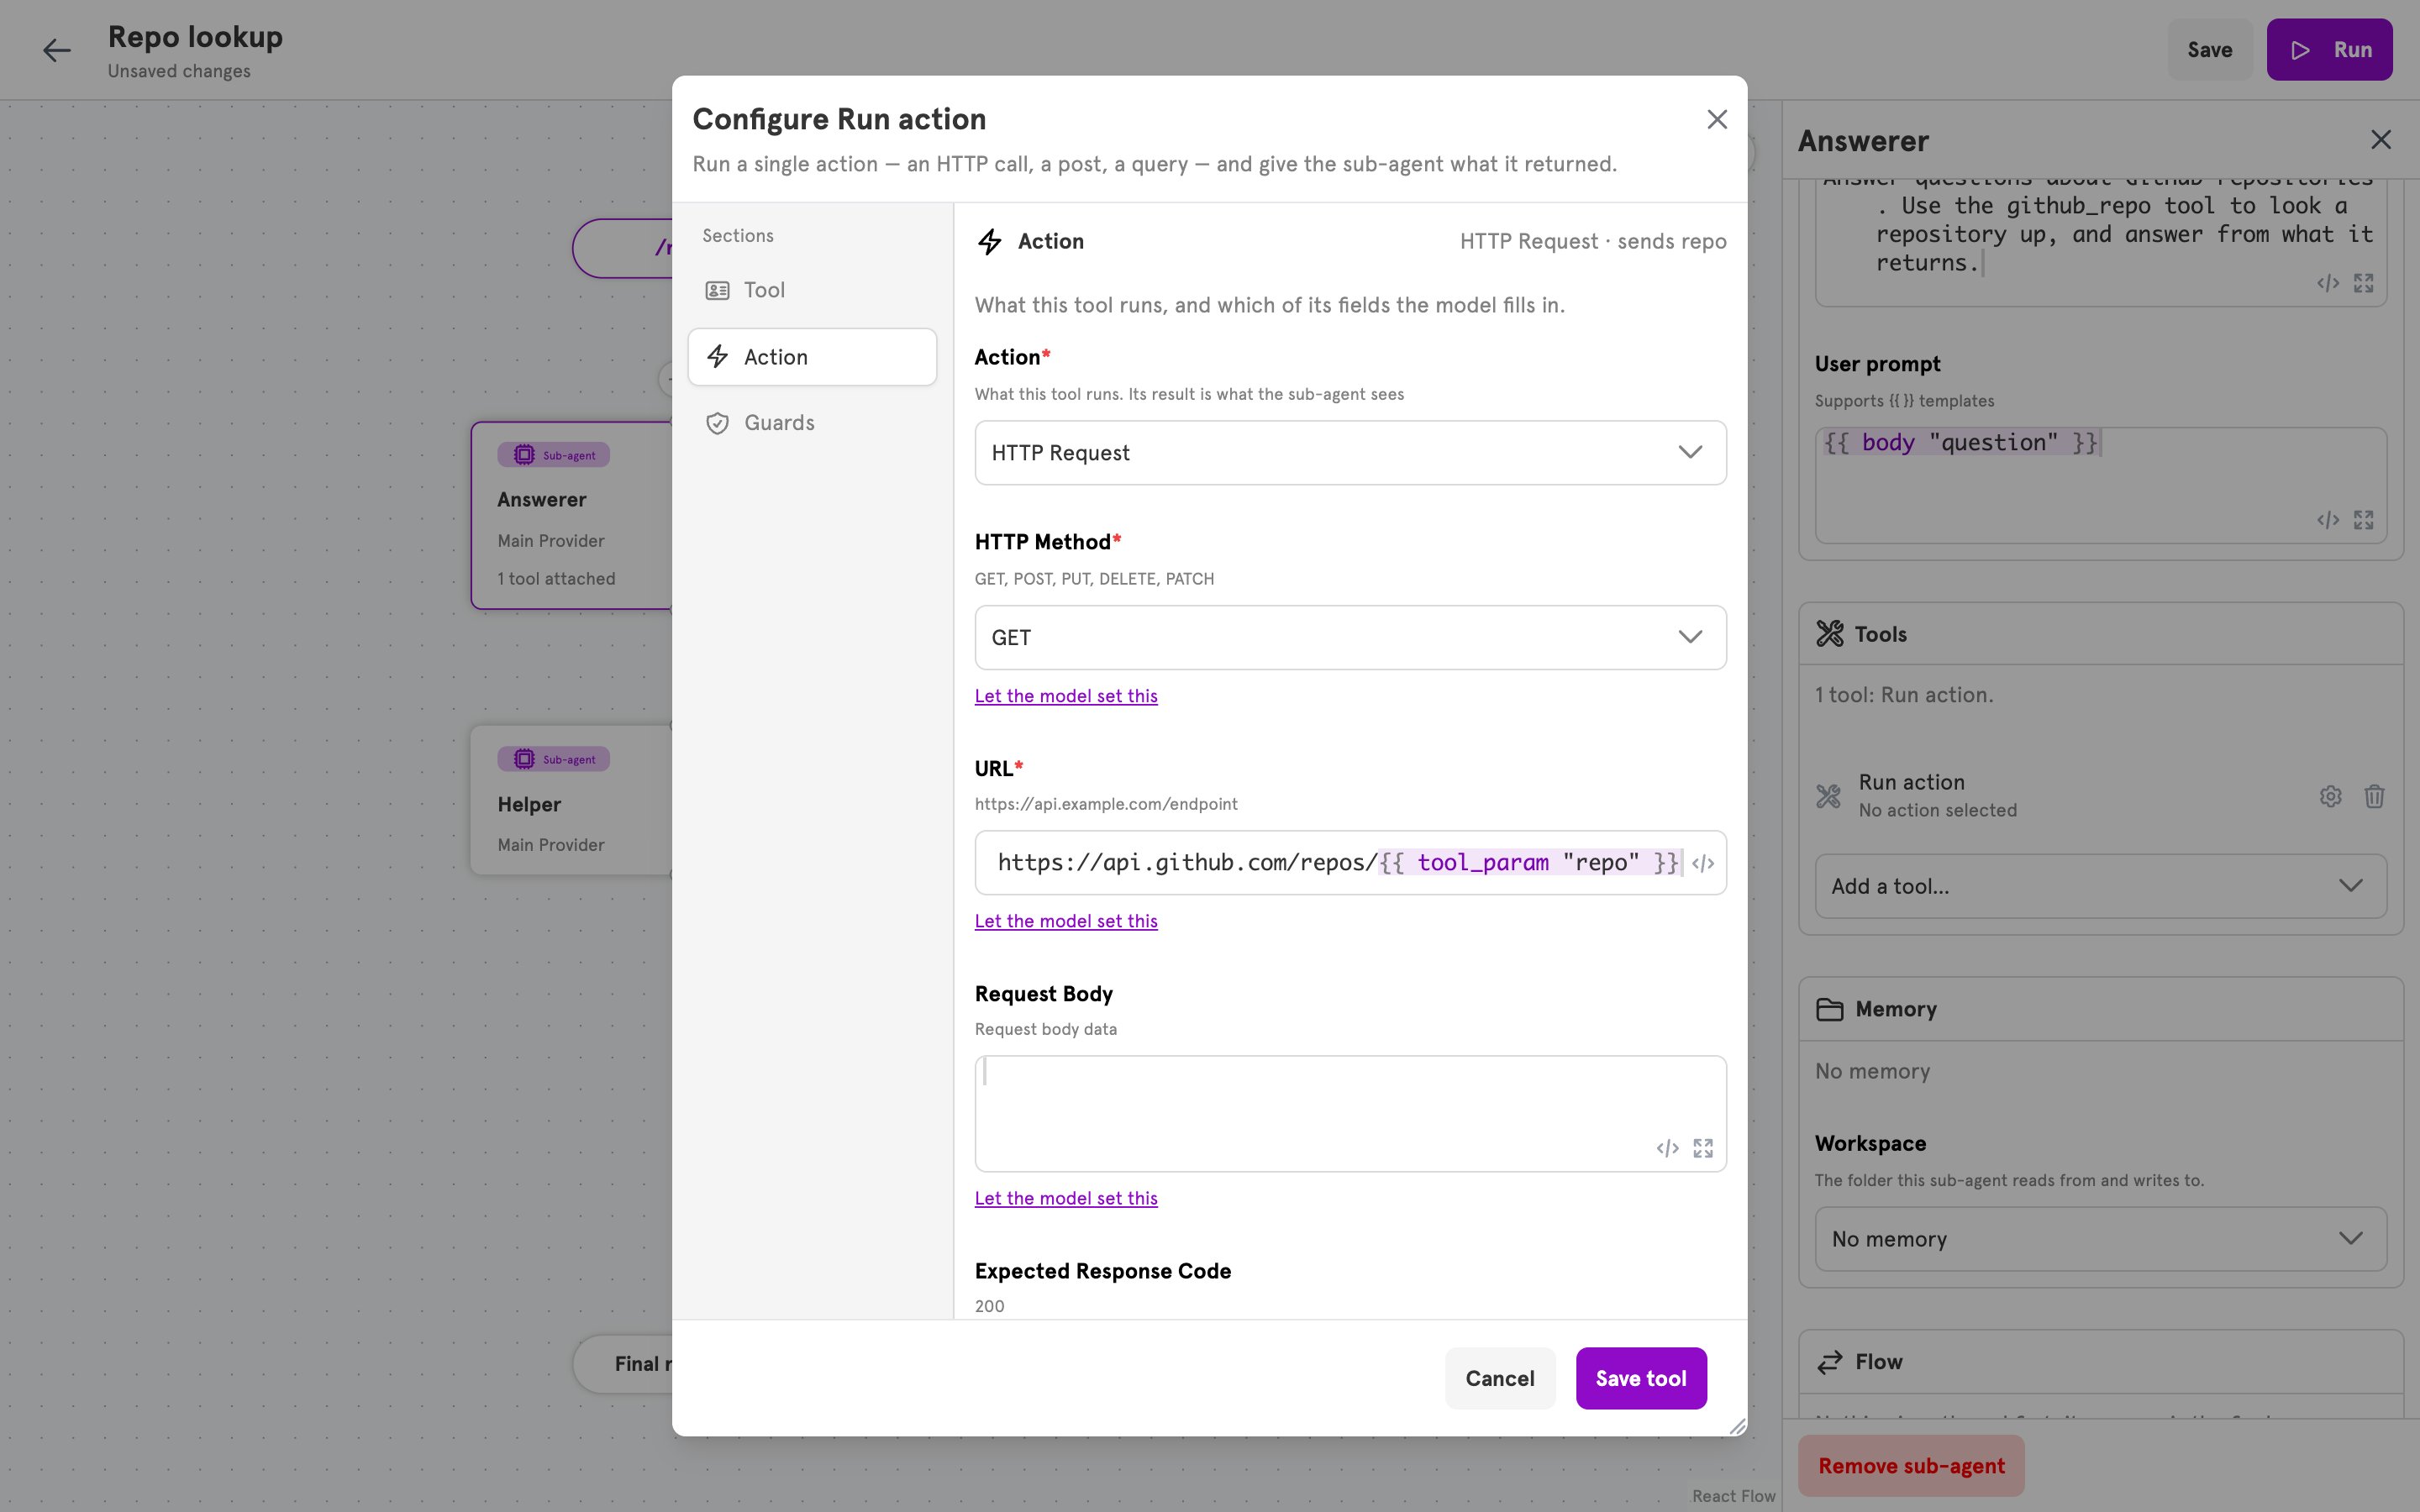
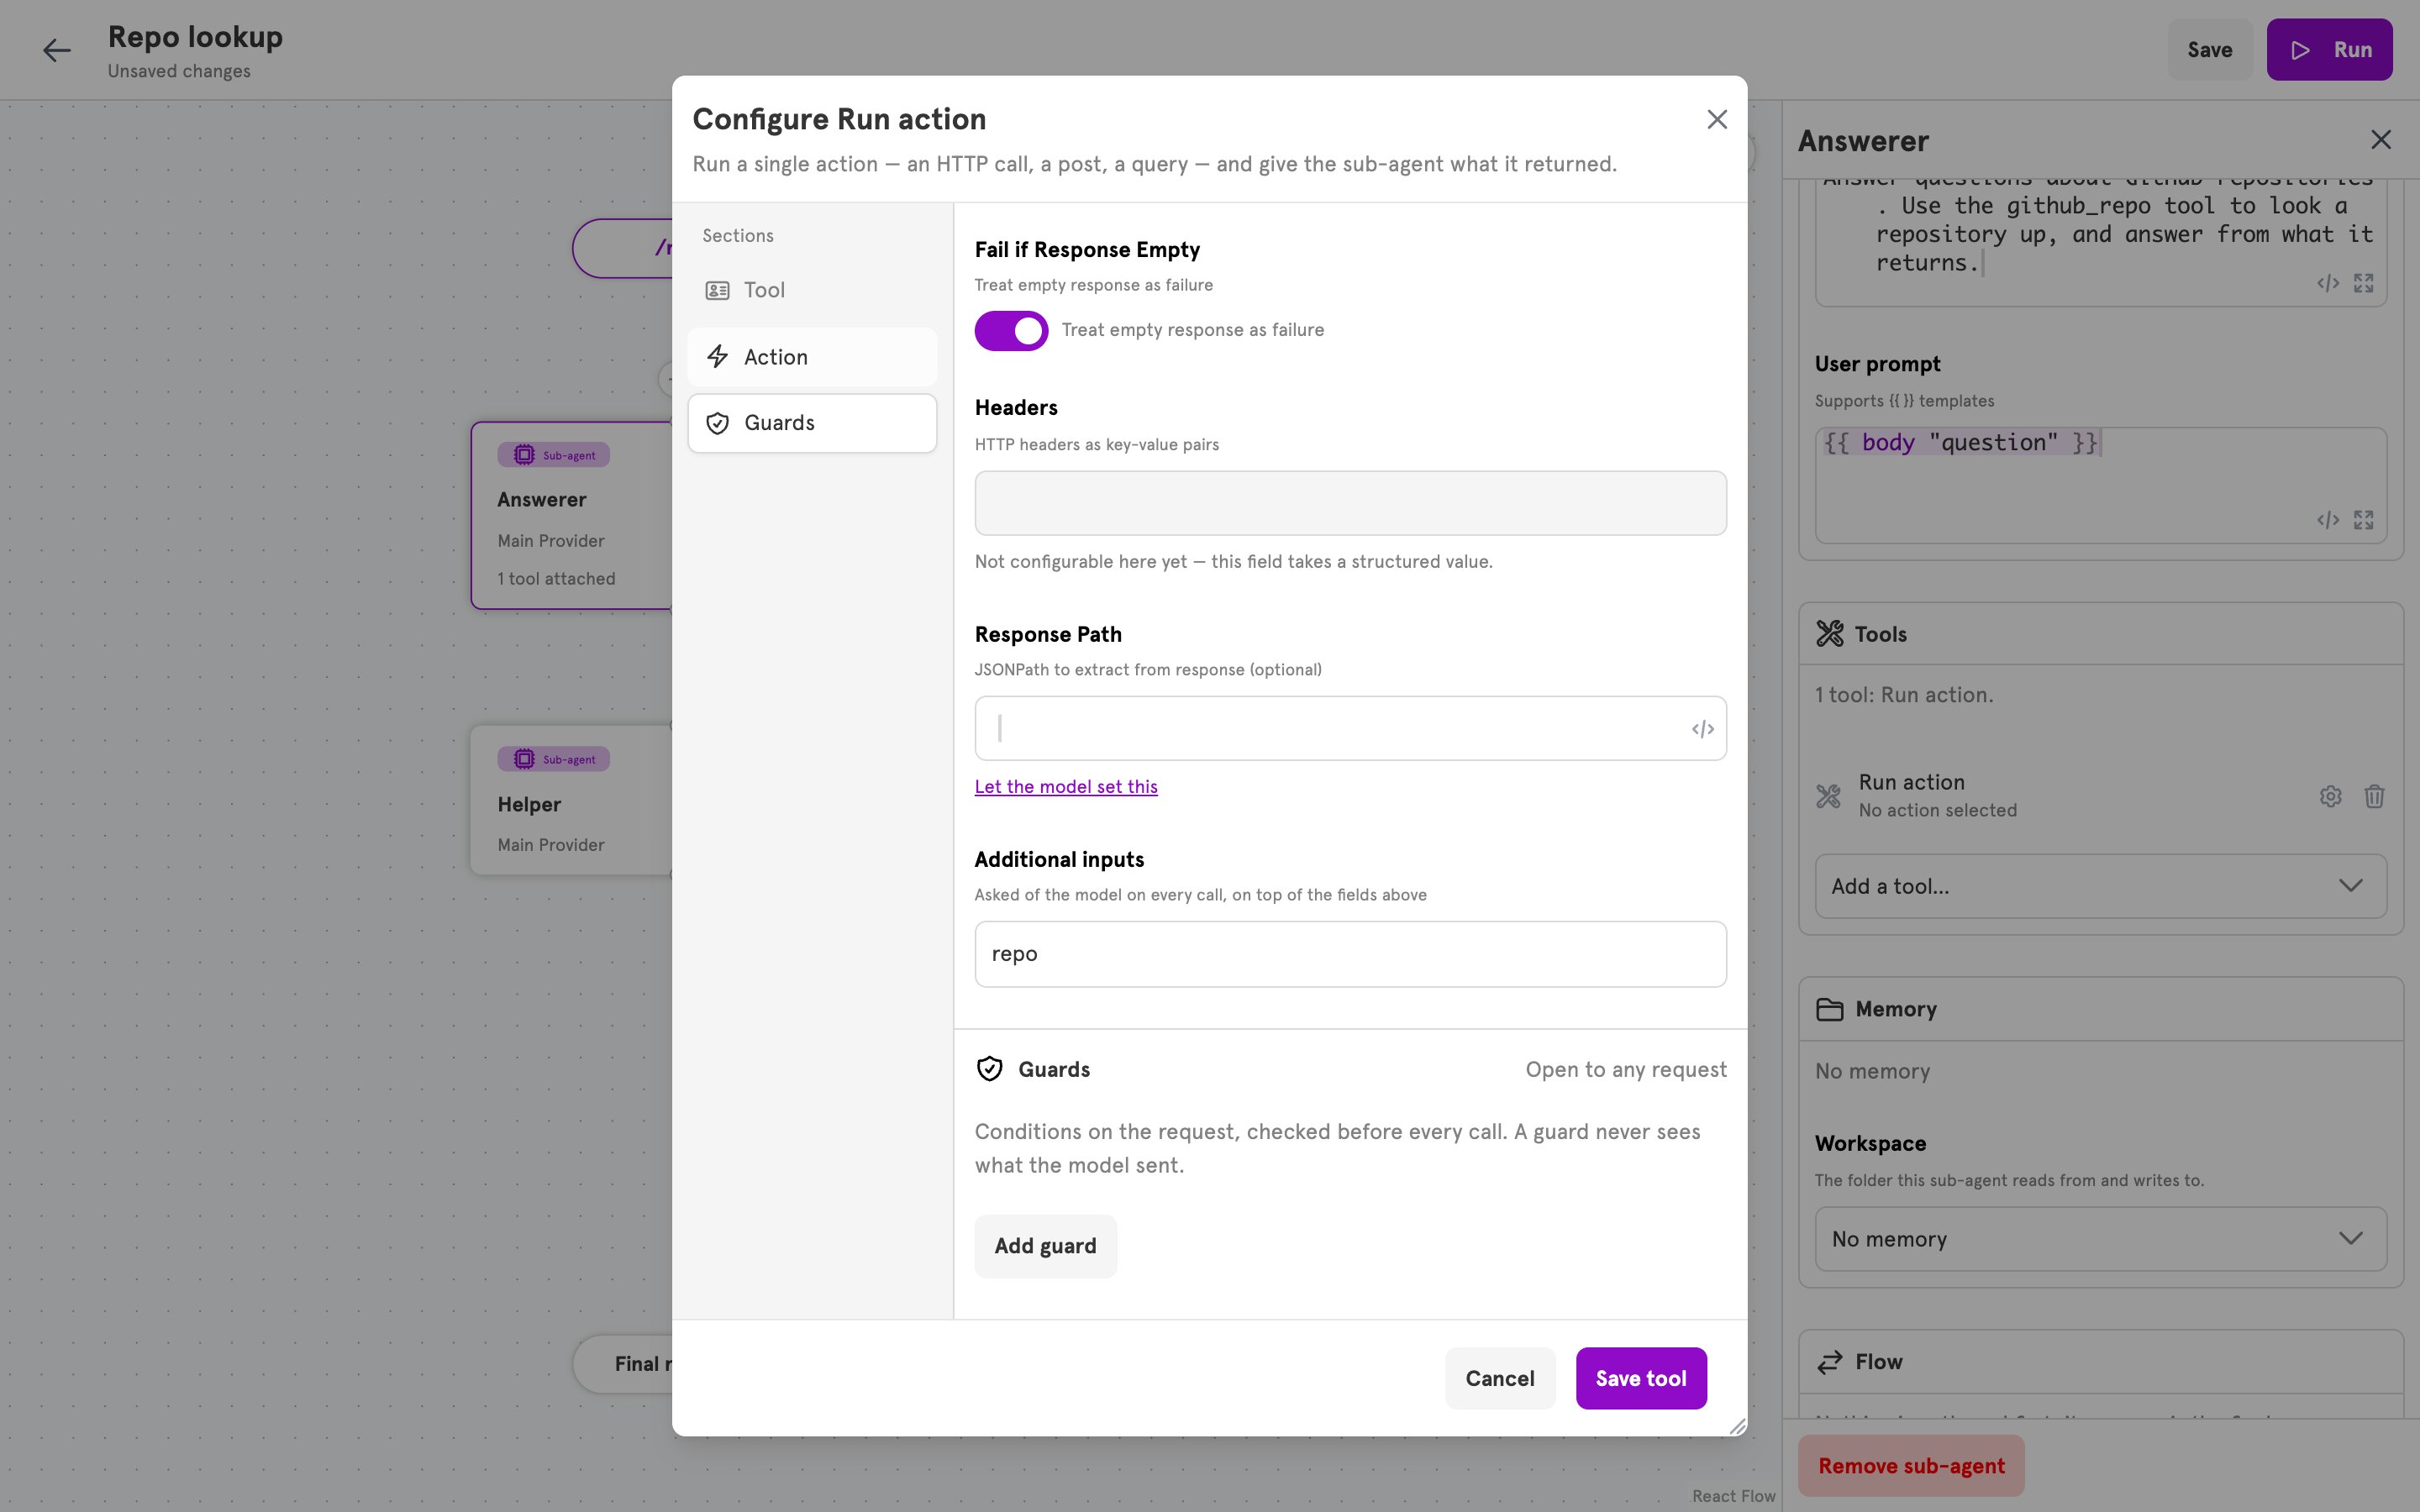
GET. Under URL, enter the address with the model’s input in the place it belongs:tool_param function reads an input the model sends when it calls the tool. With the rest of the URL fixed, the model chooses a repository and cannot point the request at another host.repo. The section’s summary line now reads “HTTP Request · sends repo”, which is everything the model sends when it calls this tool.6
Save the tool
Click Save tool. The row in the Tools section reads 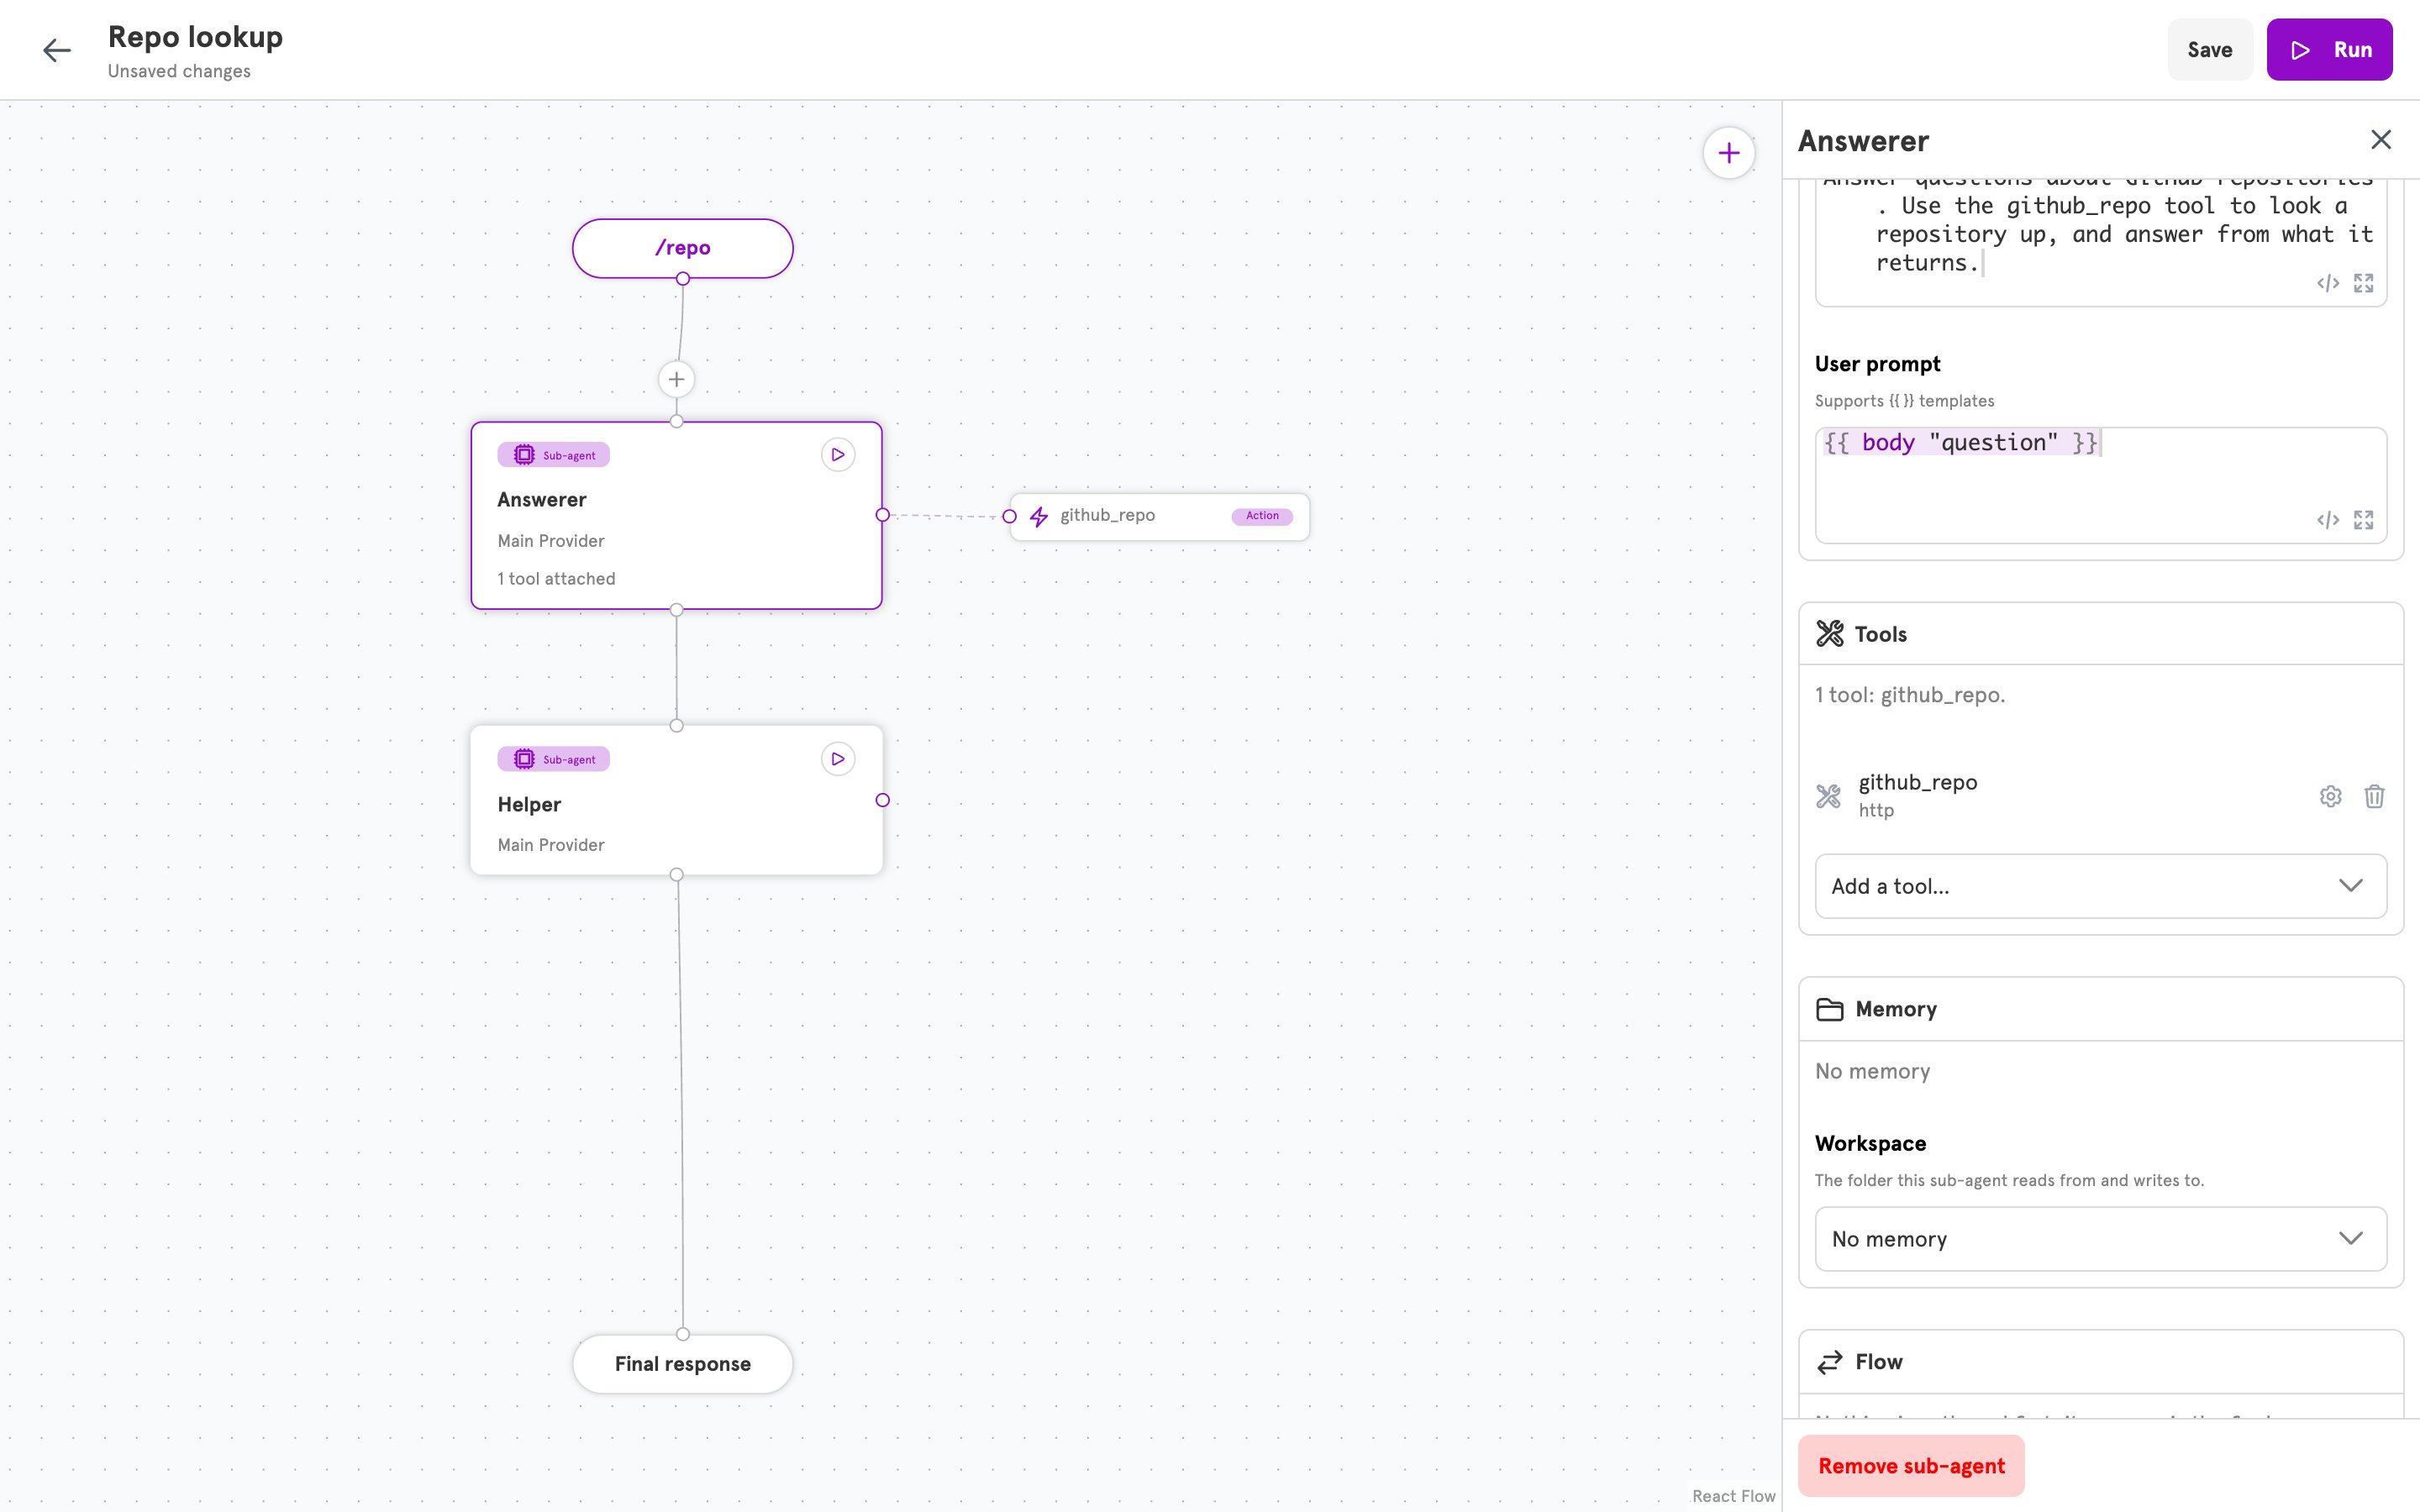
github_repo, with http under it, and the tool appears on the canvas beside the sub-agent. The gear on the row opens the dialog again, and the trash icon removes the tool.7
Tell the model about the tool
In the same panel, set the sub-agent’s System prompt so the model knows to use the tool:Click Save in the top bar. The button reads Saved.
Verify
1
Run the agent from the editor
Click Run in the top bar. Enter a Request body that needs the tool, and click Run: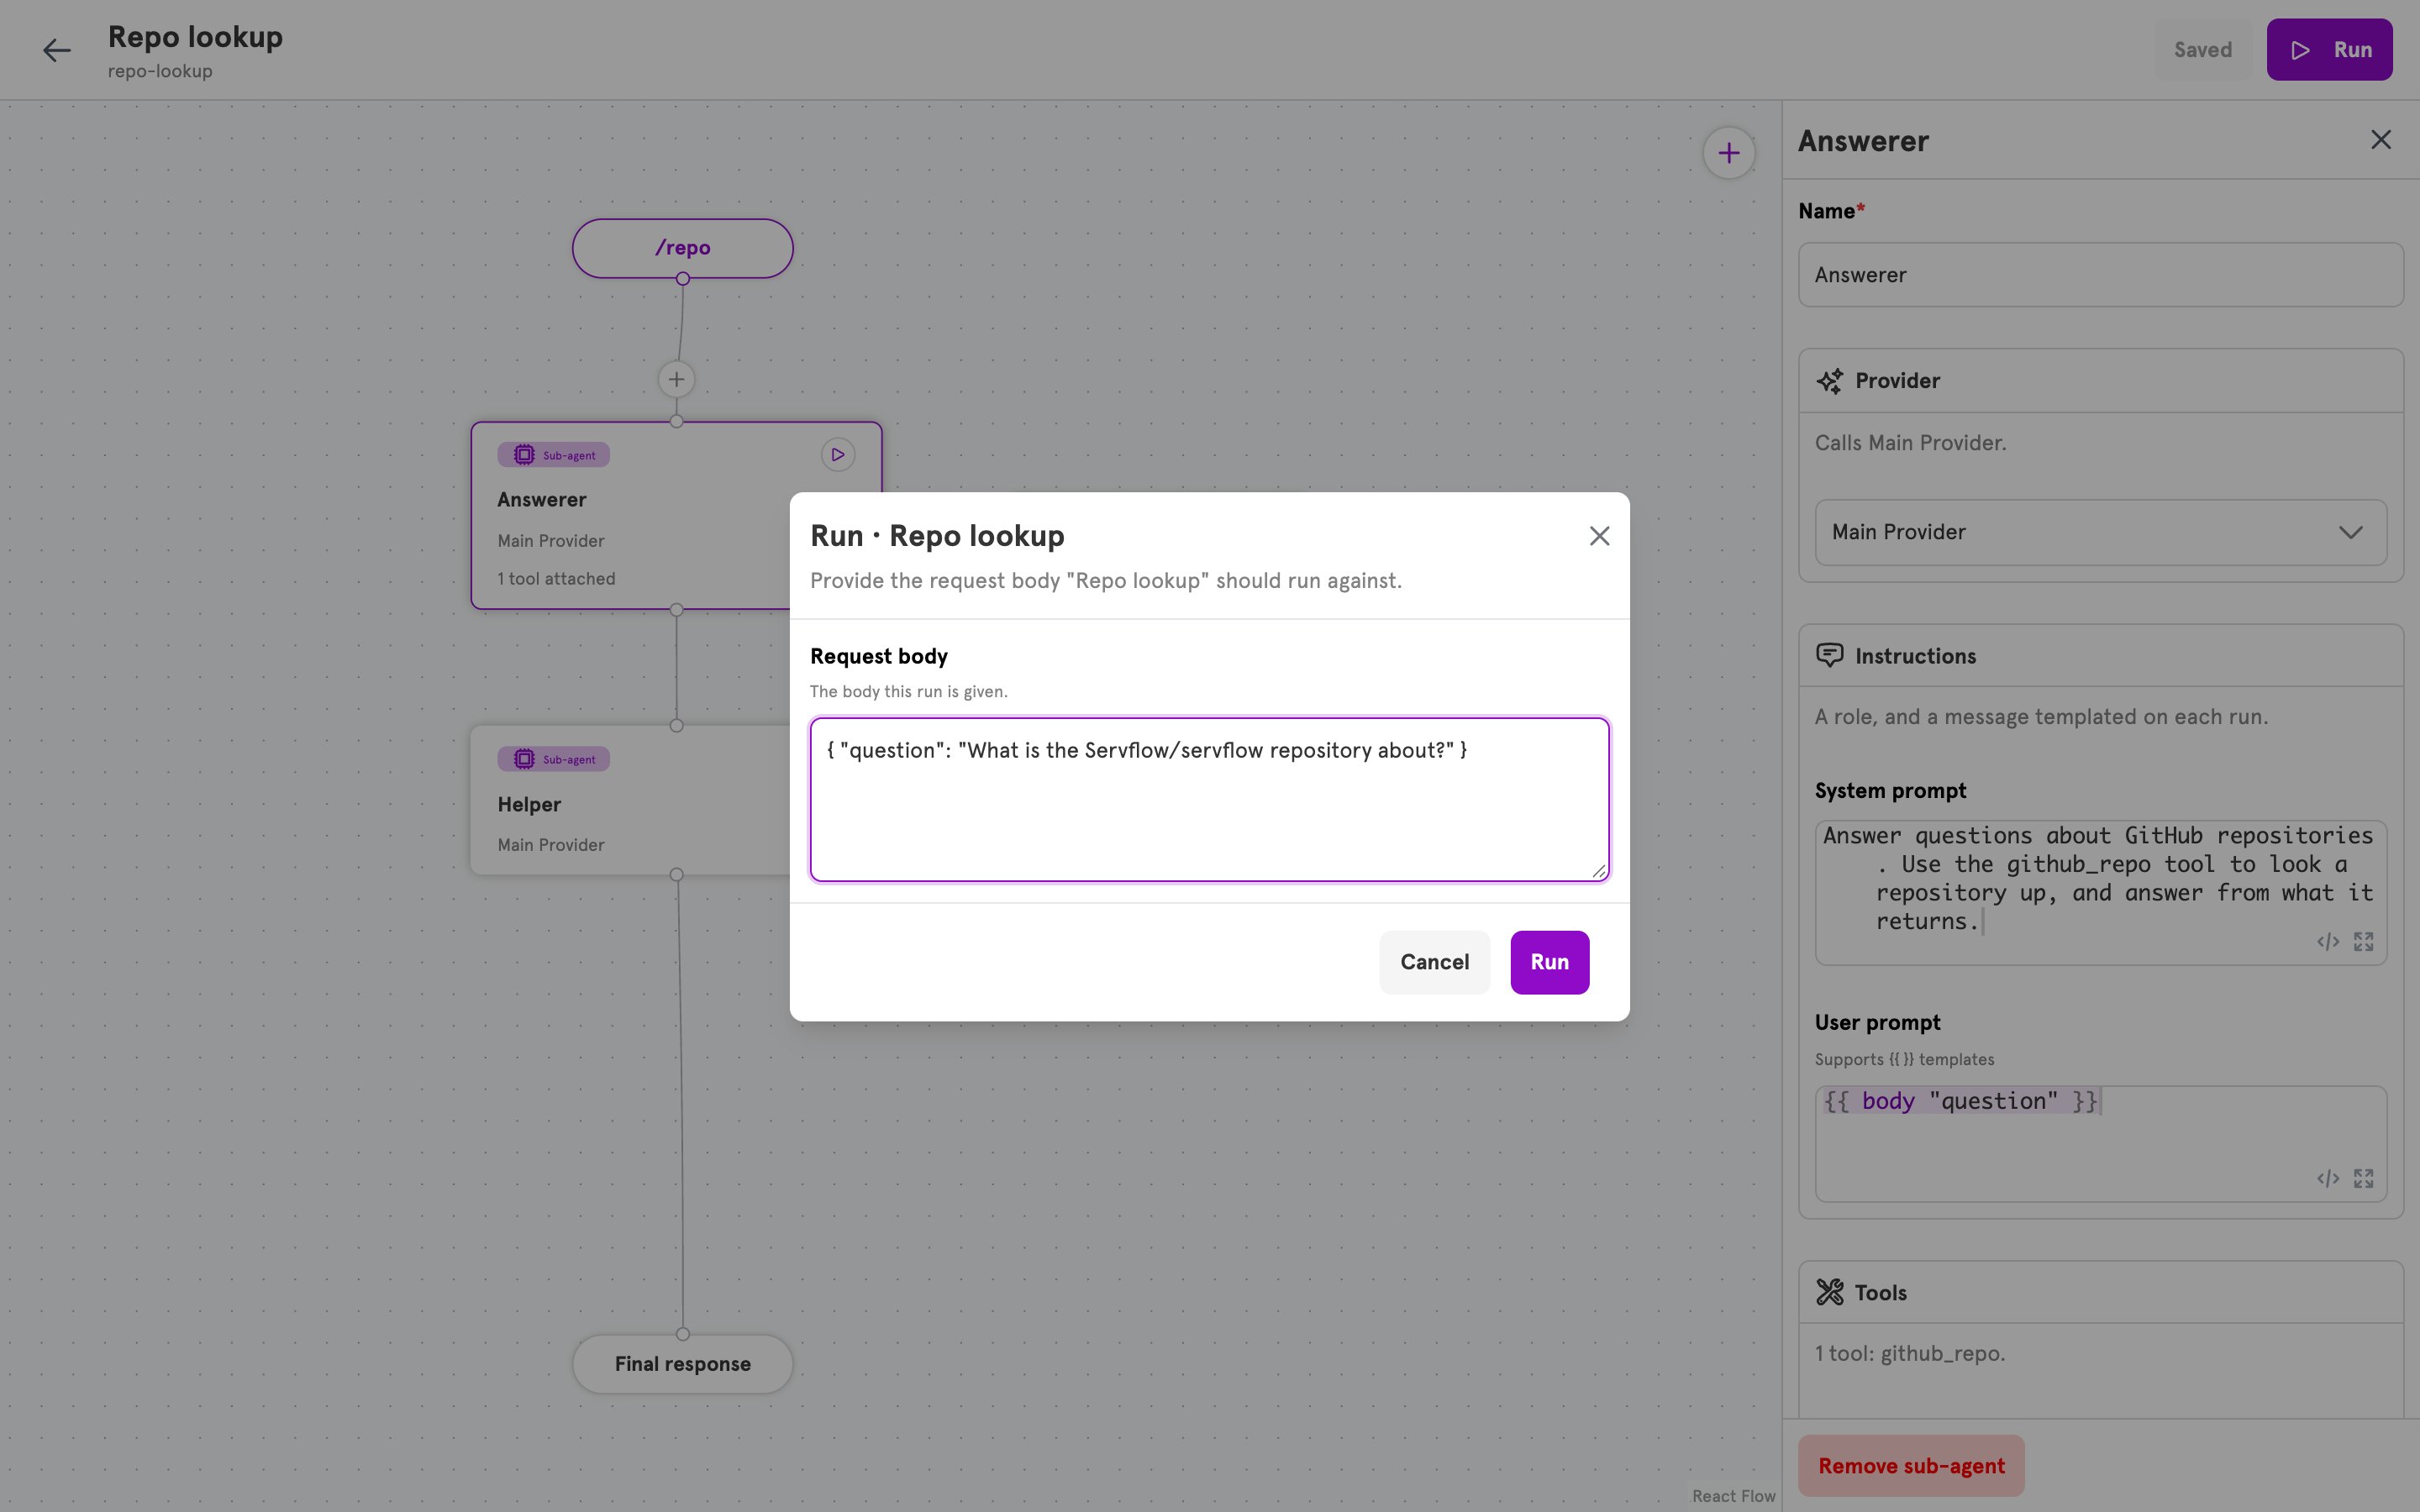
2
Read the log
The Run panel shows Completed. Its Log lists “attempting to execute tool”, then “finished request” from the HTTP action, then “successfully executed tool”. The Final response answers from what GitHub returned.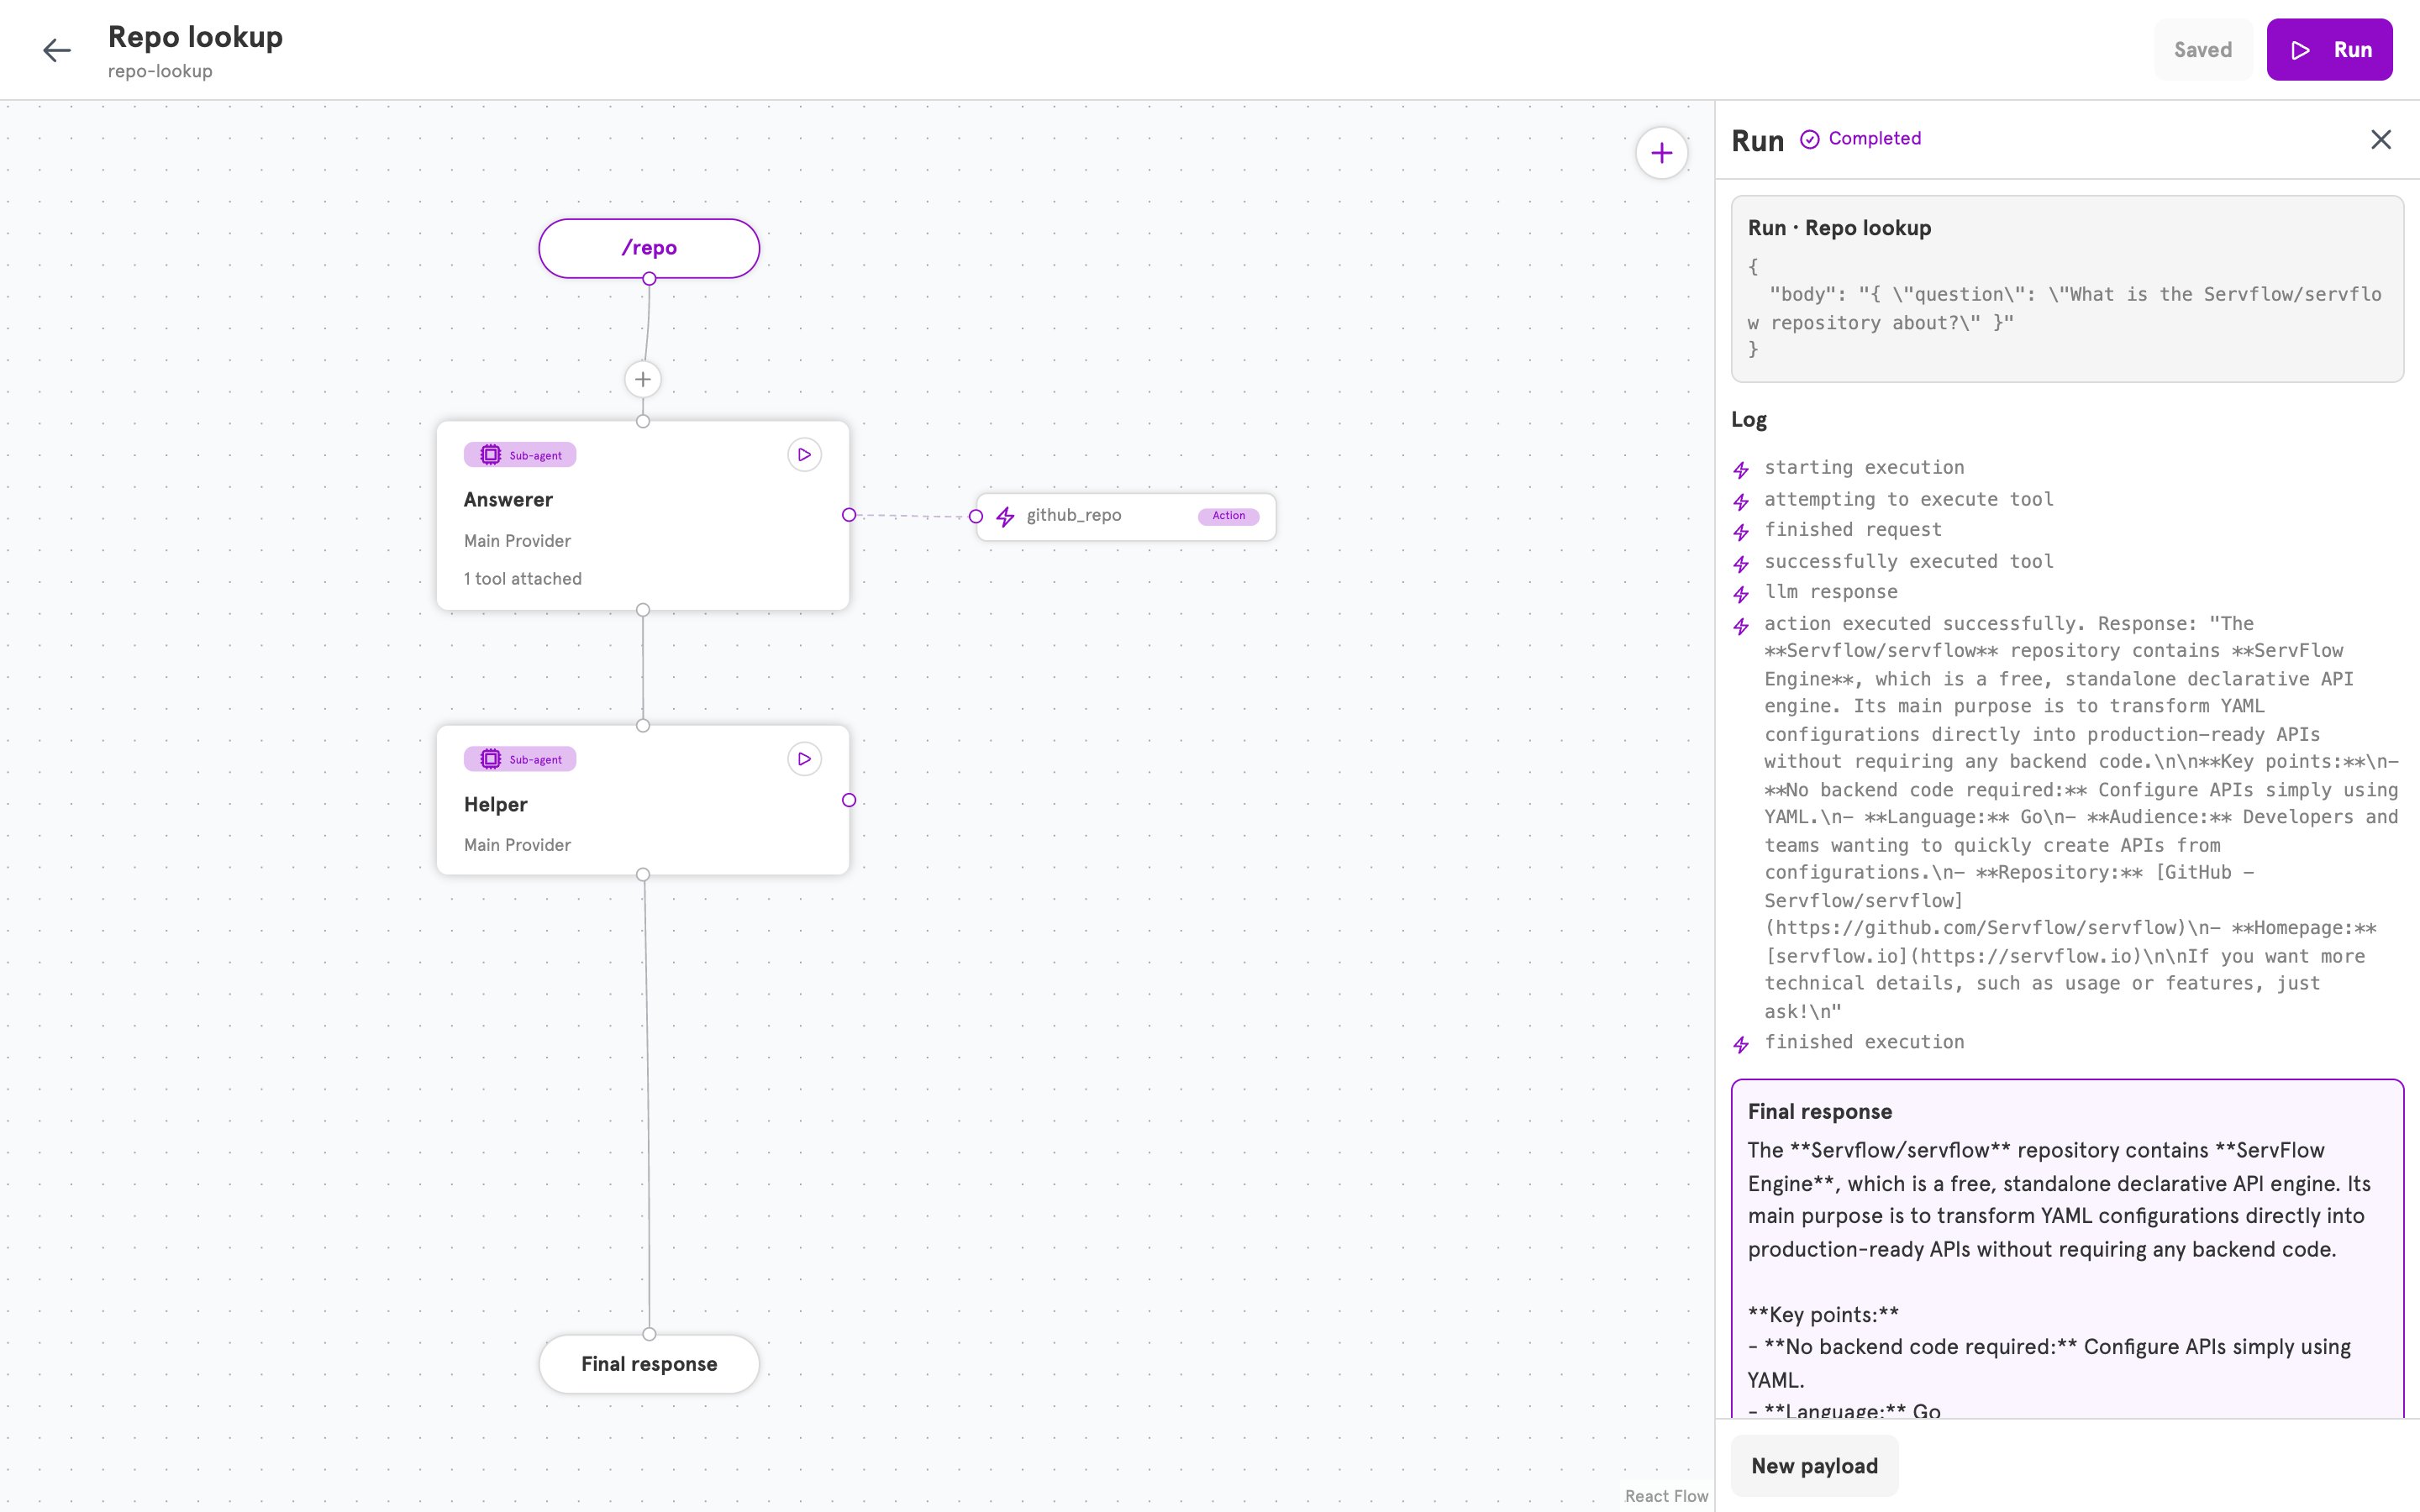
3
Call the agent from outside
Send the same question to the agent’s path:The response body is the agent’s reply.
Add a guard
A guard is a condition on the request that started the run. When it does not pass, the tool call is refused, whatever the model sent. This example allows the lookup only for requests that carry"plan": "pro".
1
Open the Guards section
In the Tools section, click the gear on the
github_repo row. In the dialog, click Guards on the left edge, then click Add guard.2
Name the guard and write its condition
Enter a Guard name, for example The section’s summary reads “1 condition must pass”, and Guards on the left edge shows a count of 1.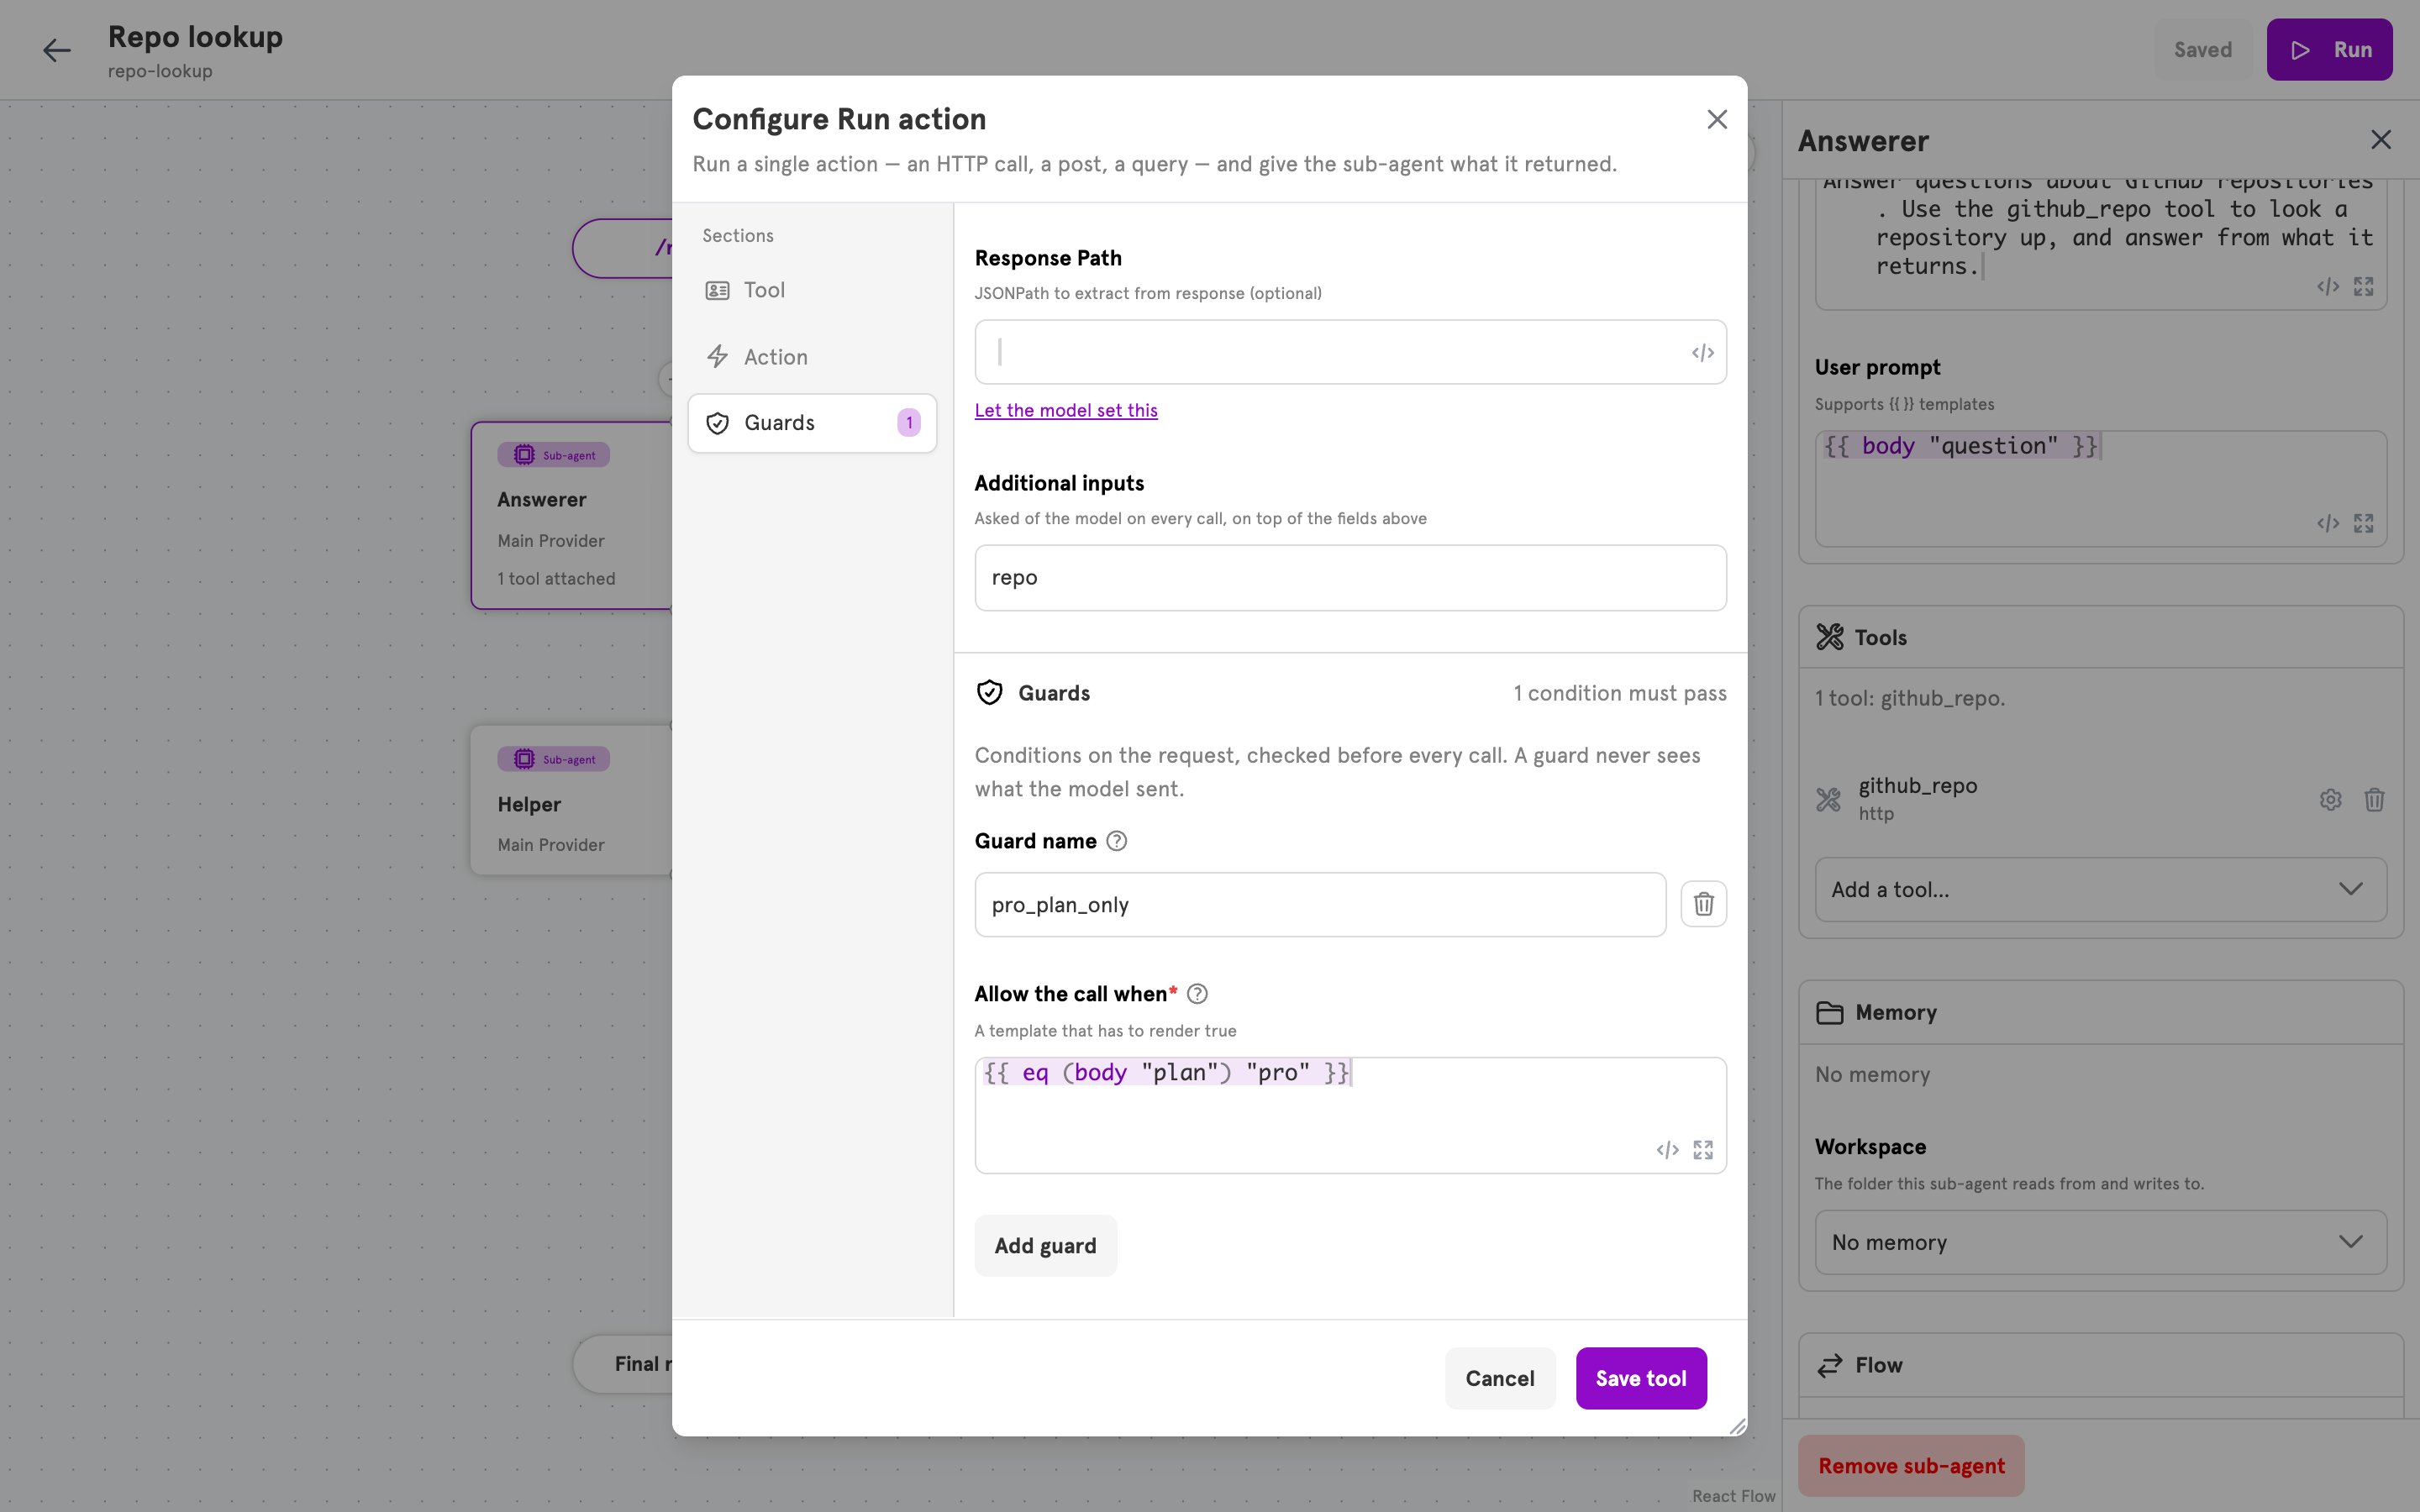
pro_plan_only. The name appears in traces, and in what the model is told when a call is refused.Under Allow the call when, enter a template that renders true when the call is allowed:3
Save and test the refusal
Click Save tool, then Save. Click Run and send the earlier request body, which has no 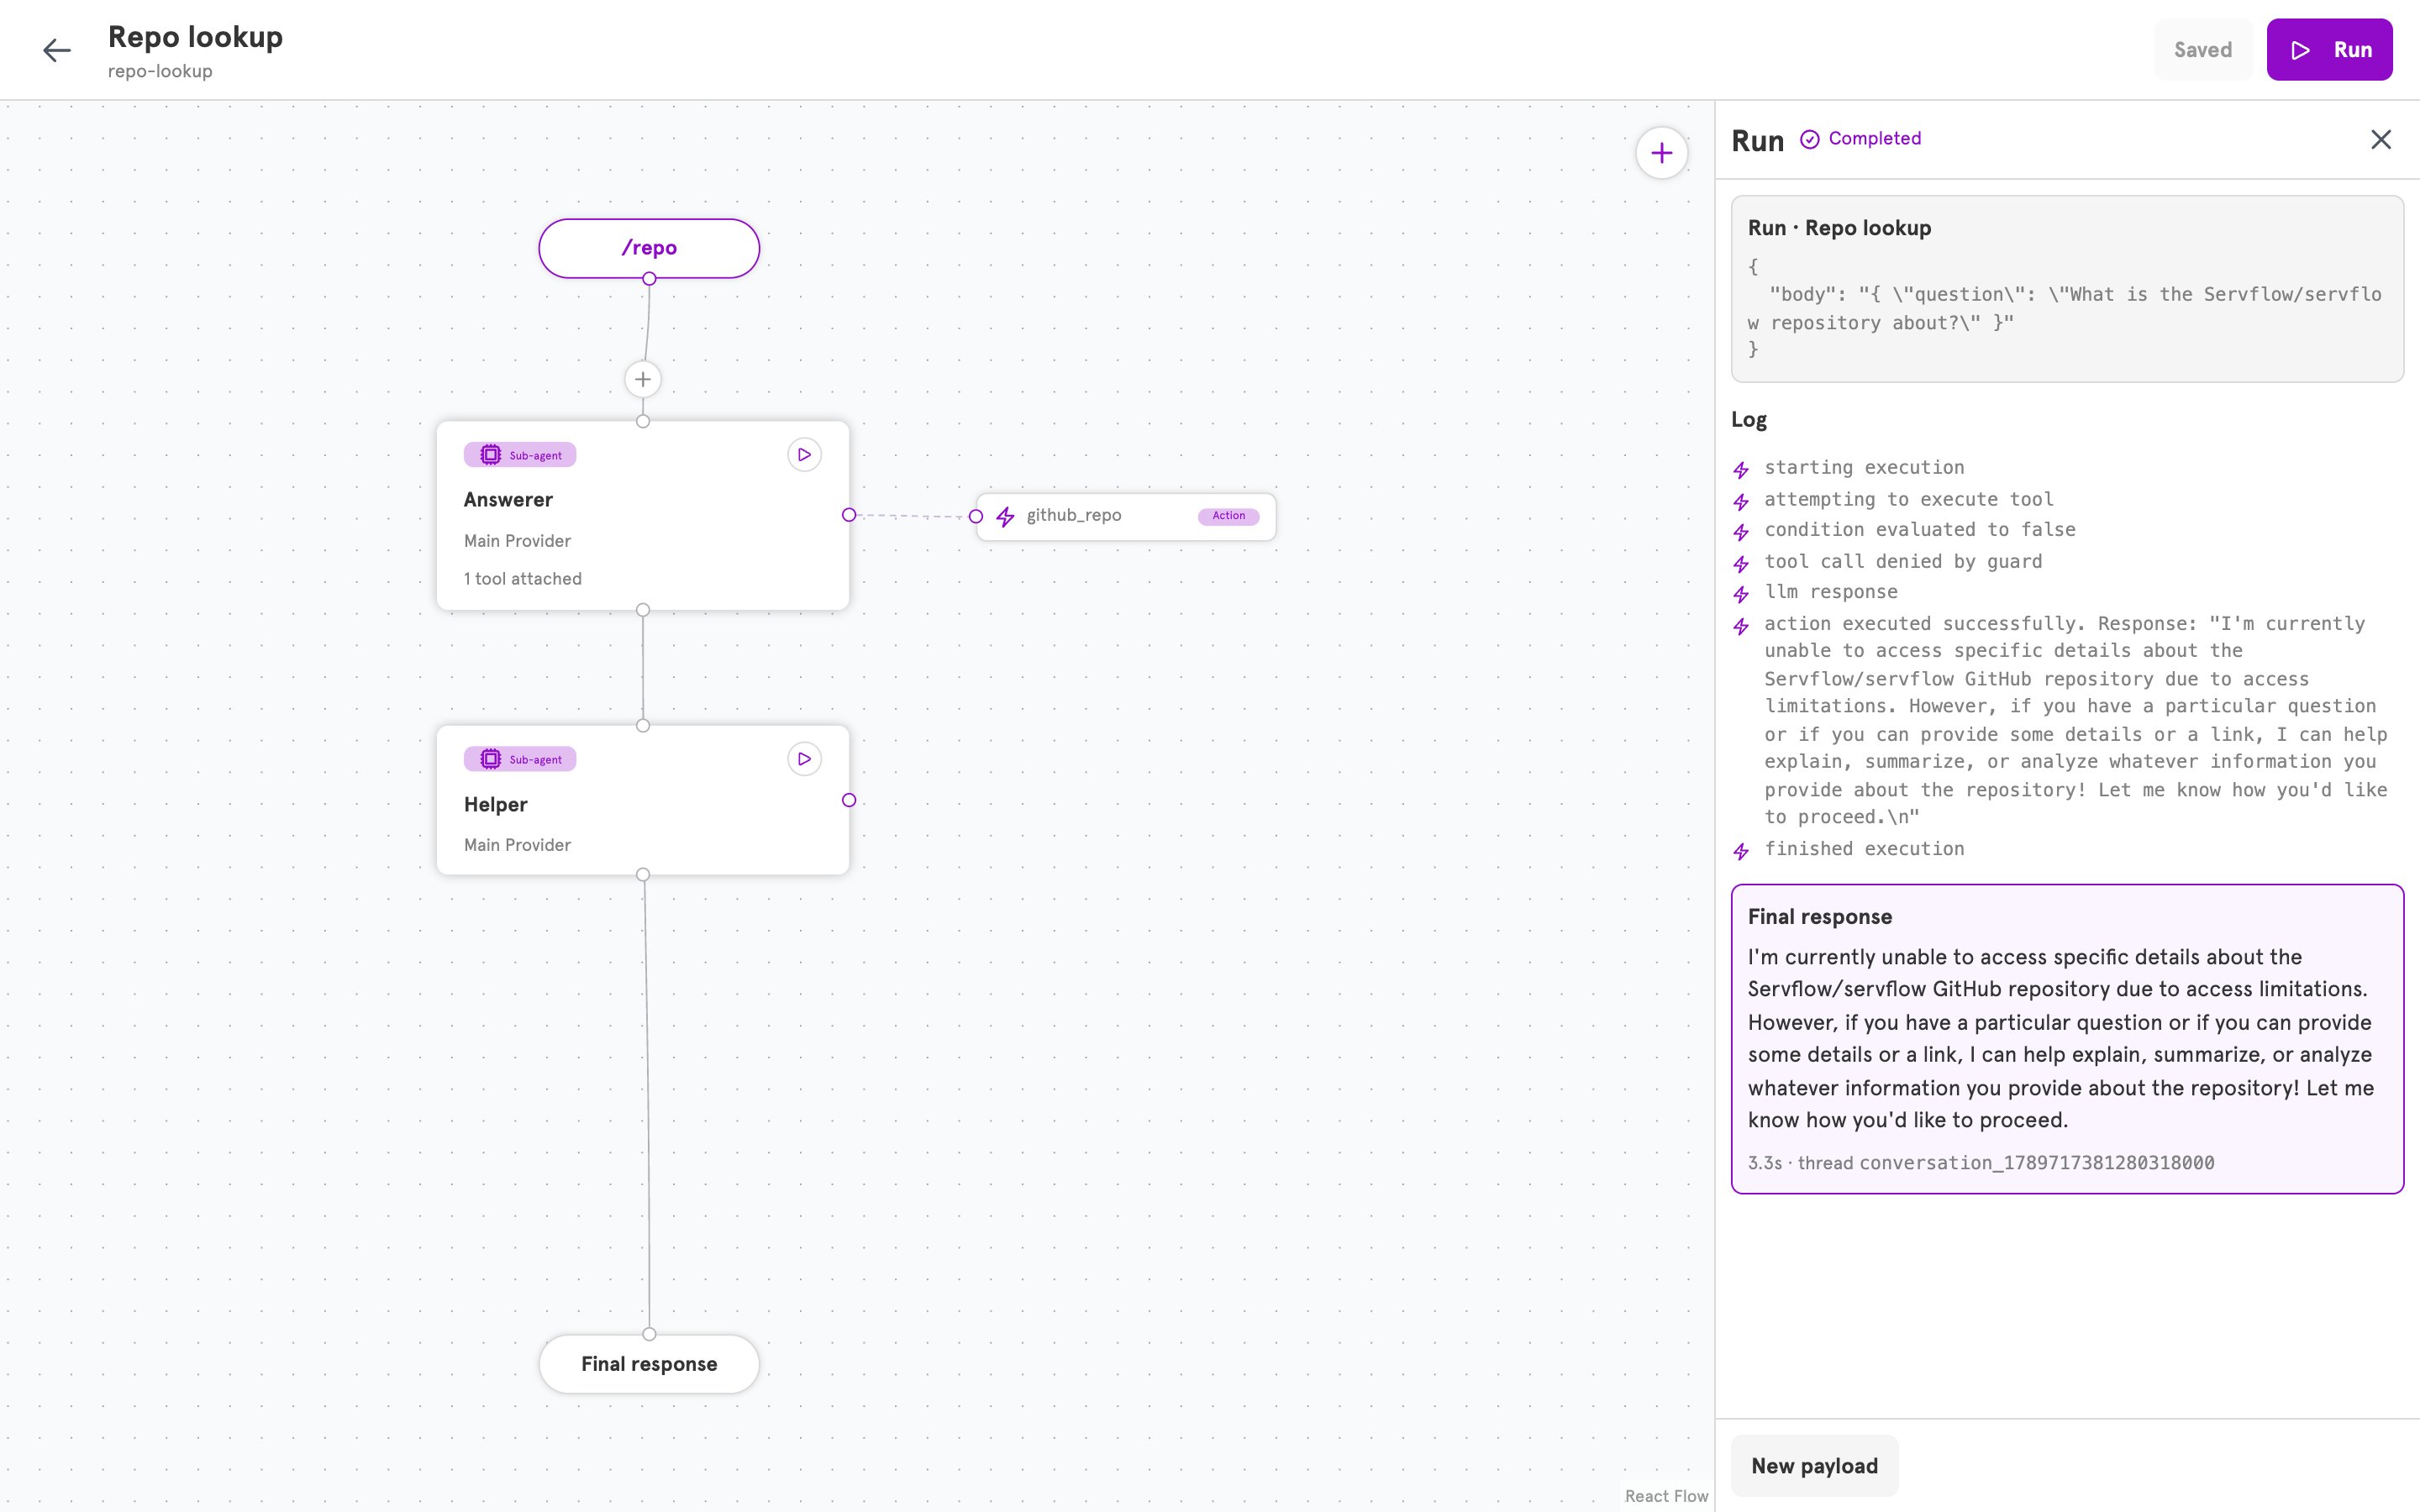
plan field. The log reads “condition evaluated to false”, then “tool call denied by guard”, and the model answers without the repository data."plan": "pro" to the body. The tool runs as before.Attach another type of tool
Add a tool… lists three more types. Each opens the same dialog with a different middle section. For every field, see the Tools reference.MCP server
To offer the tools of a Model Context Protocol server, choose MCP server…. In the Server section, enter the Server endpoint. If the server needs a token, choose where it comes from under Access token: an Integration connected through OAuth, a Secret, or a pasted Token. Click Load tools and select the Allowed tools. Save tool stays disabled until at least one tool is selected.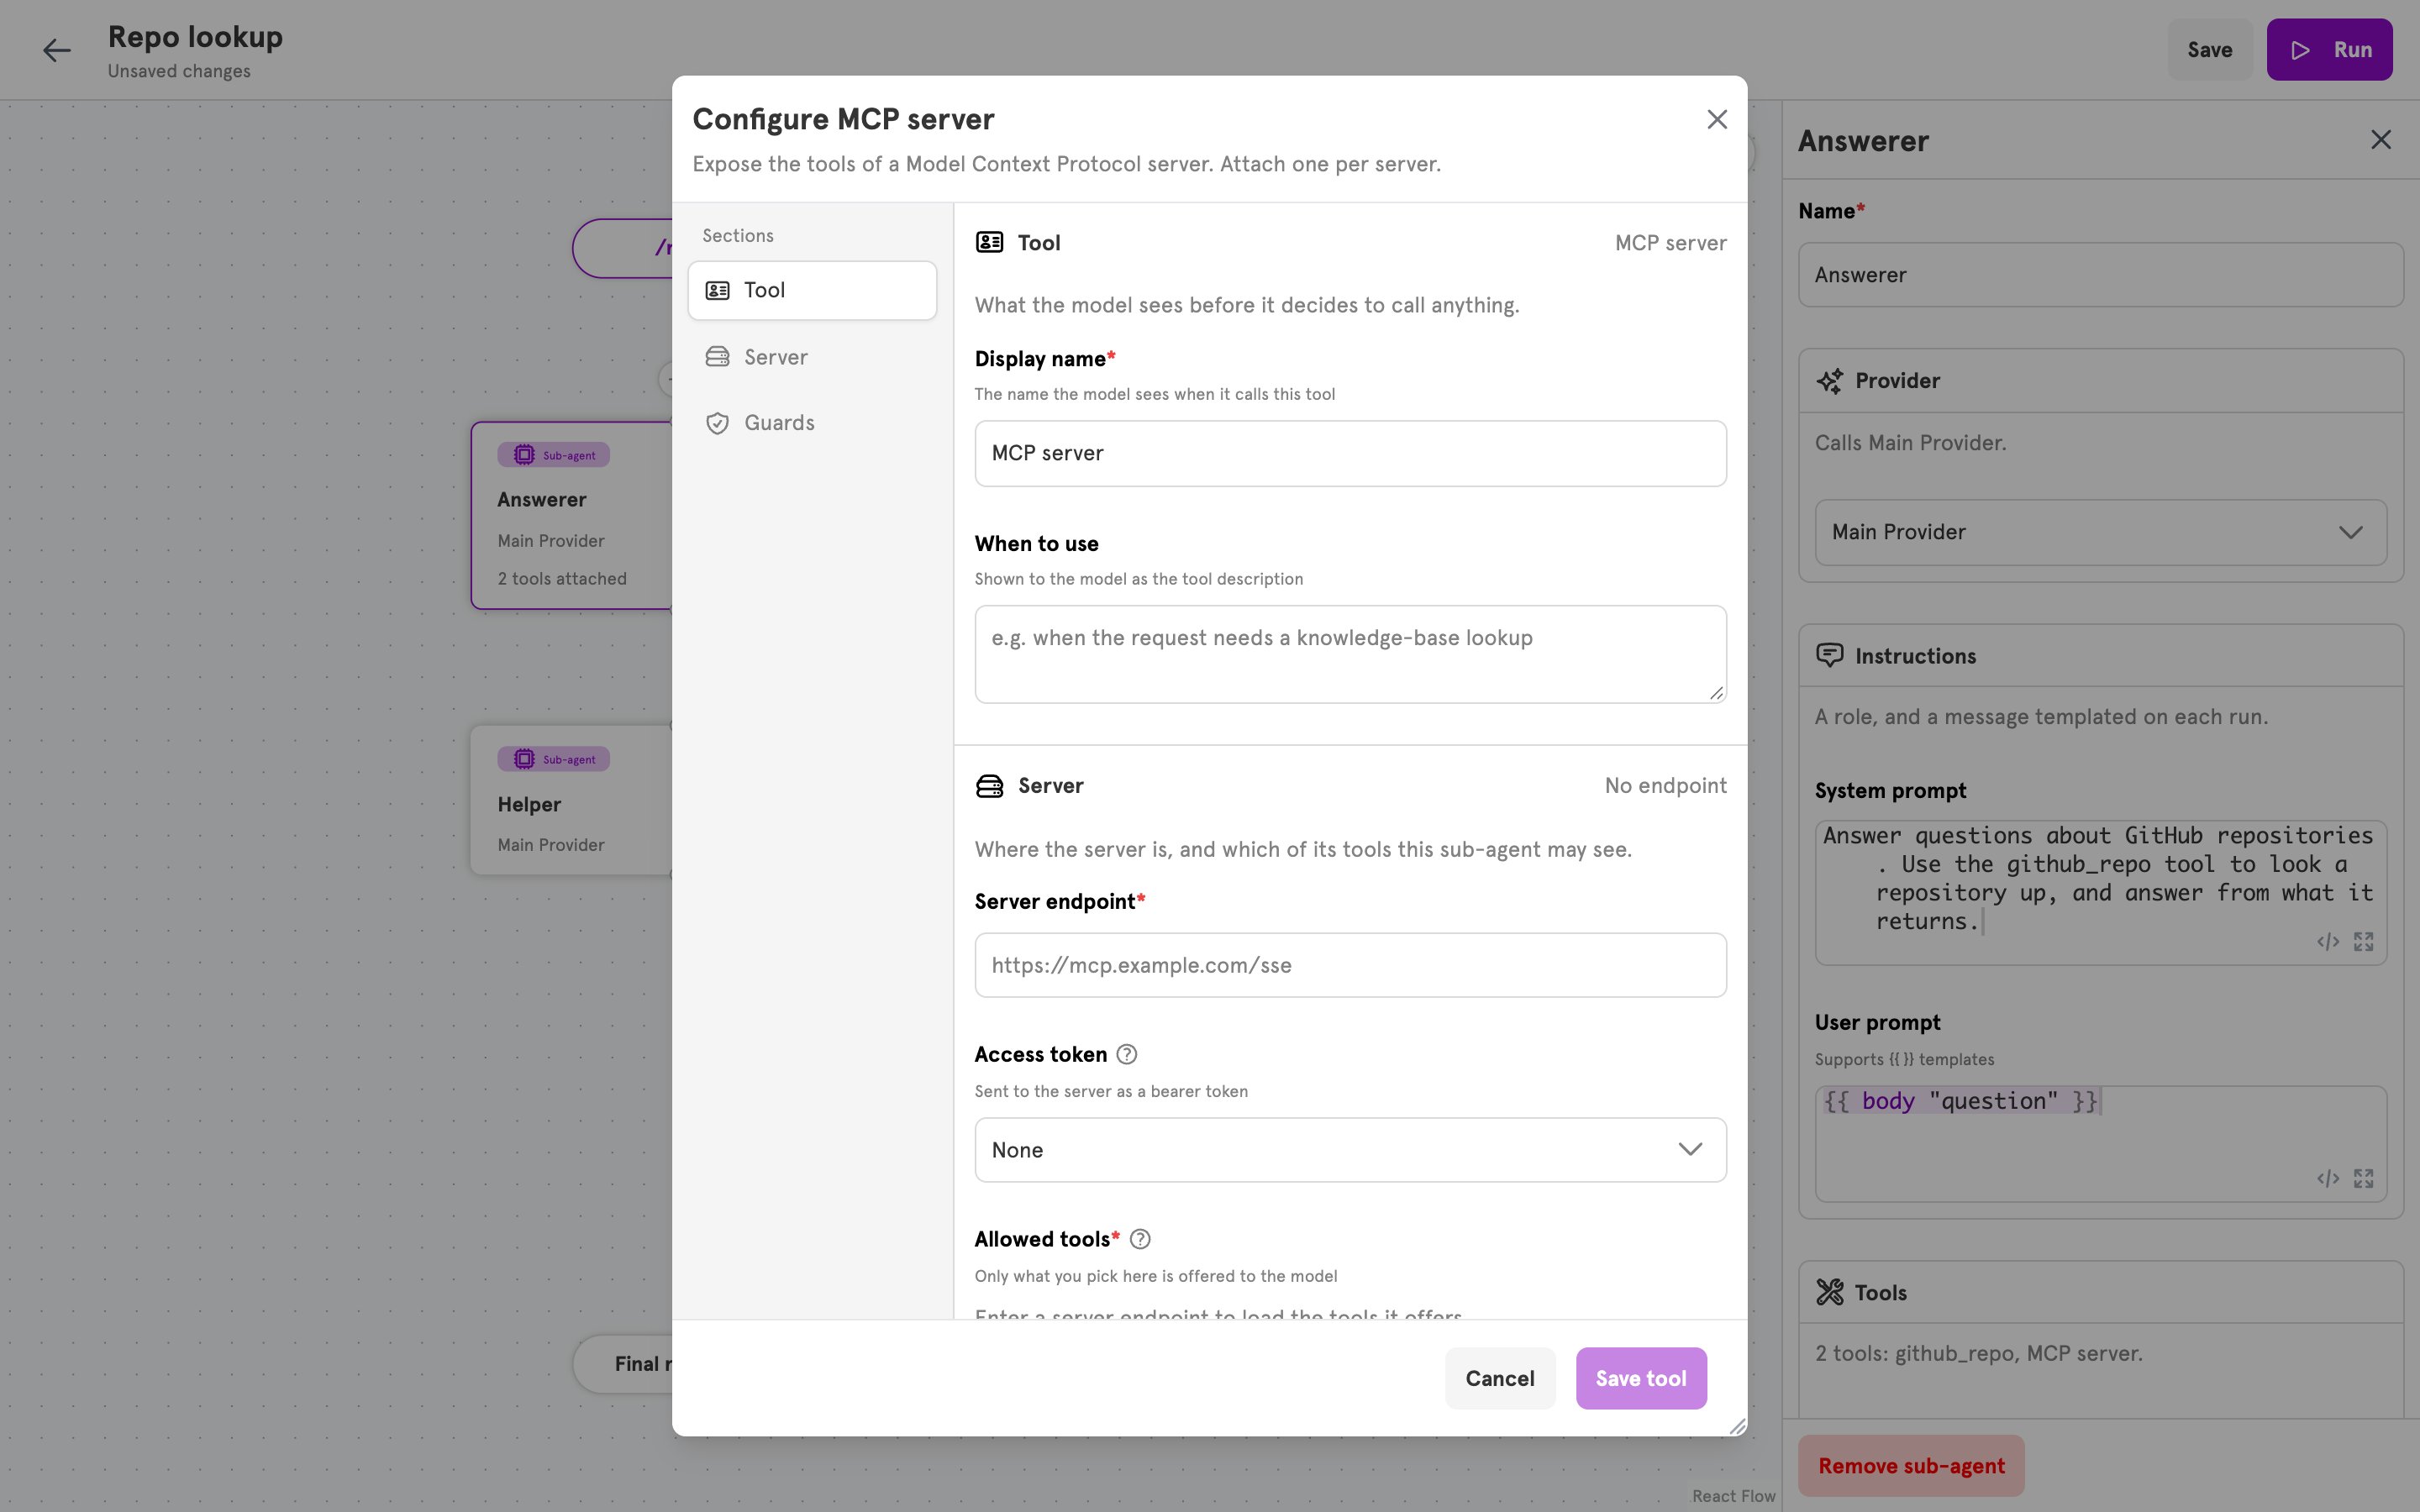
Call sub-agent
To let one sub-agent call another in the same agent, choose Call sub-agent…. Under Sub-agent, choose the sub-agent to call. The Display name takes that sub-agent’s name. The called sub-agent’s reply is what comes back.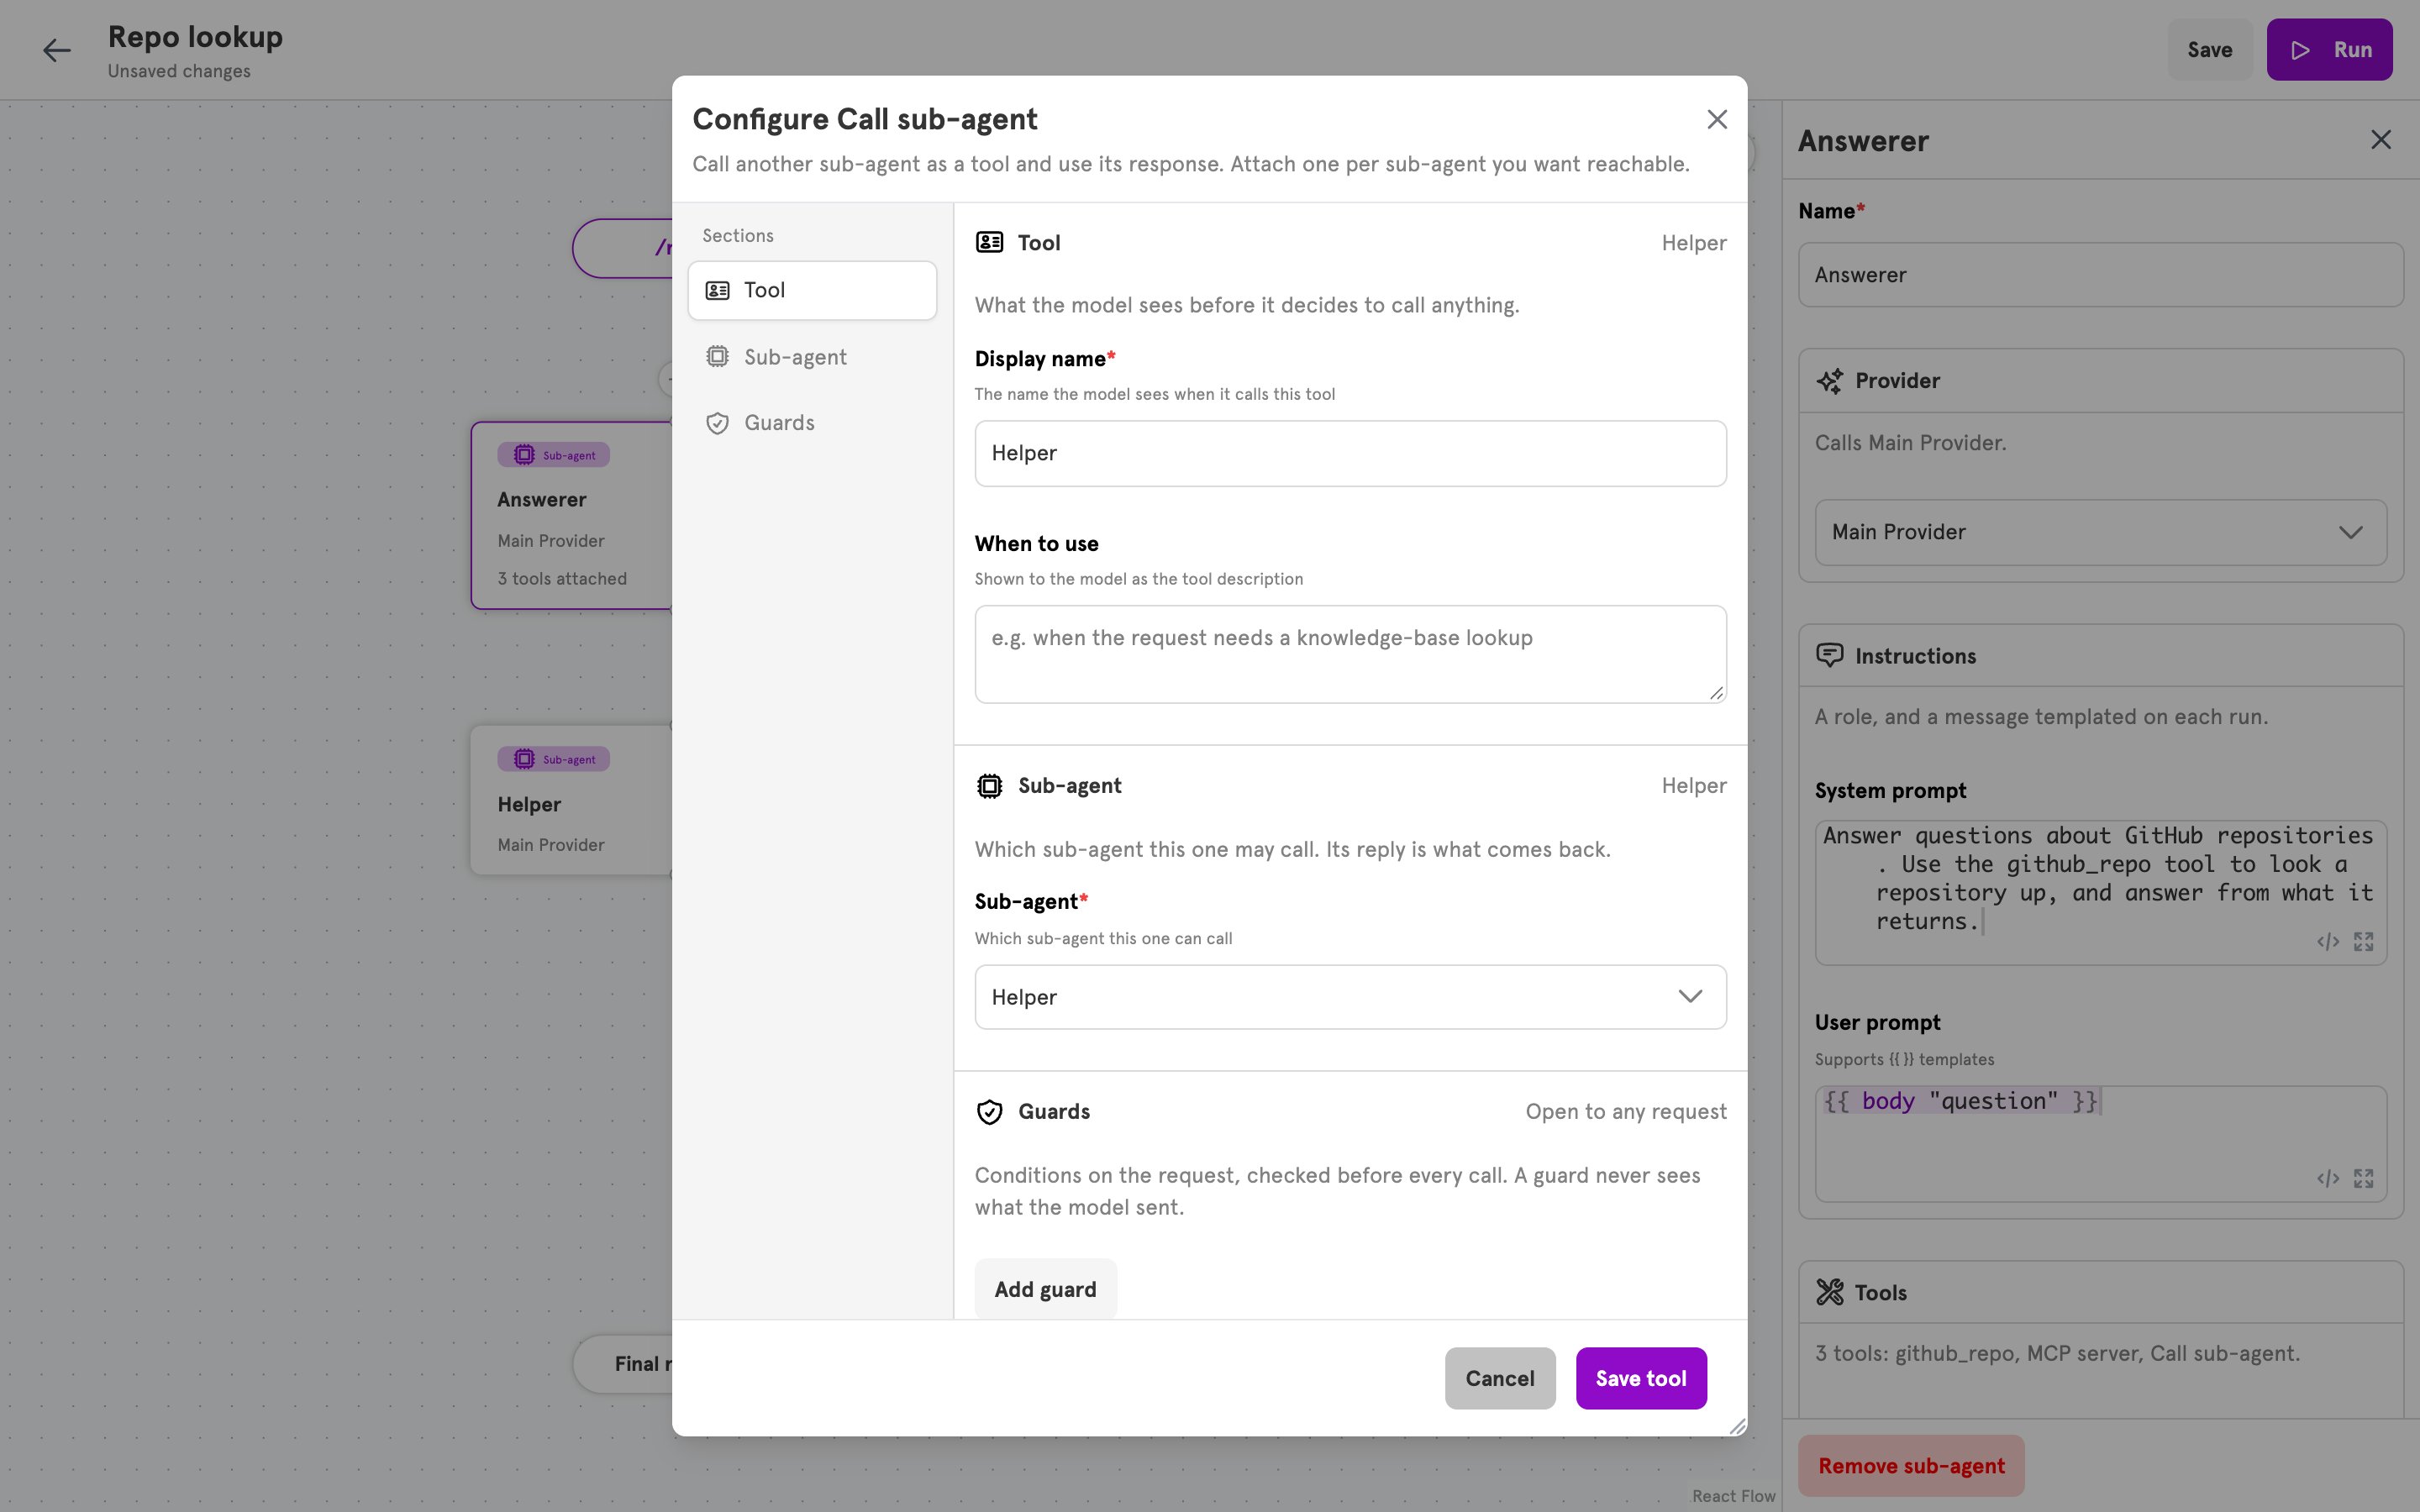
Agent Task Tool
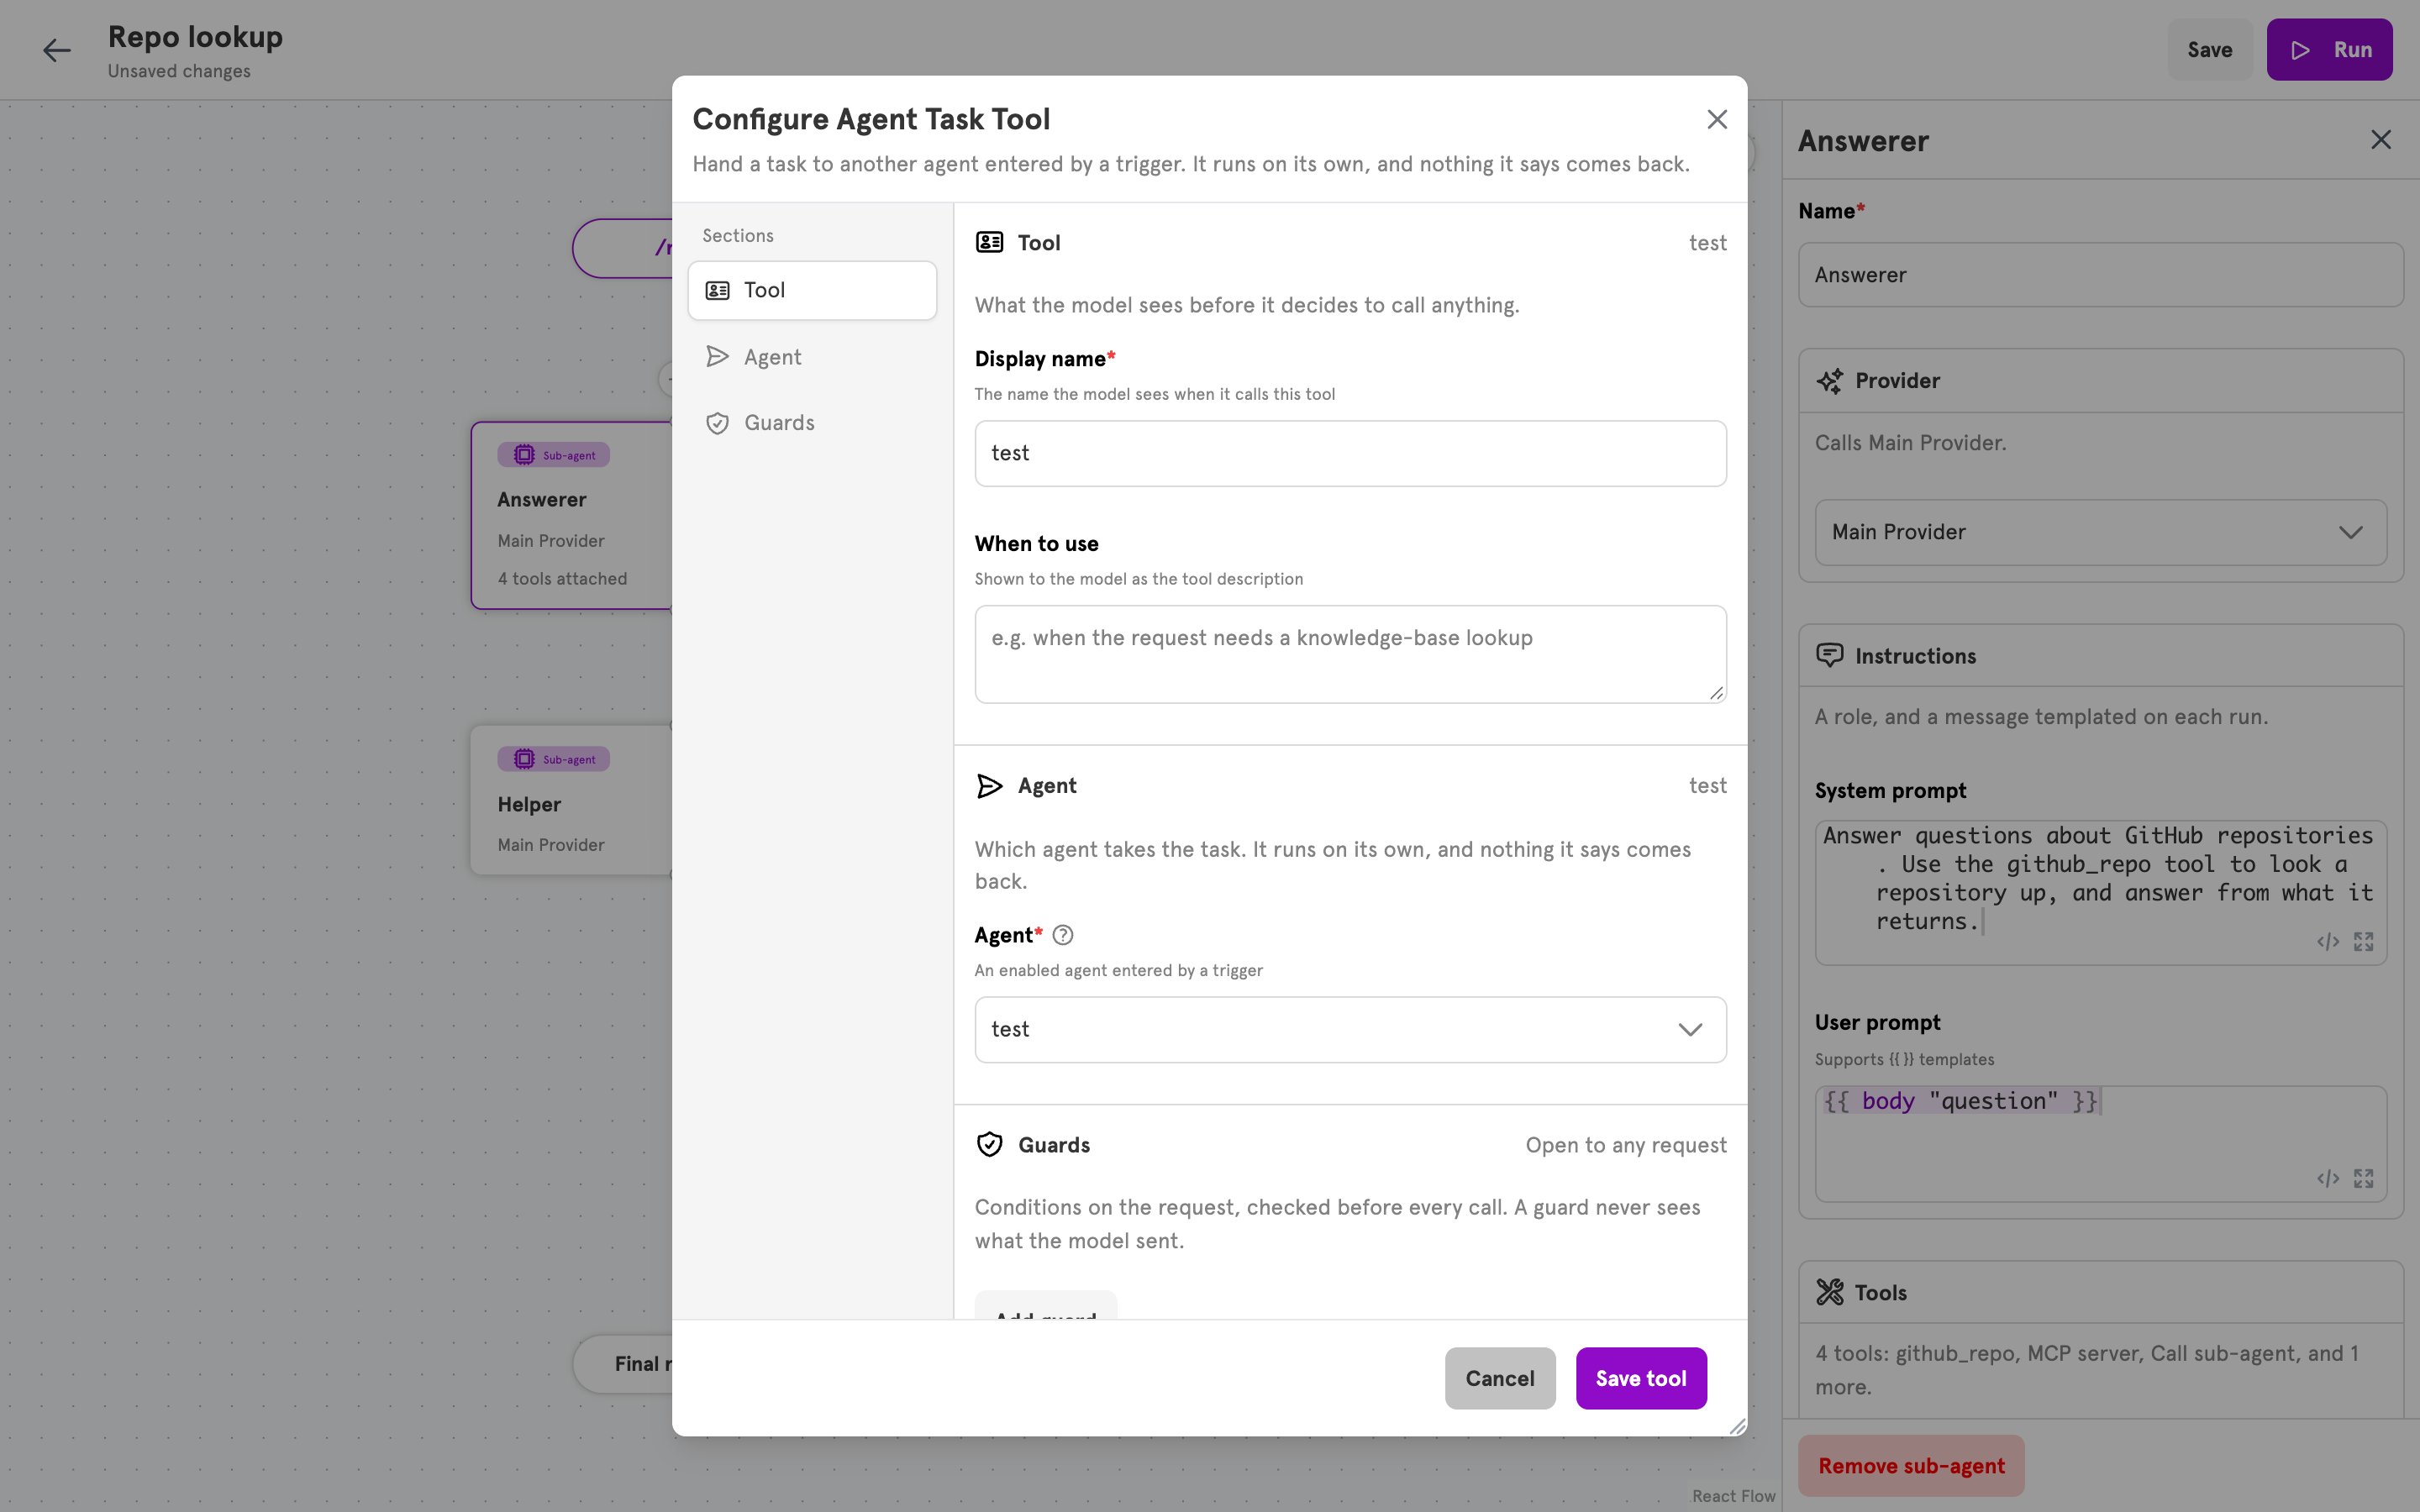
To hand a task to another stored agent, choose Agent Task Tool…. Under Agent, choose an enabled agent that is entered by a trigger. When the model calls the tool it writes one instruction, which the other agent reads as{{ input "instruction" }}. The tool returns as soon as the task has started, and nothing the other agent says comes back.
Built-in file tools
Every sub-agent already hasread_file, write_file, and list_files, with nothing to attach. They work in the folder chosen under Workspace in the panel’s Memory section. See Built-in tools.
If the tool is not called
- The model did not choose it. Make When to use specific, and name the tool in the sub-agent’s System prompt.
- A guard refused it. The log reads “tool call denied by guard”. Check the request against the guard’s condition.
- The model sent a value the field does not accept. A select field that the model fills must receive one of its listed values.
- An MCP server lists no tools. The server is asked with the access token you entered, so it lists nothing until the token is right. Correct the token and click Refresh.
Related
Tools reference
Every tool type, its fields, the rules a config has to pass, and the built-in file tools.
Dynamic content
Template functions such as
tool_param, body, and header.Available actions
The actions a tool can run.
Creating your first agent
Build the agent this guide adds a tool to.