

Before you begin
- A running instance with an LLM provider. See Install ServFlow.
- An agent to connect. See Creating your first agent.
- A Discord account with permission to add bots to the server you want the agent in.
Create the bot in Discord
These steps happen in the Discord Developer Portal, not in ServFlow.- Create an application, then open its Bot page and copy the bot’s token. You paste it into ServFlow in the next section.
- On the same page, under Privileged Gateway Intents, turn on the Message Content intent. Discord refuses the connection when a bot asks for an intent it has not been granted, so the agent does not start without it.
- Open OAuth2 > URL Generator. Select the
botscope, then the View Channels, Send Messages, Send Messages in Threads, and Read Message History permissions. - Open the generated URL and add the bot to your server.
Add the Discord integration
1
Open Integrations
In the sidebar under Configure, open Integrations and click New Integration.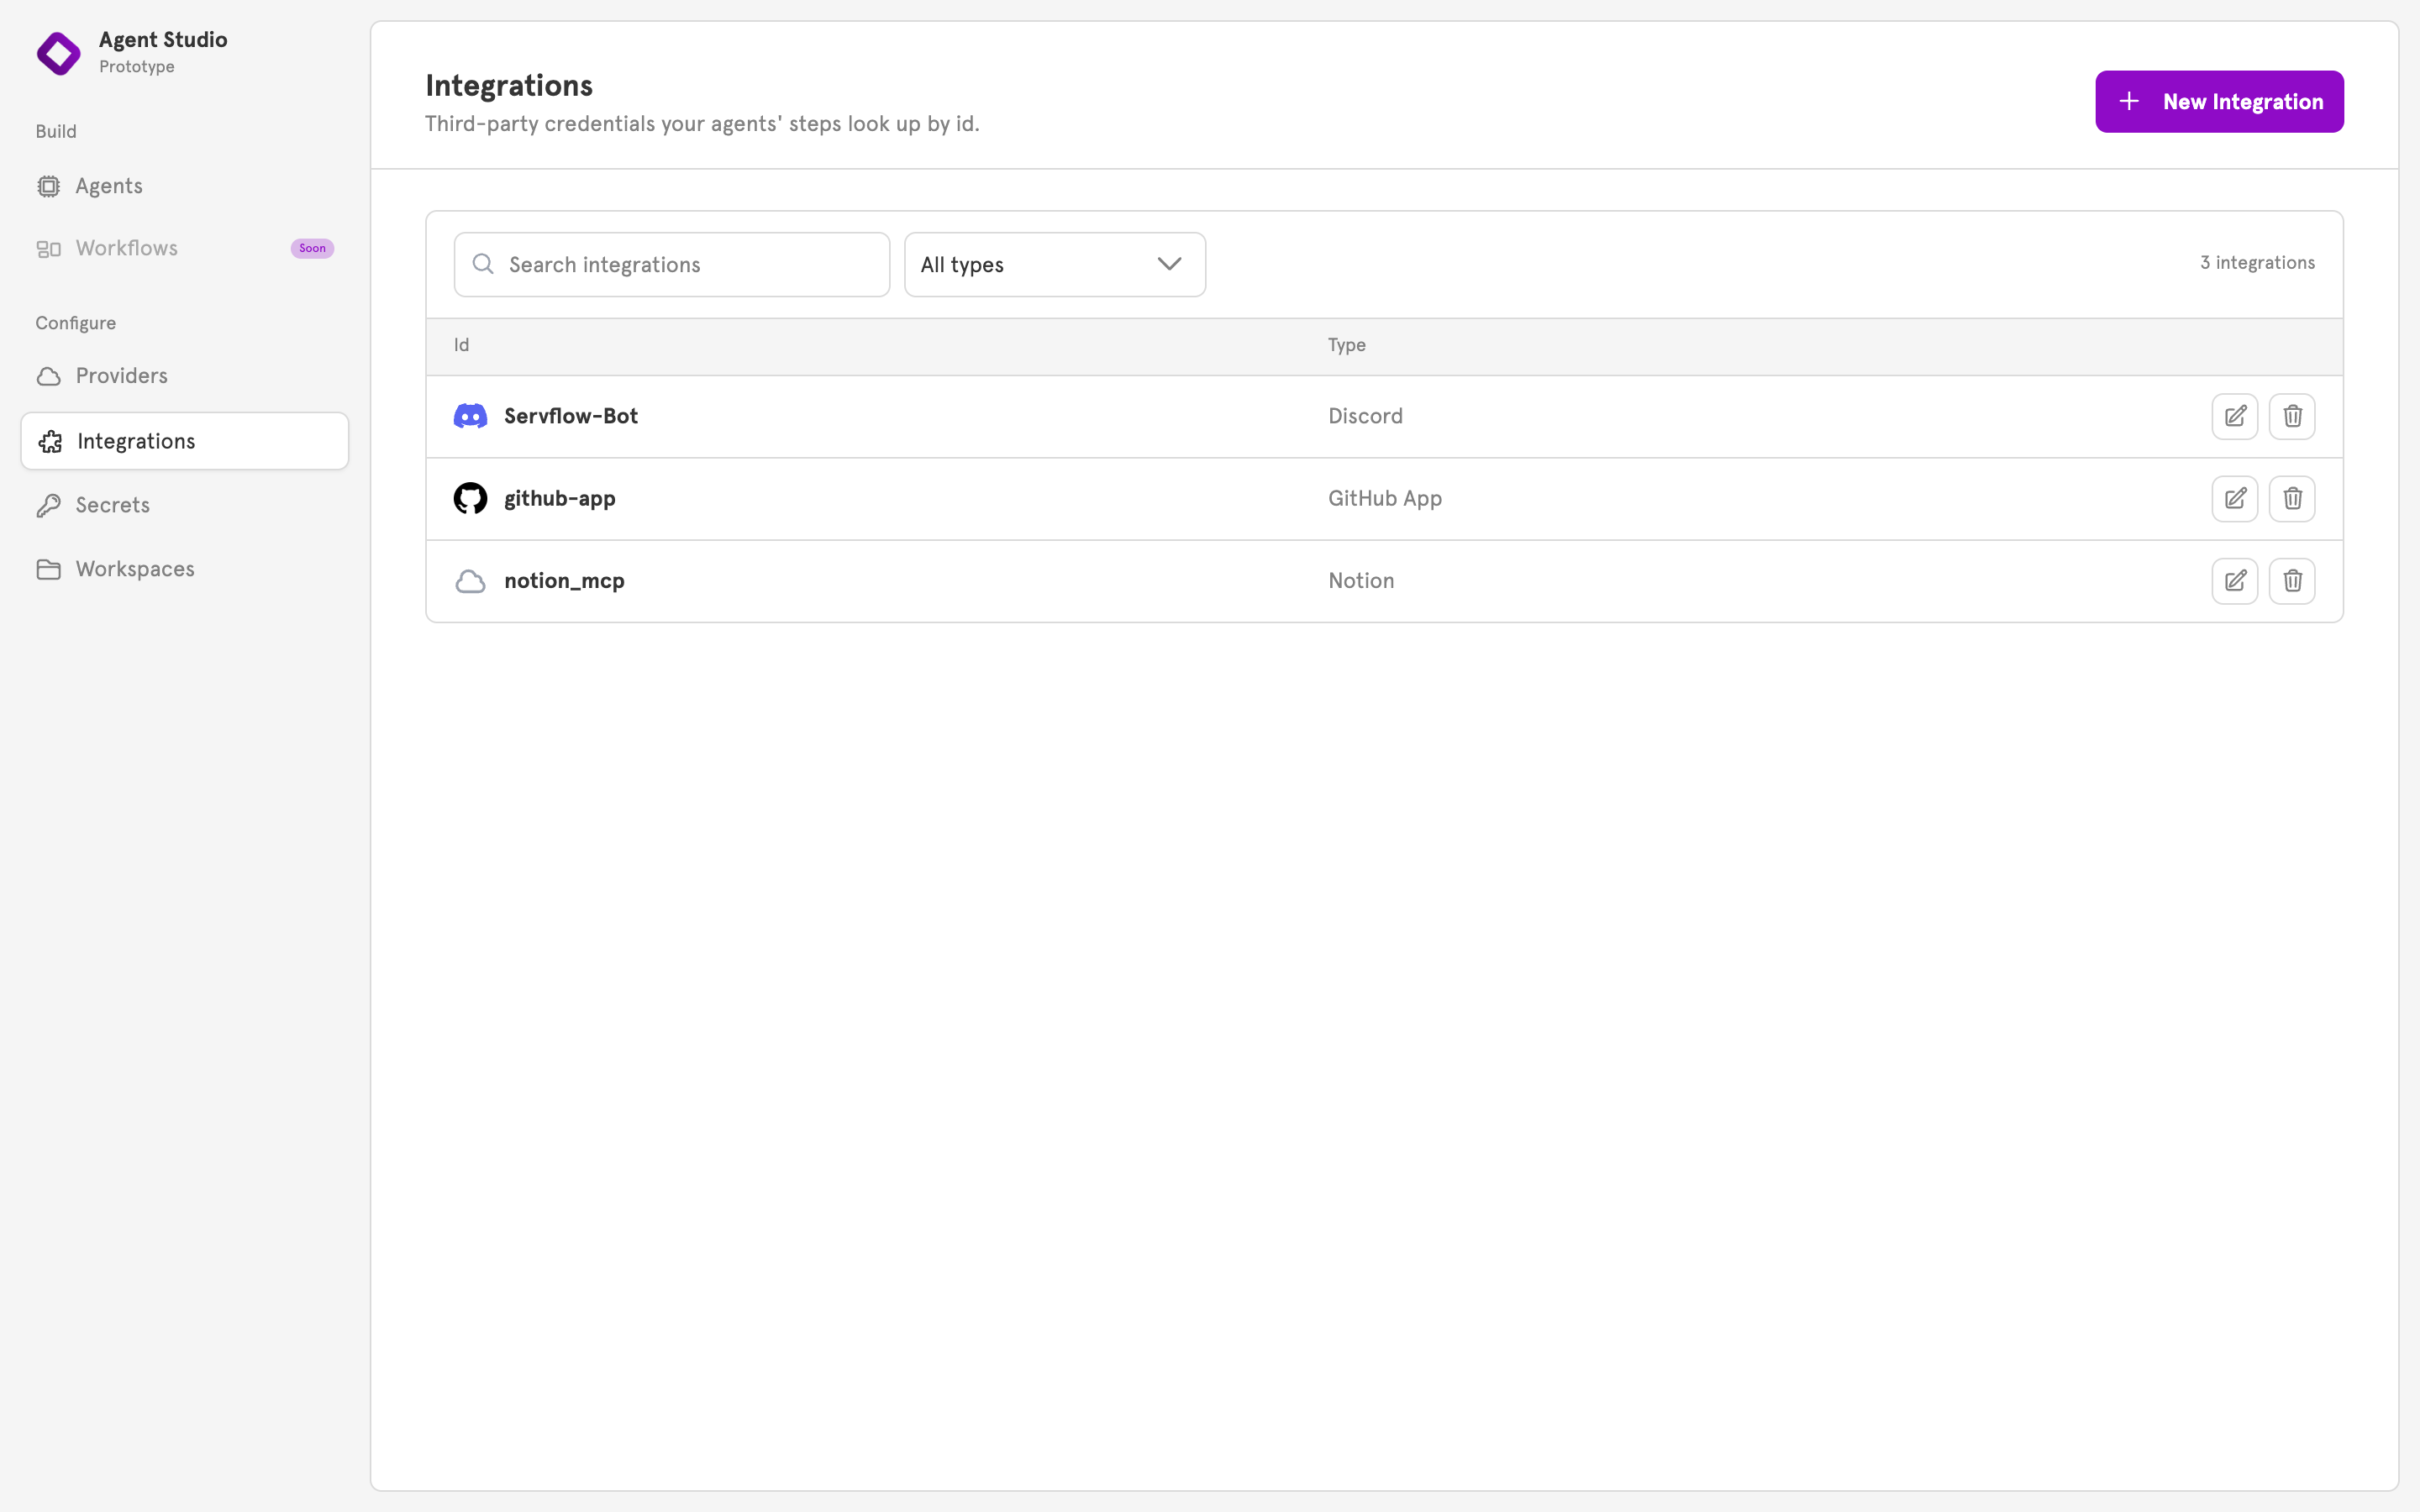
2
Choose Discord
Choose Discord, which is marked Guided setup. The Connect Discord dialog opens.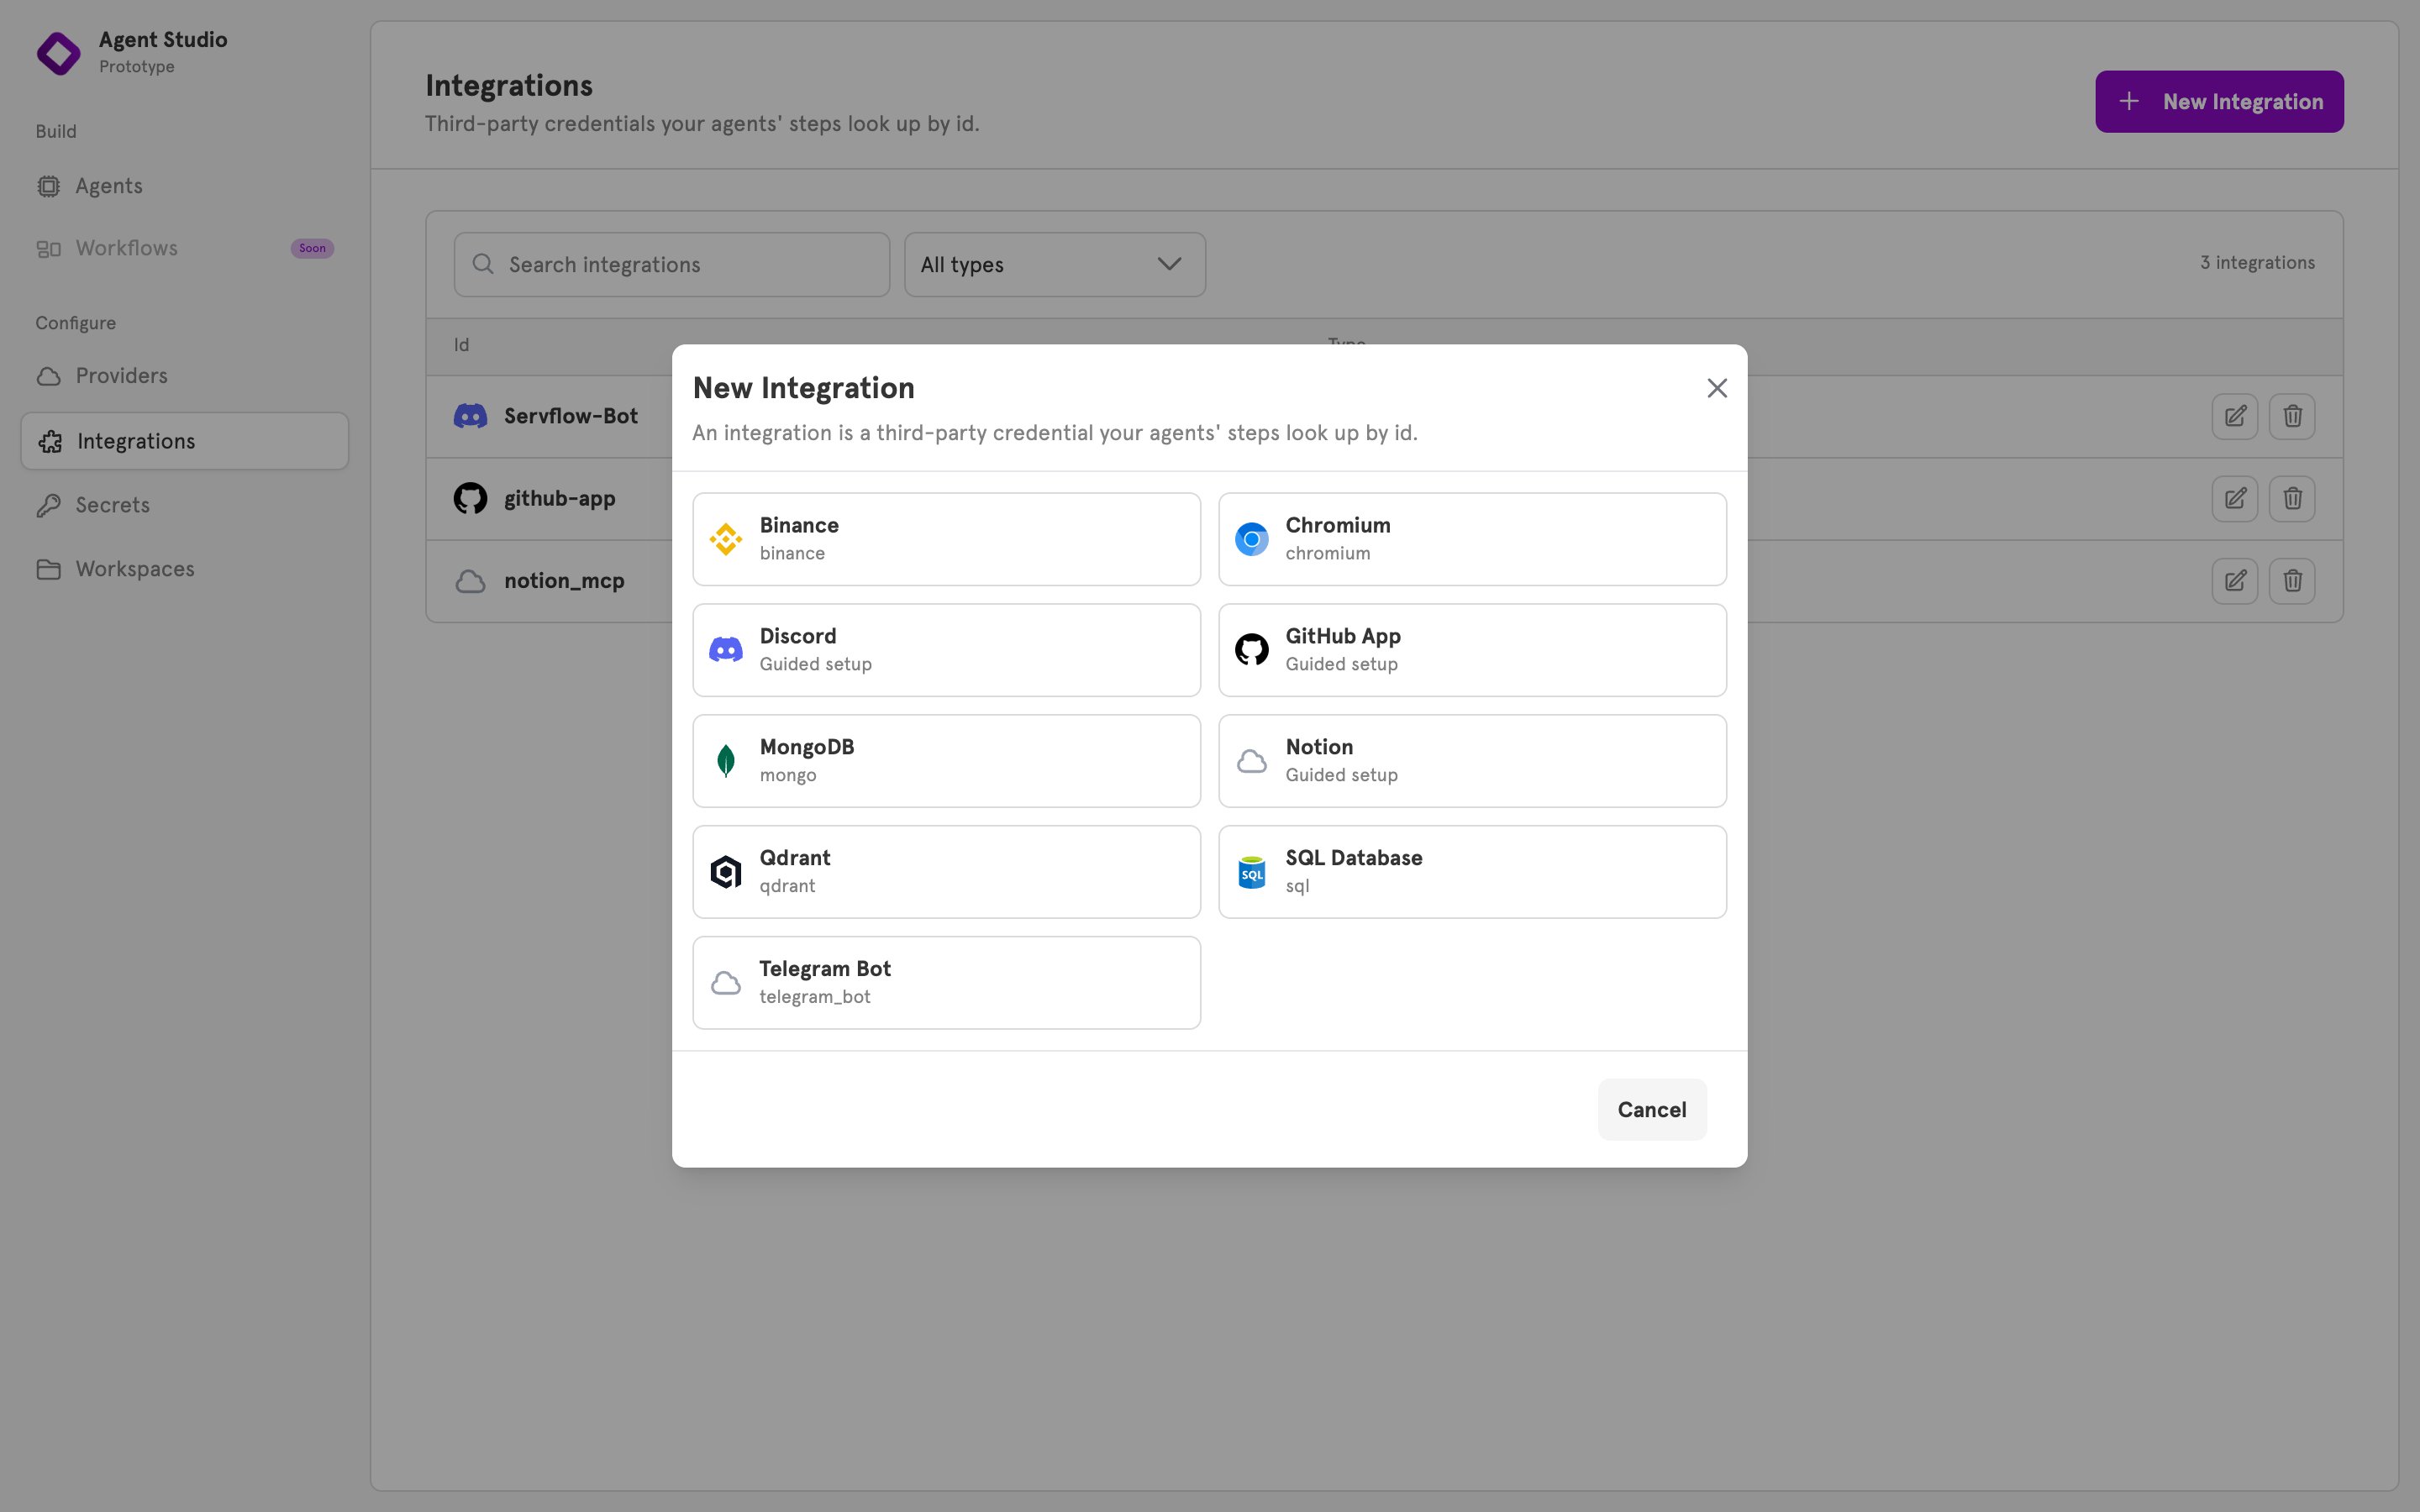
3
Enter an id and the bot token
Enter an Id, for example 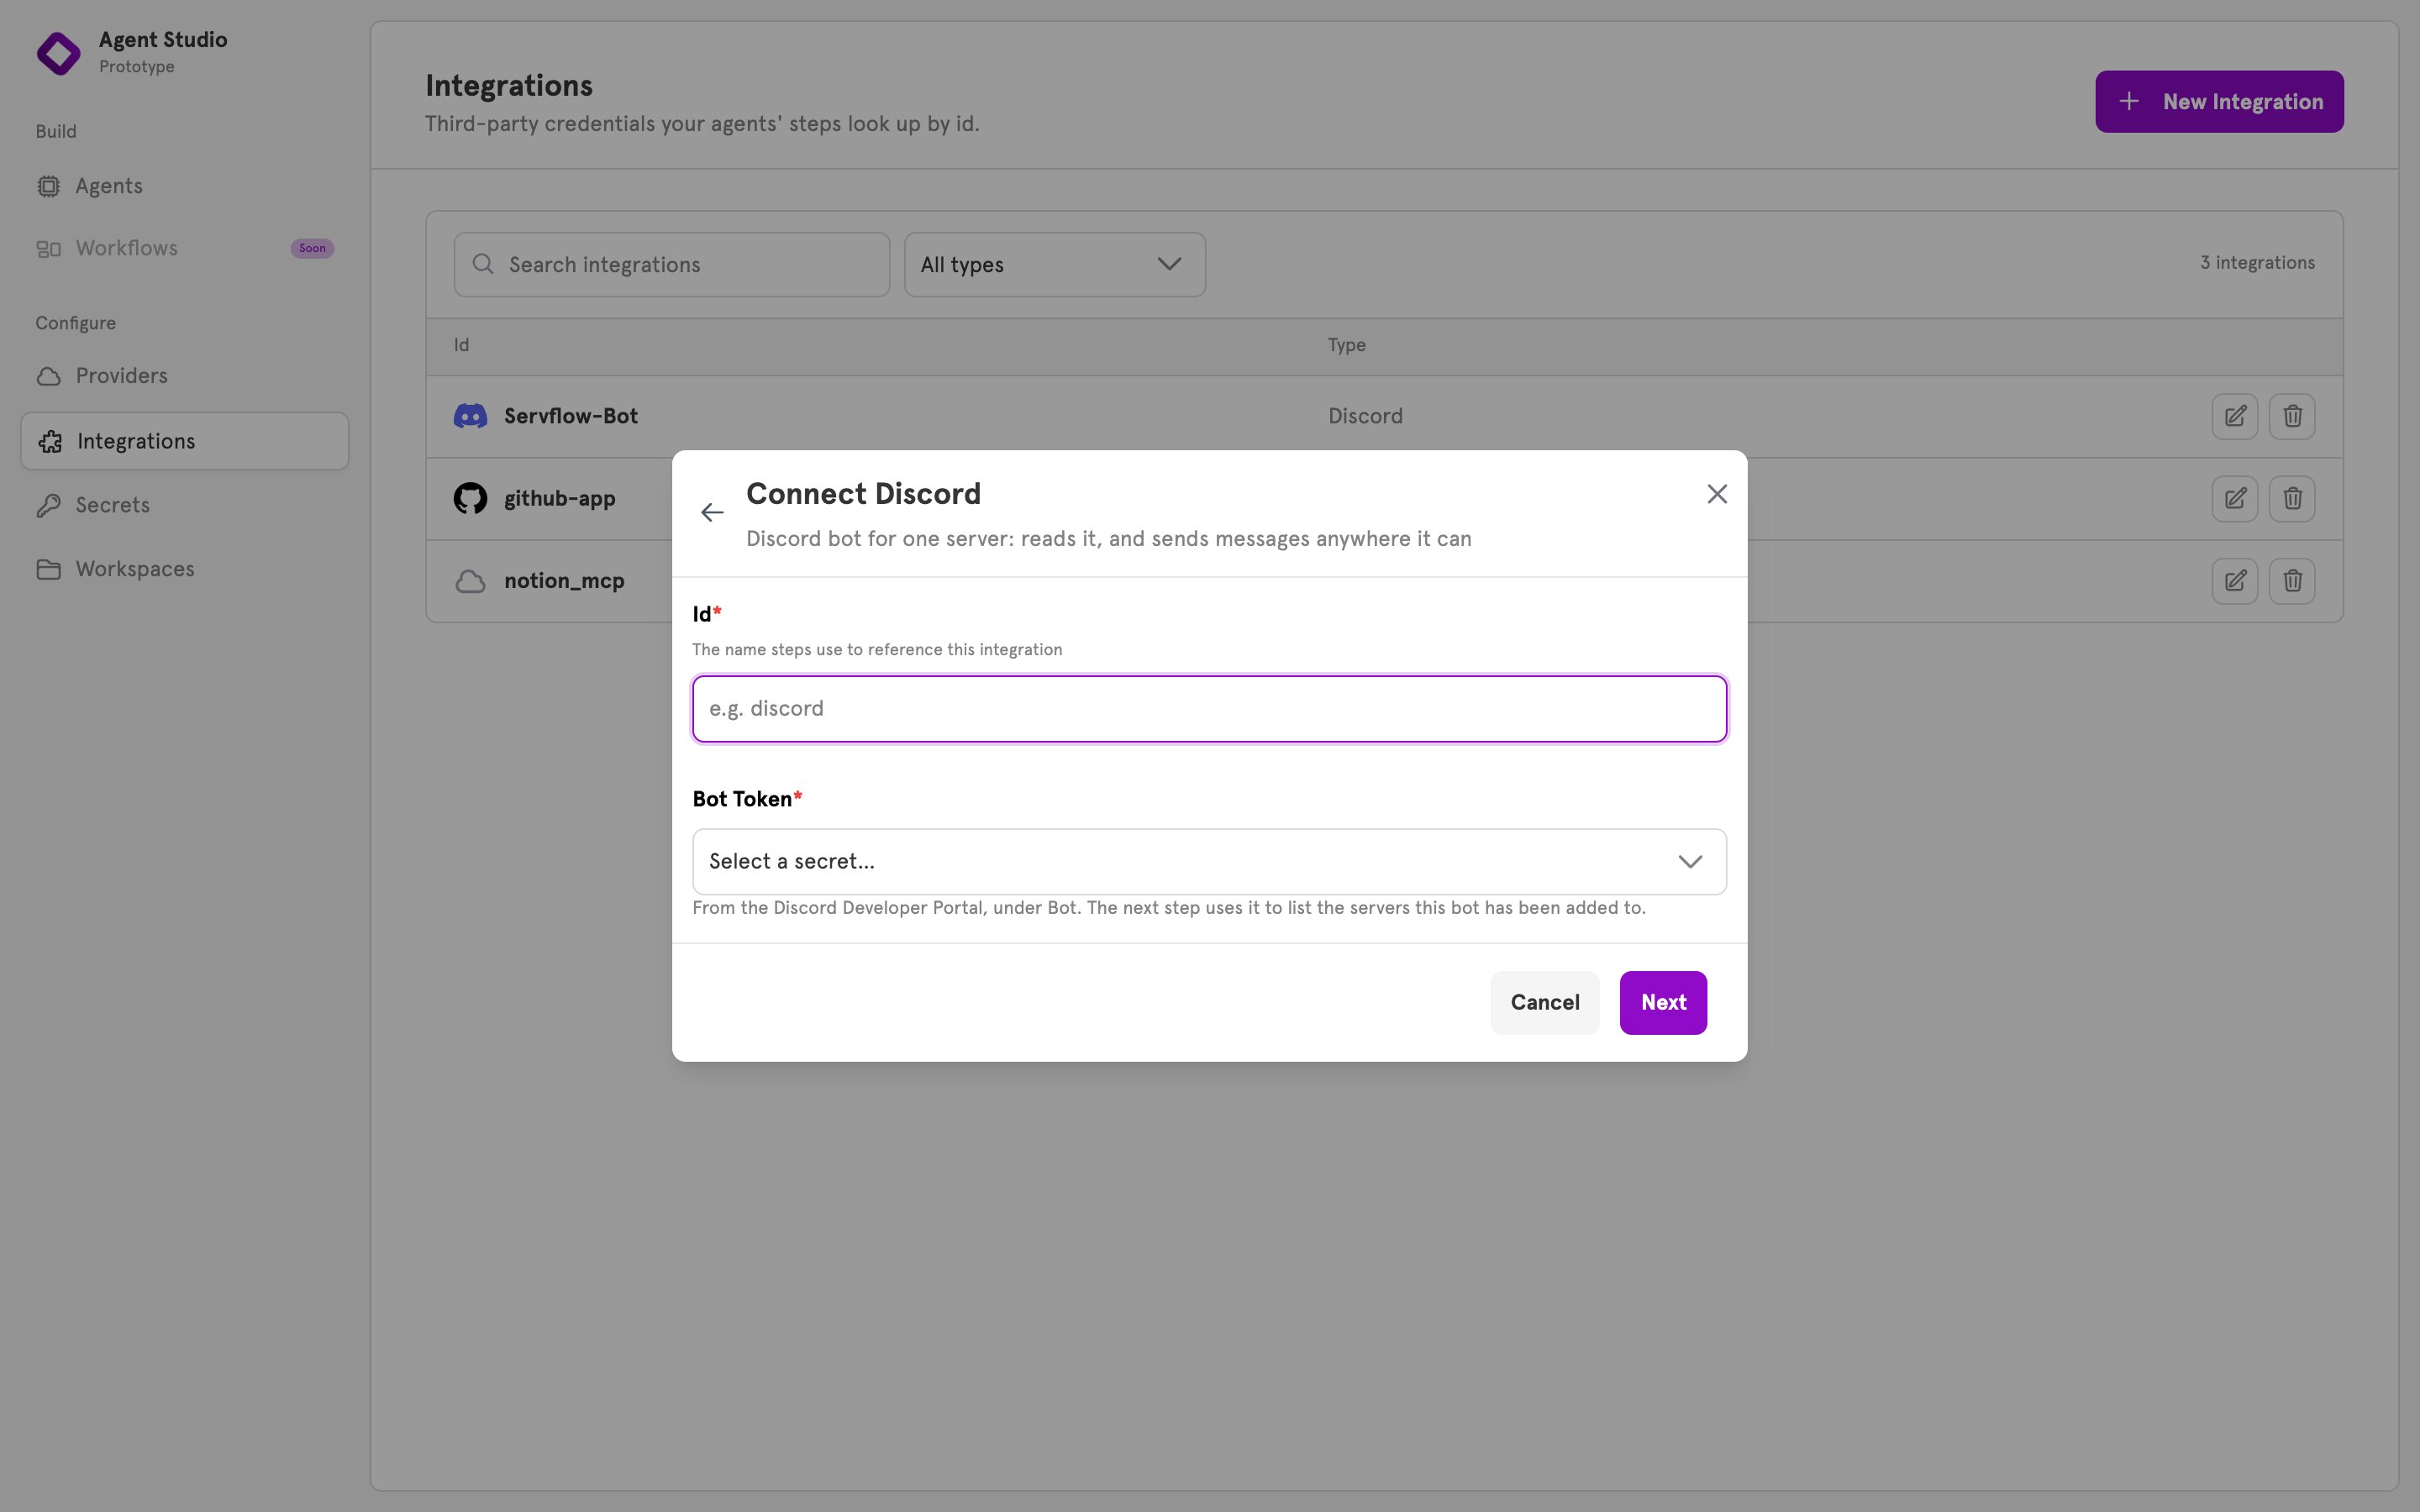
discord. Agents reference the integration by this id, and it cannot be changed later.Under Bot Token, choose a stored secret that holds the token, or choose + New secret… to store it now. To paste the token into the integration instead, choose Enter a value directly…. A secret keeps the token out of the integration’s config. See Secrets.Click Next.4
Choose the server
ServFlow asks Discord which servers the bot has been added to and lists them. Select your server. If it is not listed, enter its Server id directly.If the bot is in no server yet, the dialog says so. Go back to the invitation step in Discord, then enter the server id.
5
Add the integration
Click Add integration. The integration appears in the list on the Integrations page, with the type Discord.
Set the agent’s entry to Discord
1
Open the entry panel
Open the agent in the editor and click the entry node at the top of the canvas. The Entry panel opens.
2
Choose Discord bot
Under Entry type, choose Discord bot. The entry node relabels to Discord bot. A Discord entry has no path.
3
Choose the bot
Under Bot, choose the integration you added.Optional: under Super user, enter one person’s Discord user id or 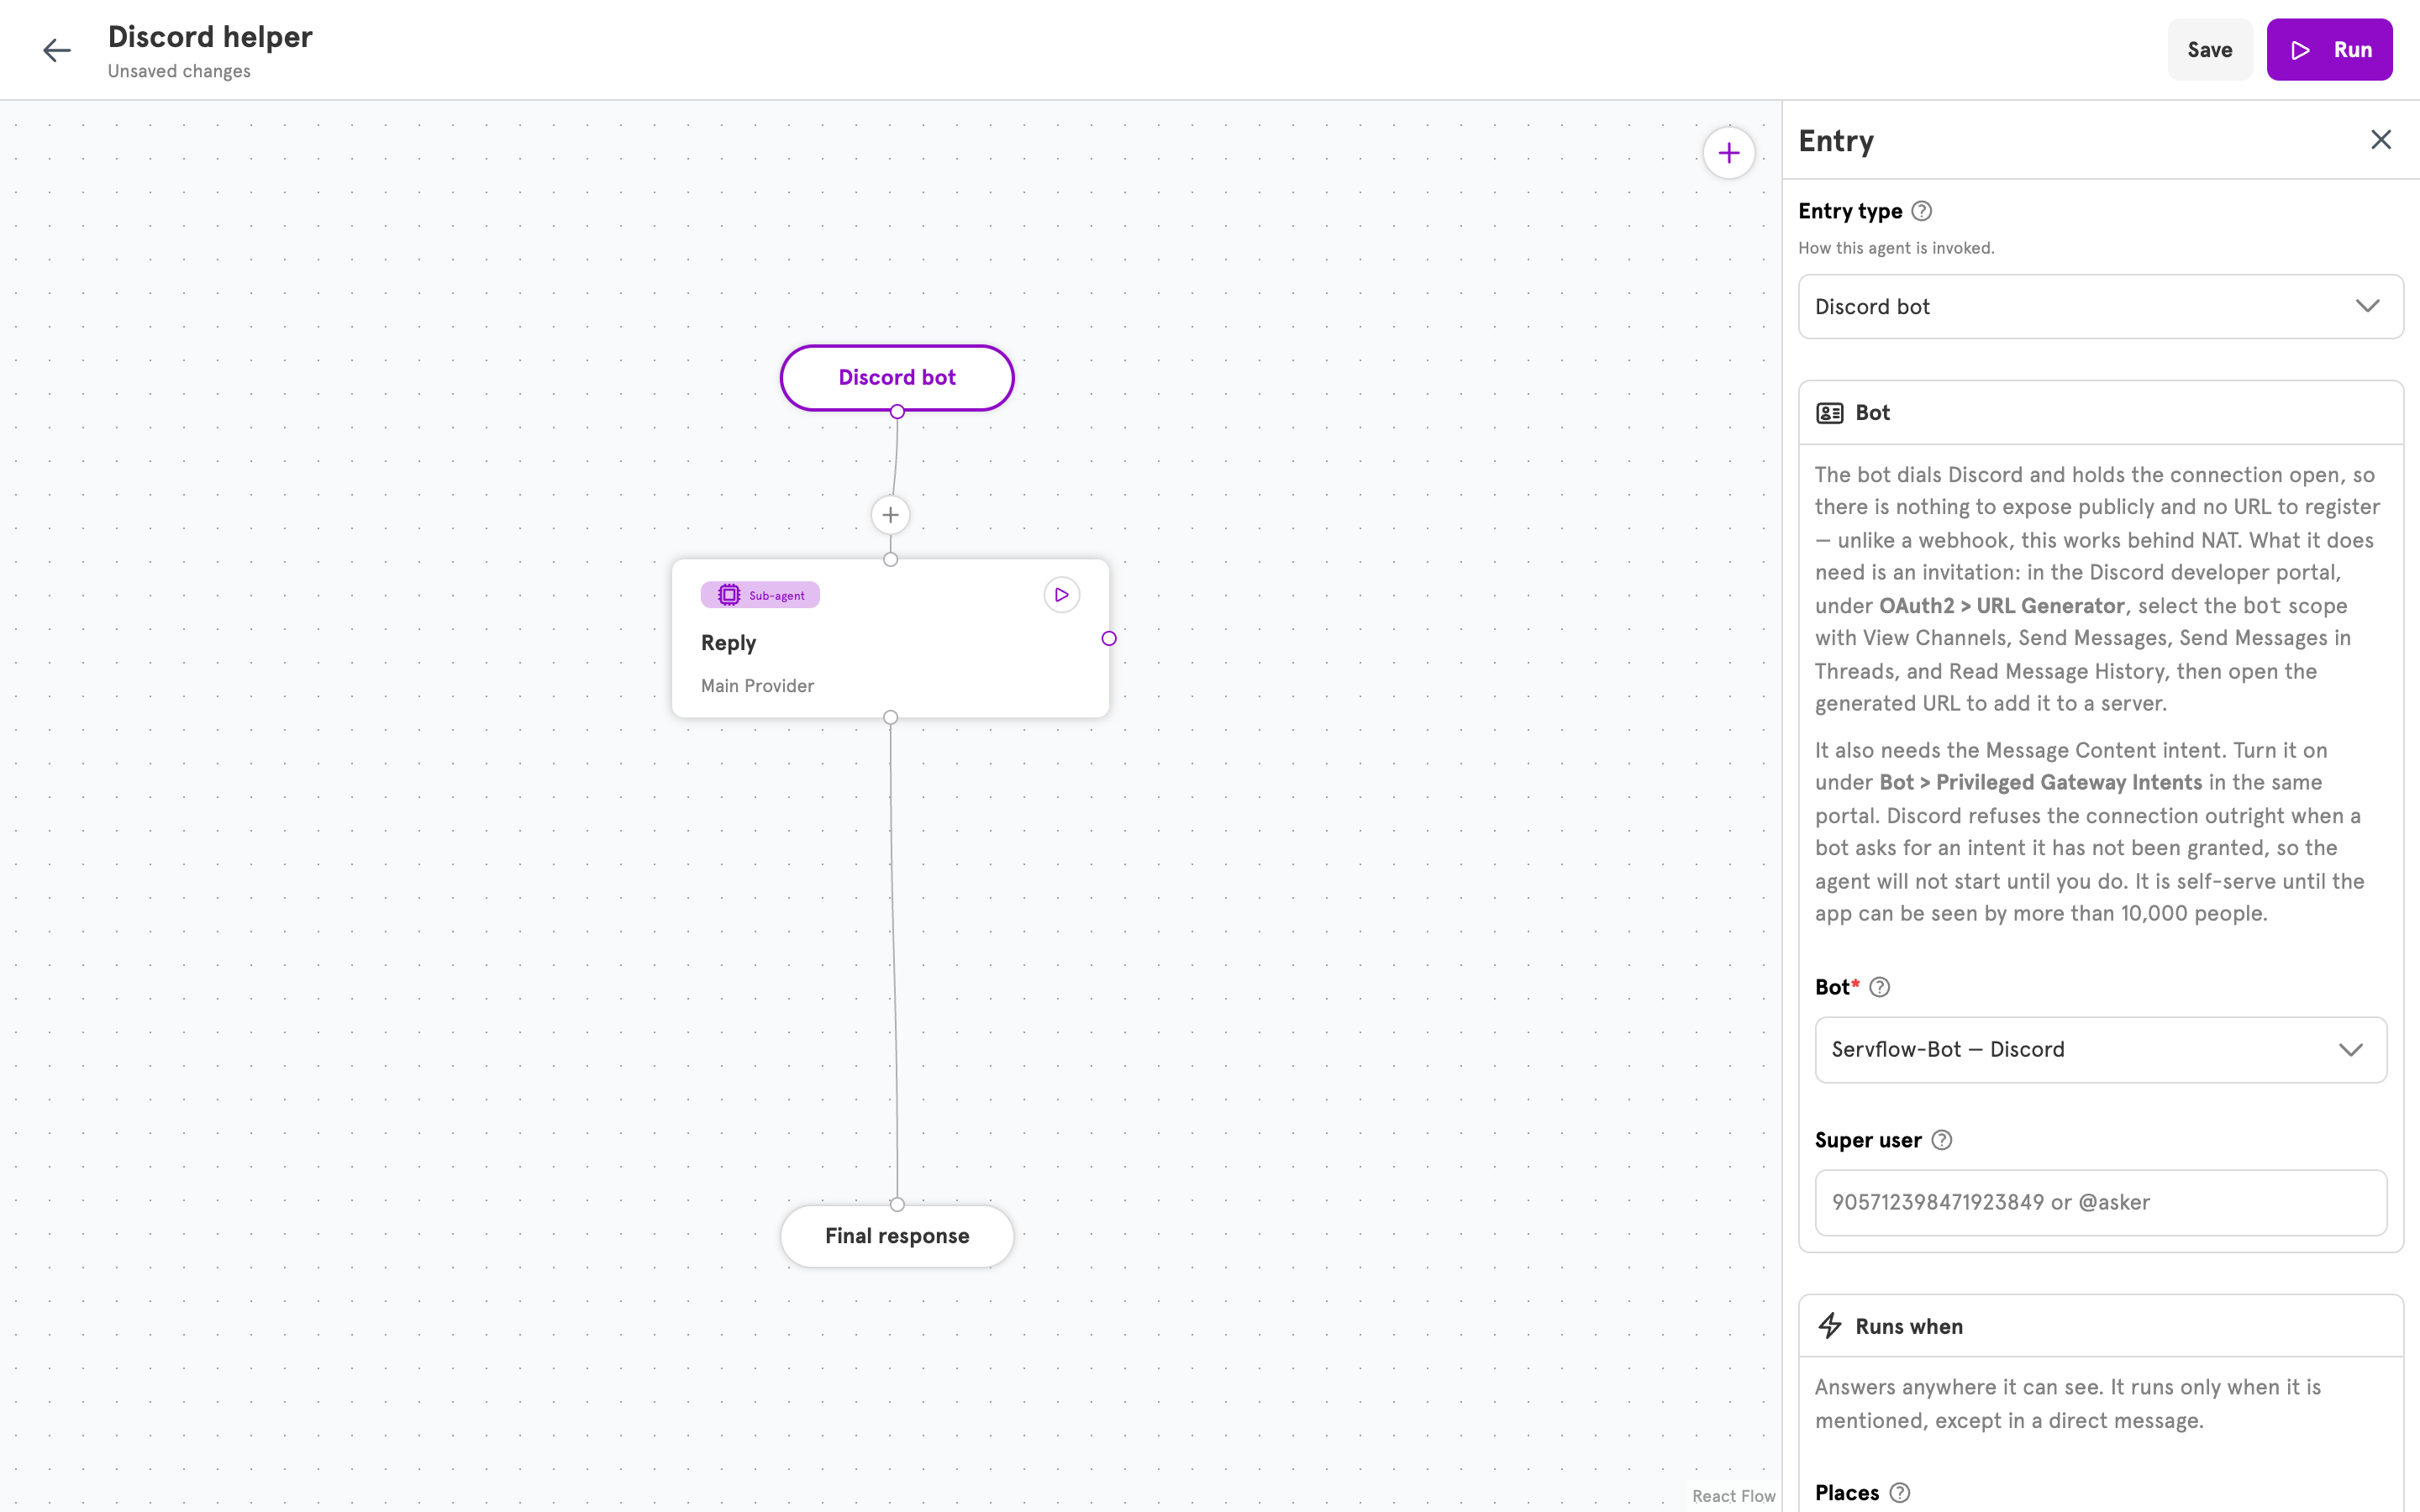
@username. Every run then tells the prompt whether that person sent the message, so the agent can take instructions from them alone. A user id is safer, because a username can change.4
Decide when the agent runs and how it replies
Under Runs when, choose the Places the agent answers in. The default is everywhere the bot can see. Keep Require mention set to Only when the bot is mentioned, so the agent answers people addressing it rather than every message in the channel. A direct message never needs a mention.Under Replies, keep Show “typing…” so people see the agent working until the reply arrives.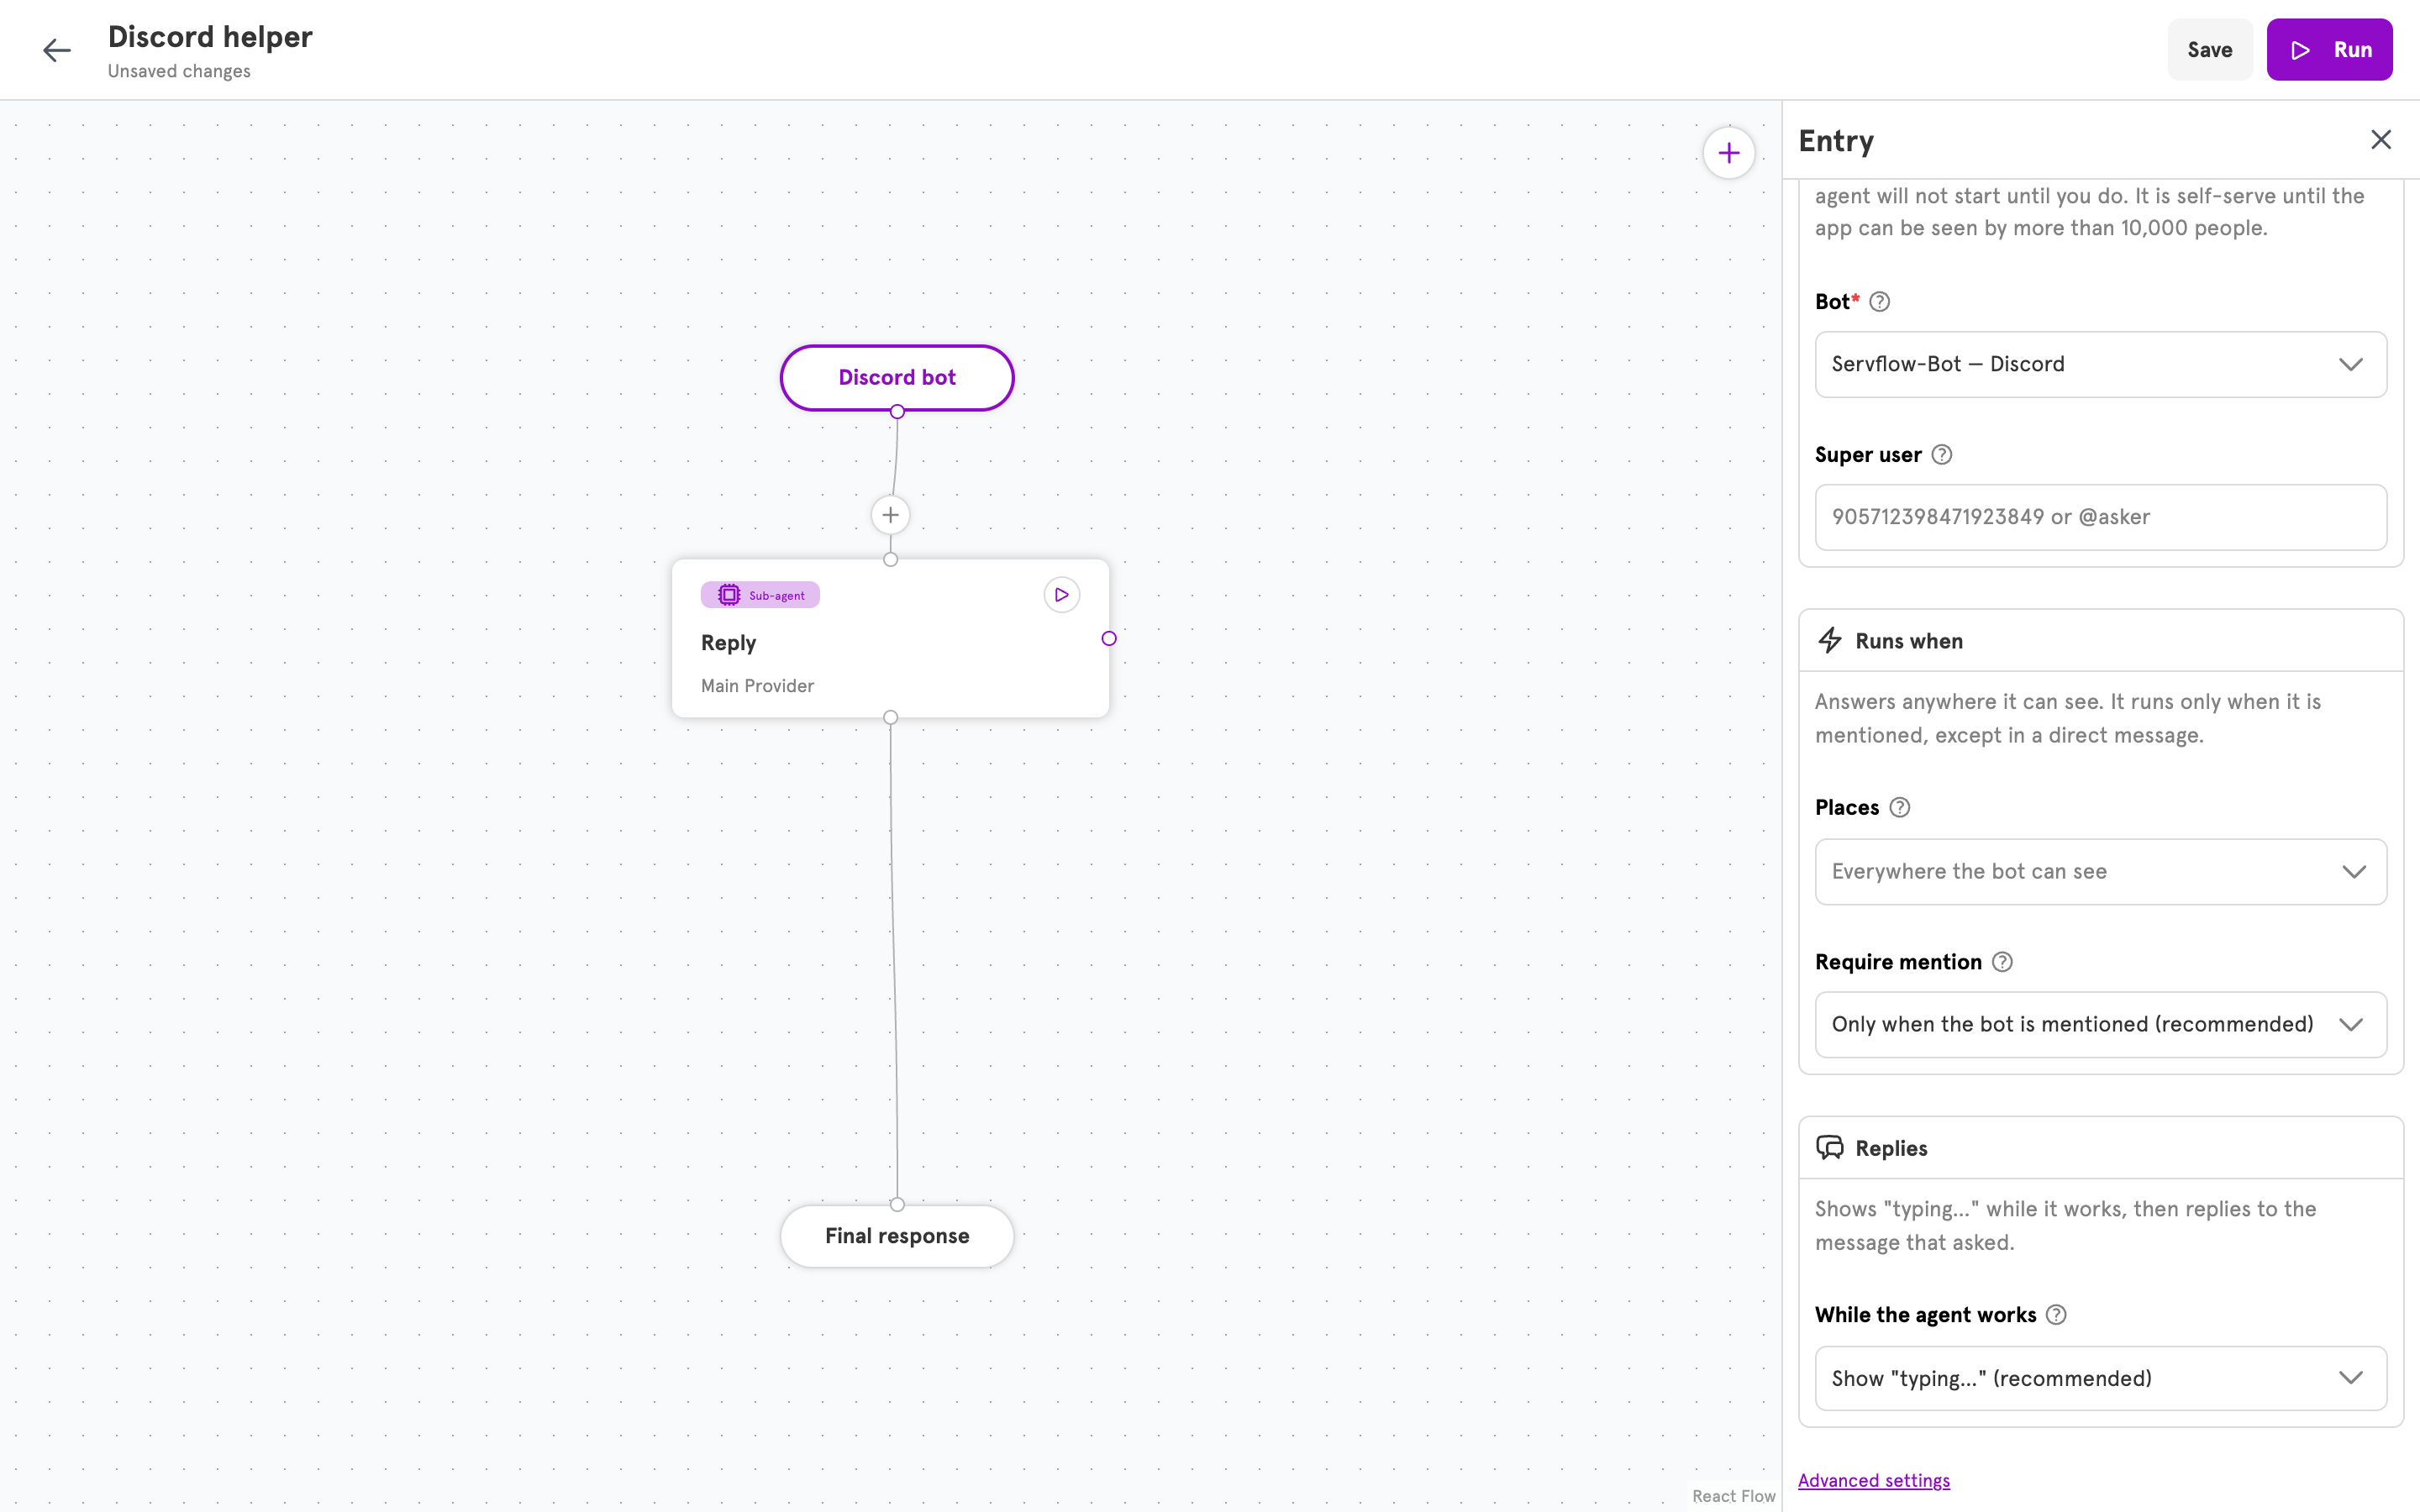
! commands, and decides whether it answers other bots. For every field, see Entry handlers.Read the message in the prompt
Click the agent’s first sub-agent and set its User prompt to the message text: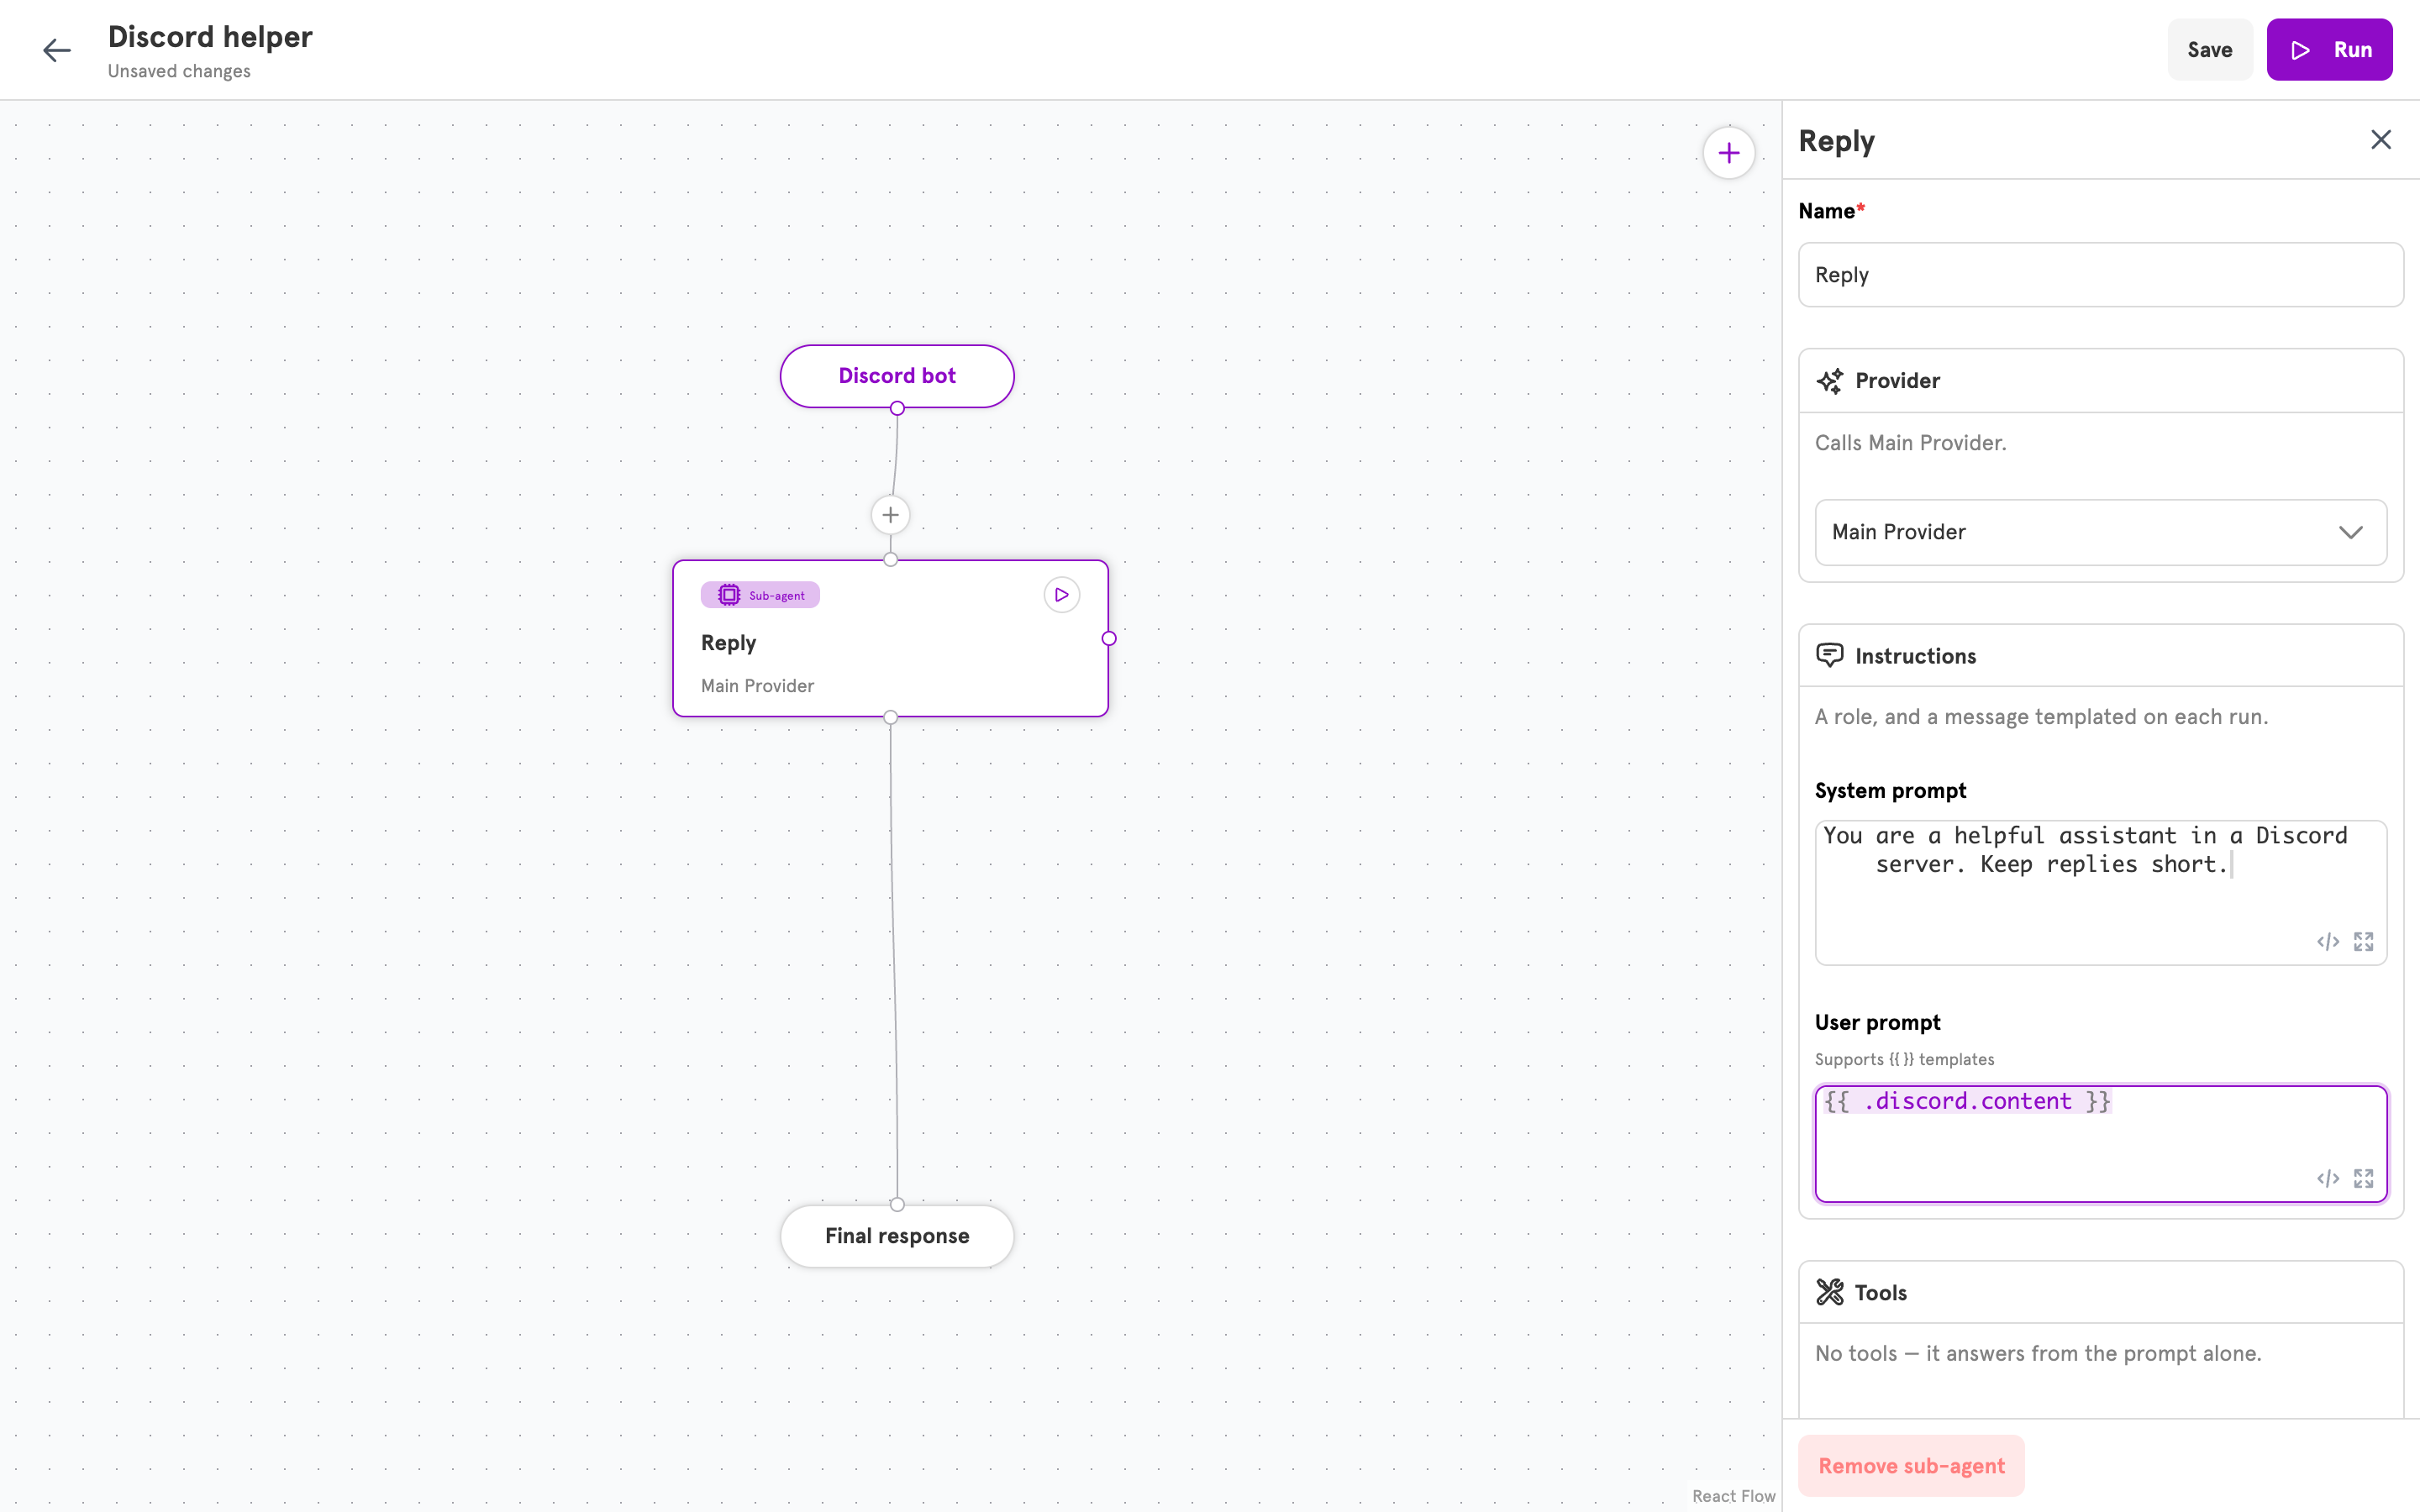
Verify
1
Test in the editor
Click Run. For a Discord entry, the dialog asks for what a message would provide instead of a request body: the Message, the Place, the channel and server ids, and the sender. Enter a message and click Run. Nothing is sent to Discord, and the run panel shows the agent’s reply.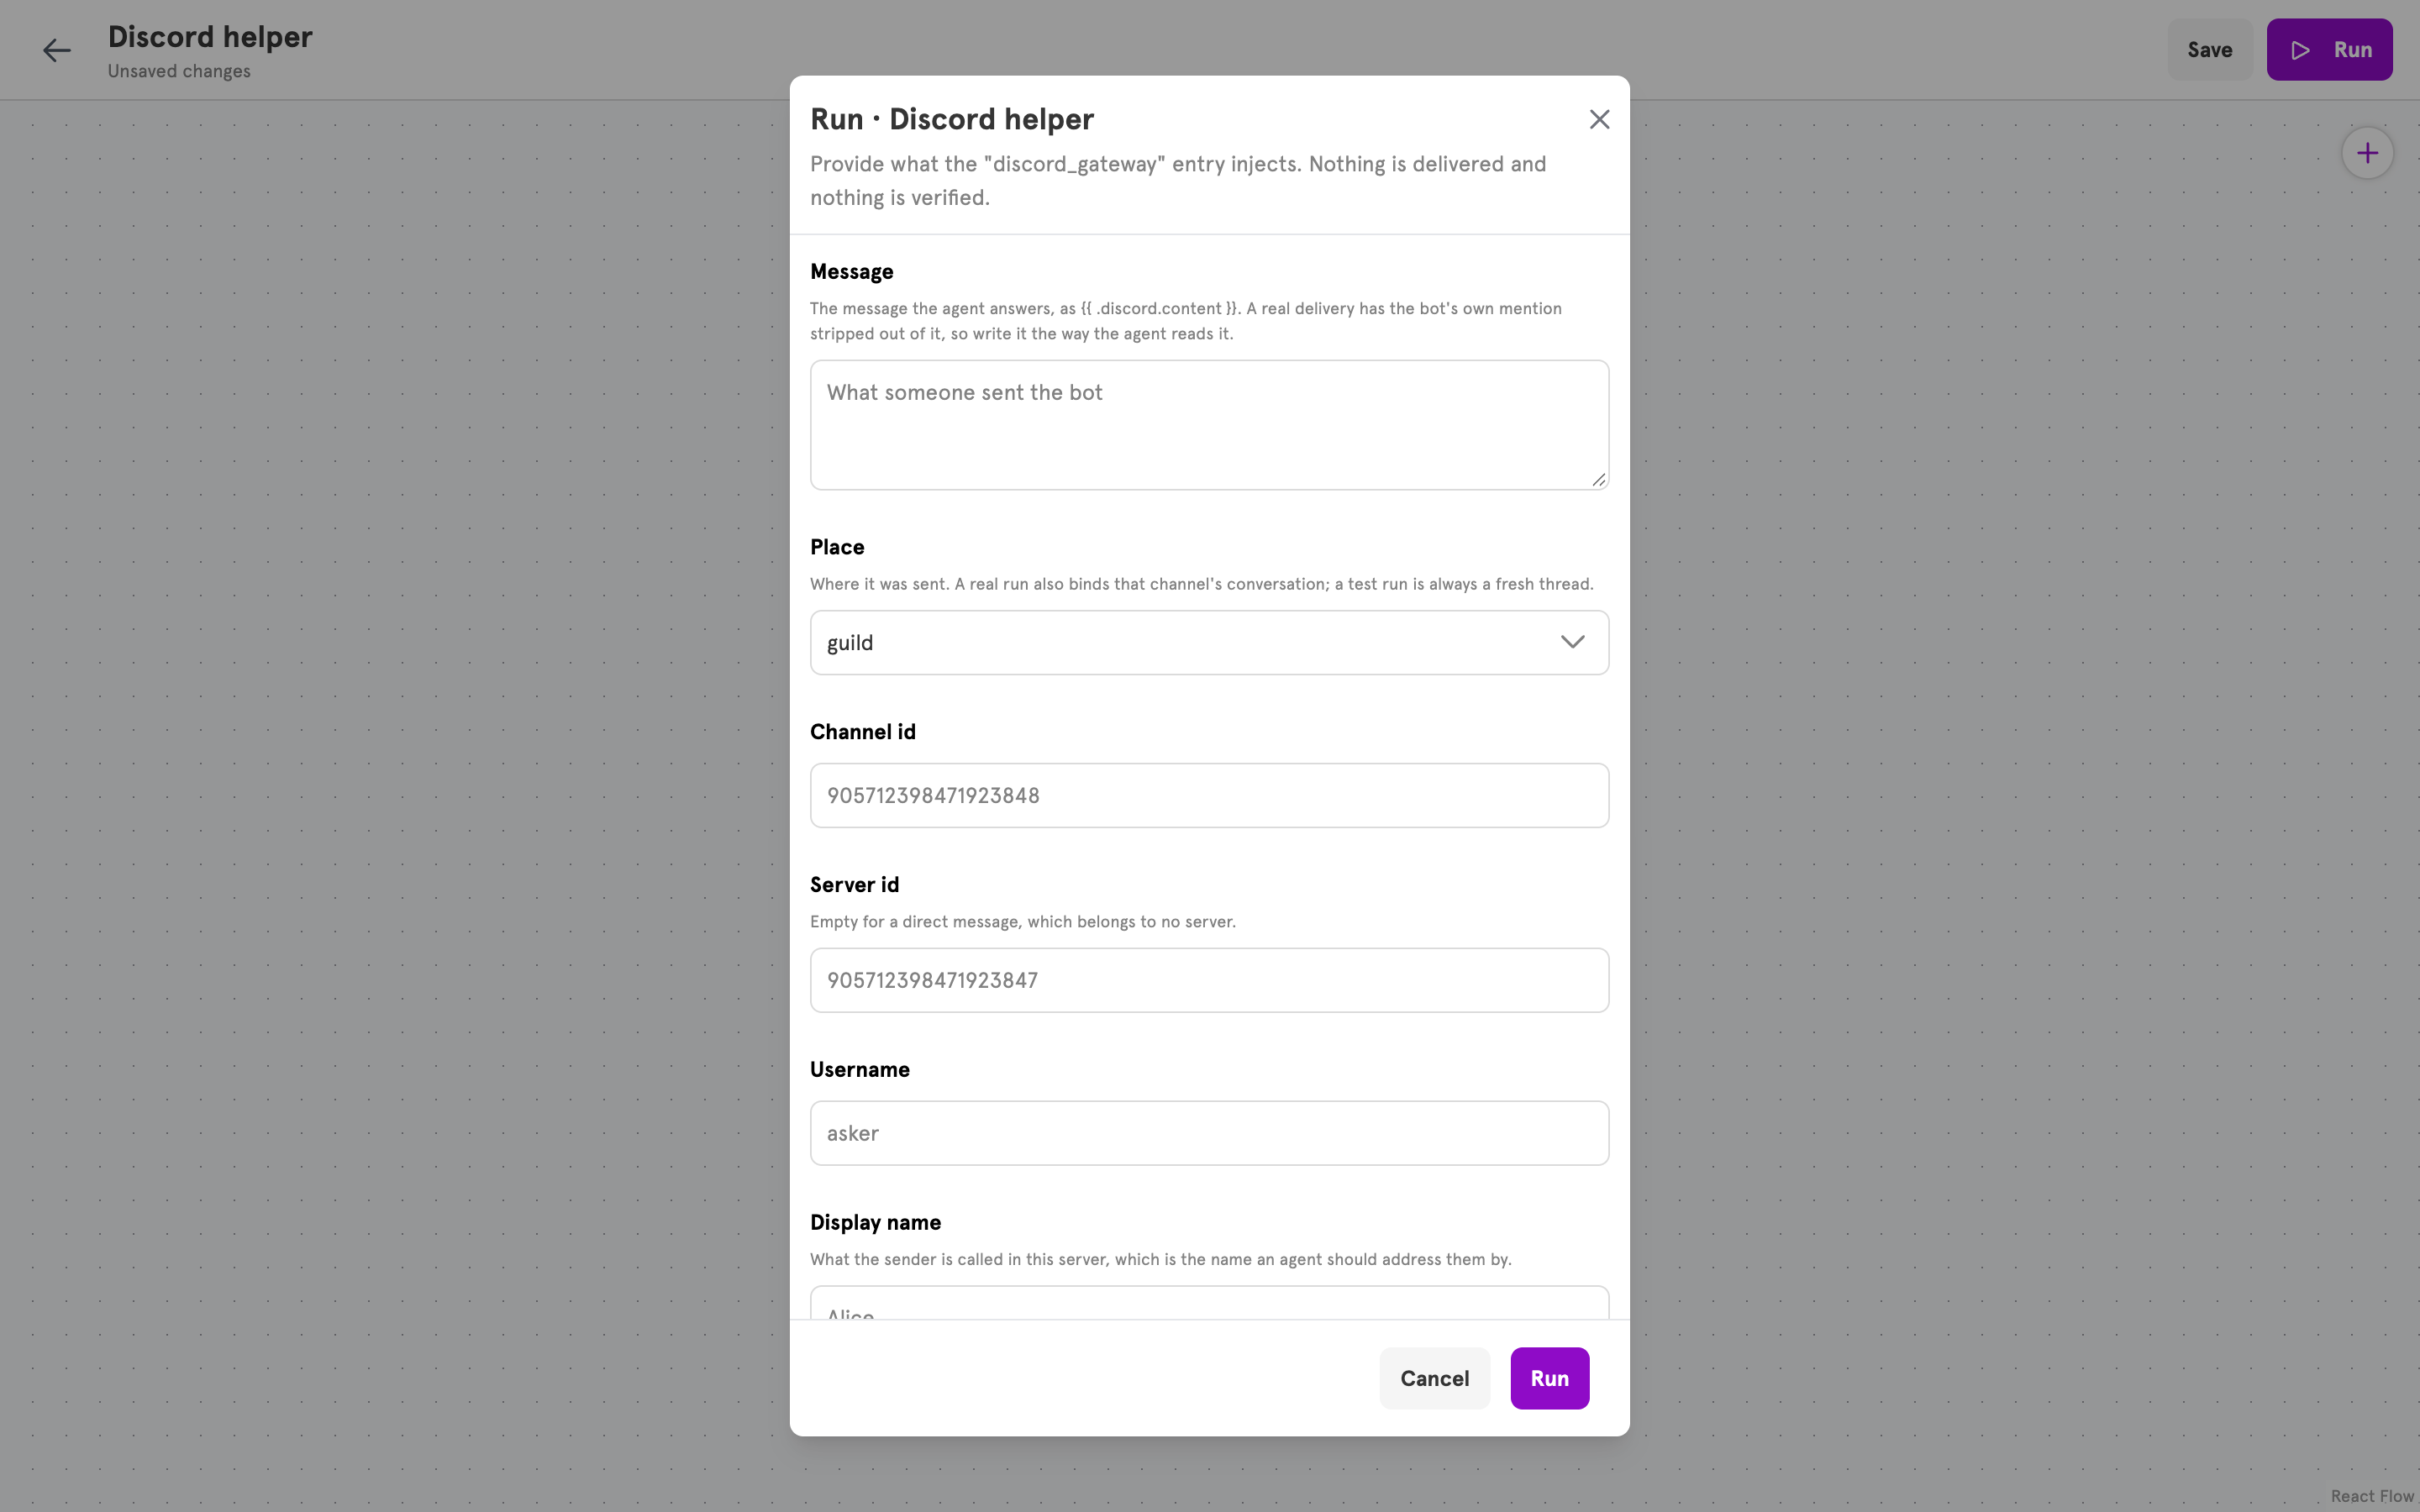
2
Save
Click Save. The running server picks up the change without a restart. The agent must be enabled to connect. If it is not, run
servflowai resource agent enable <config_id>.3
Mention the bot in Discord
In a channel the bot can see, mention the bot with a question. The bot shows typing, then replies to your message.
If the bot does not answer
- The Message Content intent is off. Discord refuses the connection, so the agent never starts. Turn it on in the Developer Portal.
- The bot is not in the server. Open the invitation URL from the Developer Portal again.
- The message did not mention the bot. With Require mention on, messages that do not mention the bot are ignored.
- The channel is not allowed. Check Places and Advanced settings.
- Another agent uses the same bot. Agents on one bot share a single connection to Discord. Each sees every message the bot can see and decides for itself whether to answer, so narrow each agent to its own channels or commands.
- The agent is disabled. Run
servflowai resource agent enable <config_id>.
Related
Entry handlers
Every field and variable of the Discord entry.
Integrations
The Discord integration’s fields and what uses it.
Discord actions
Send messages and read channel history from an agent’s steps.
Creating your first agent
Build the agent this guide connects.