

Before you begin
- A ServFlow instance with the dashboard open. Any instance works, including one on your own computer, because ServFlow connects out to Discord and Discord does not need to reach it. See Install ServFlow.
- A Discord account, and a server you own. Create a new server for this tutorial.
- A provider. See Manage LLM providers.
- About 25 minutes. Every message the bot answers is billed by your model company.
Step 1: Create the bot in Discord
This step happens in the Discord Developer Portal, not in ServFlow.- Create an application and give it a name. This is the name your bot has in Discord.
- Open the application’s Bot page. Under Privileged Gateway Intents, turn on Message Content. Without it, the bot connects and is disconnected at once.
- On the same page, copy the bot’s token. Keep it private. Anyone who has it can act as your bot.
- Open OAuth2 > URL Generator. Select the
botscope, then the View Channels, Send Messages, Send Messages in Threads, and Read Message History permissions. - Open the generated URL and add the bot to your server.
Step 2: Store the token
- In the ServFlow sidebar under Configure, open Secrets and click New Secret.
- Name it
discord-bot-token, paste the token as its value, and save.
Step 3: Connect Discord
- In the sidebar, open Integrations, click New Integration, and choose Discord.
- Under Id, enter
community-bot. Under Bot Token, choosediscord-bot-token. Click Next. - Choose your server and add the integration.
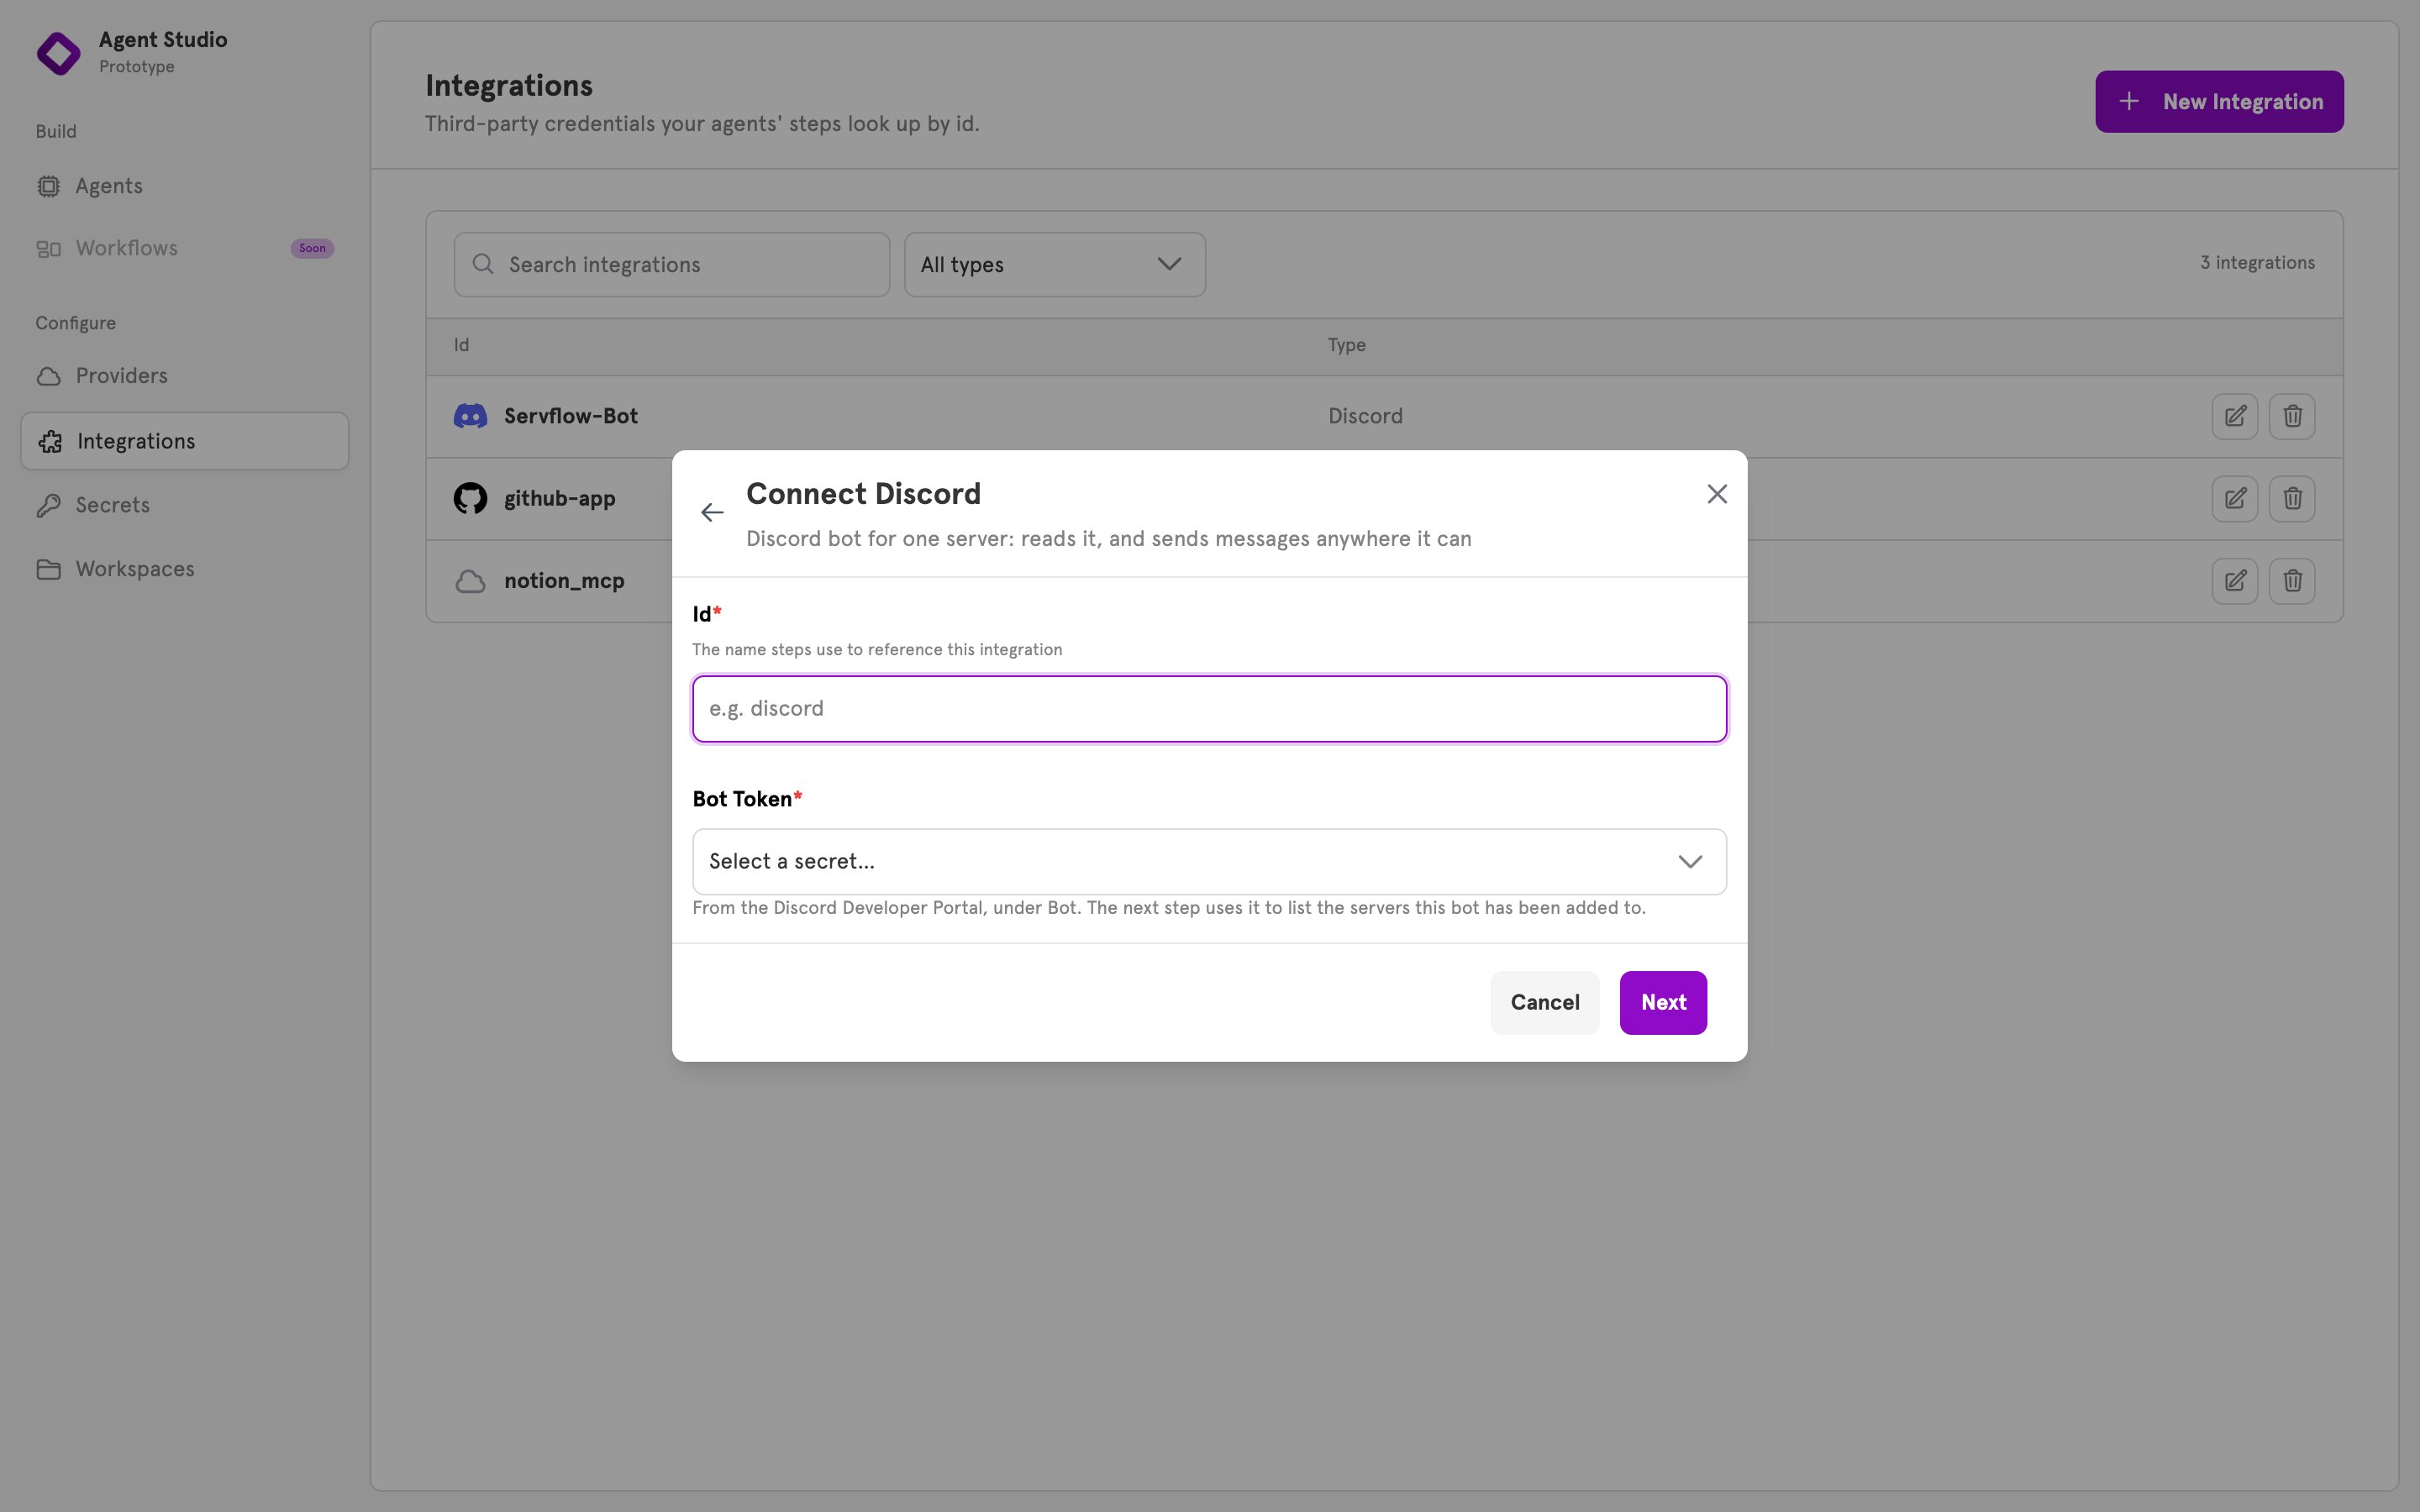
community-bot appears in the Integrations list. For each screen of this dialog, see Connect an agent to Discord.
Step 4: Create a workspace
- In the sidebar, open Workspaces and click New Workspace.
- Name it
Community notesand click Create Workspace.
Step 5: Install the template
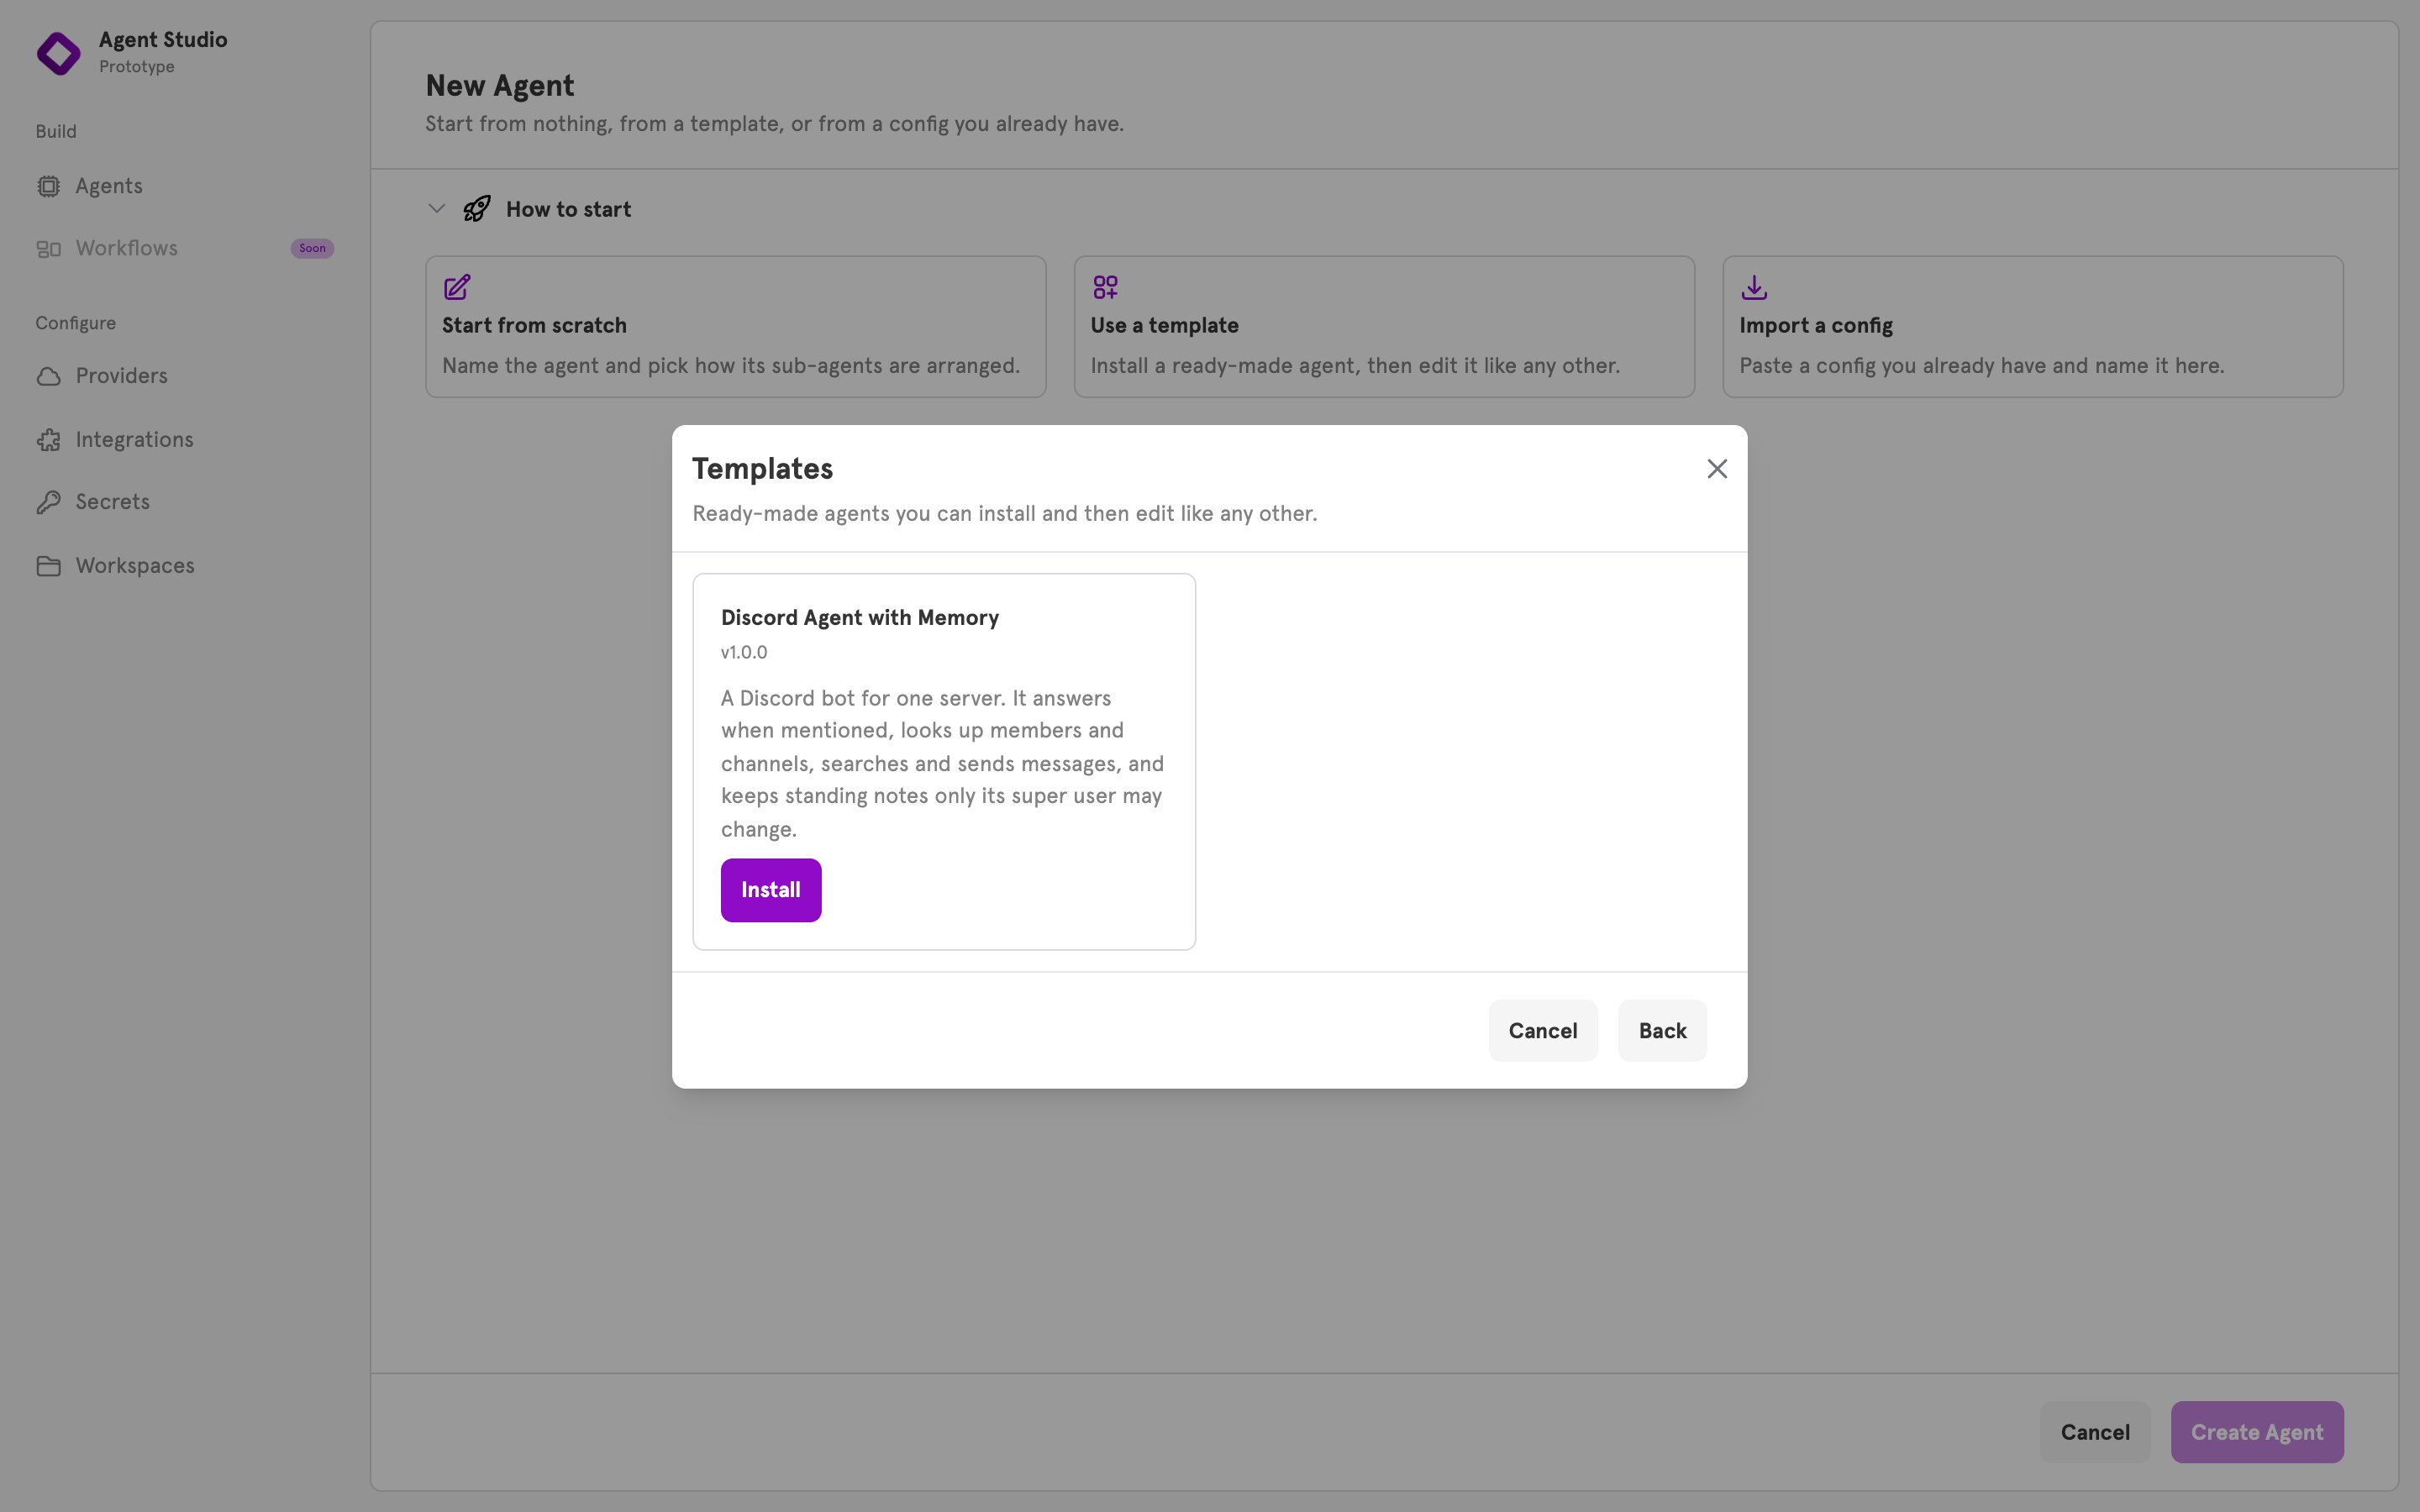
- In the sidebar under Build, open Agents and click New Agent.
- Under How to start, choose Use a template. On the Discord Agent with Memory card, click Install.
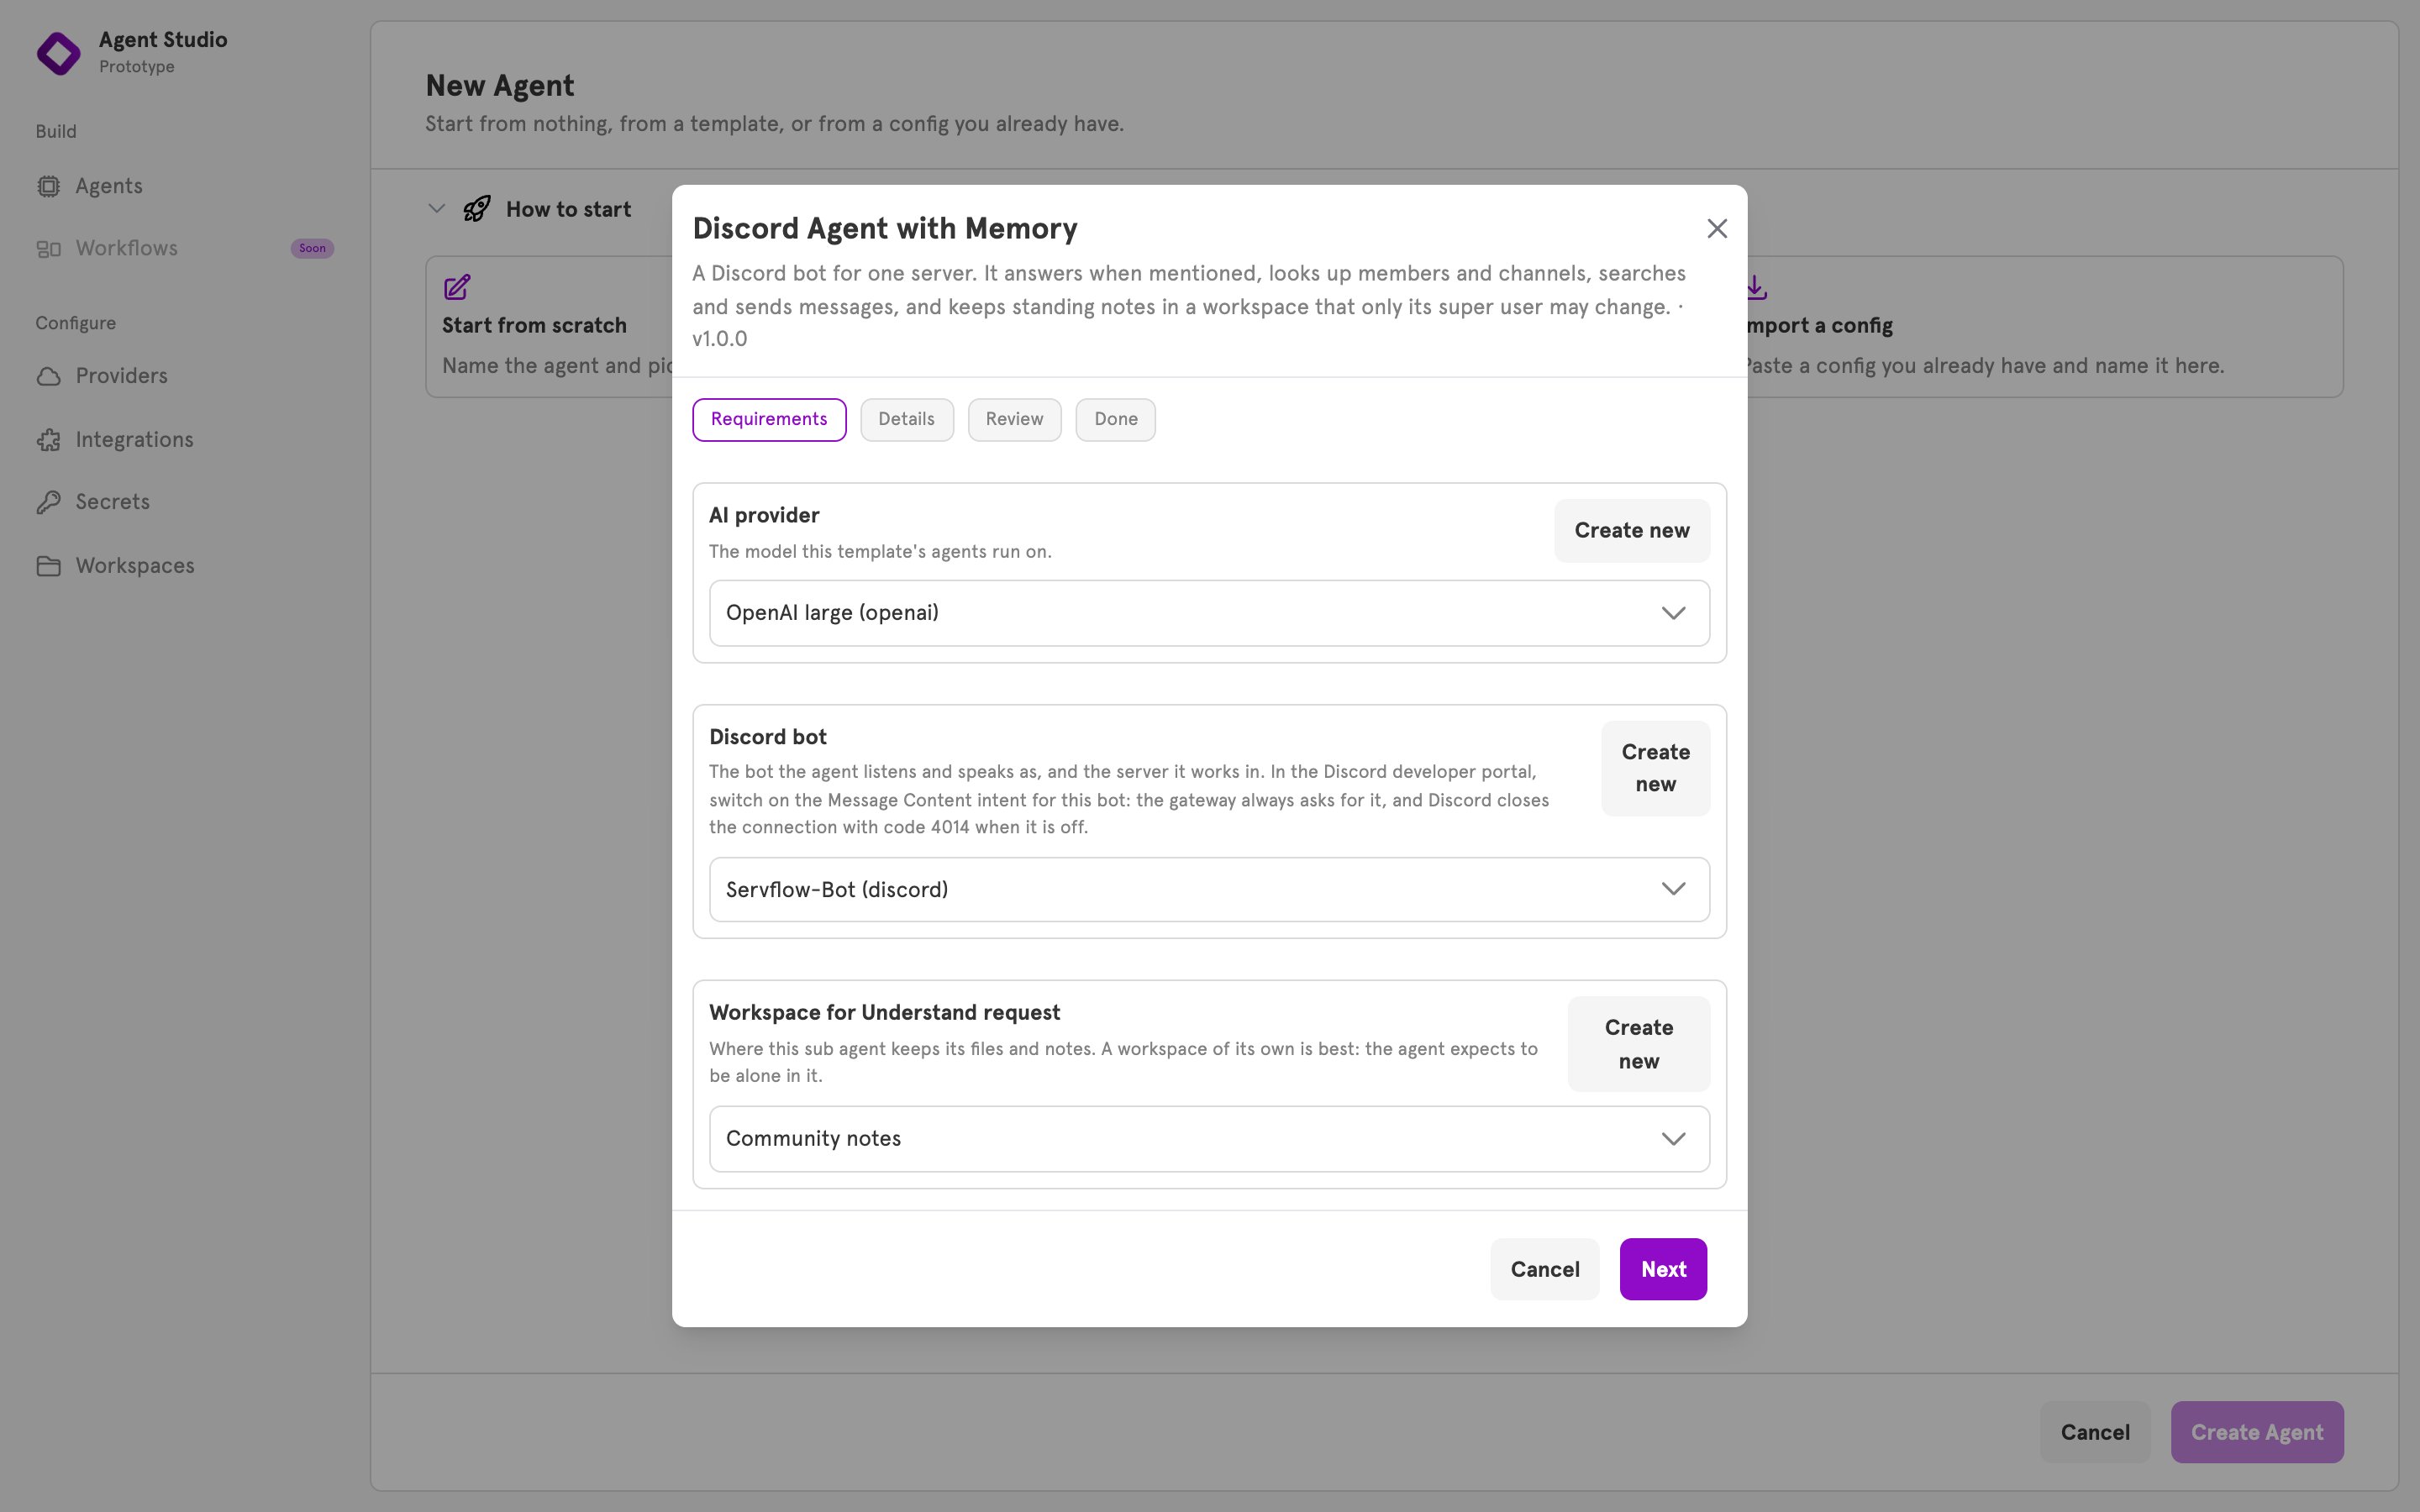
- Under Requirements, choose your provider under AI provider,
community-botunder Discord bot, andCommunity notesunder Workspace for Understand request. Click Next.
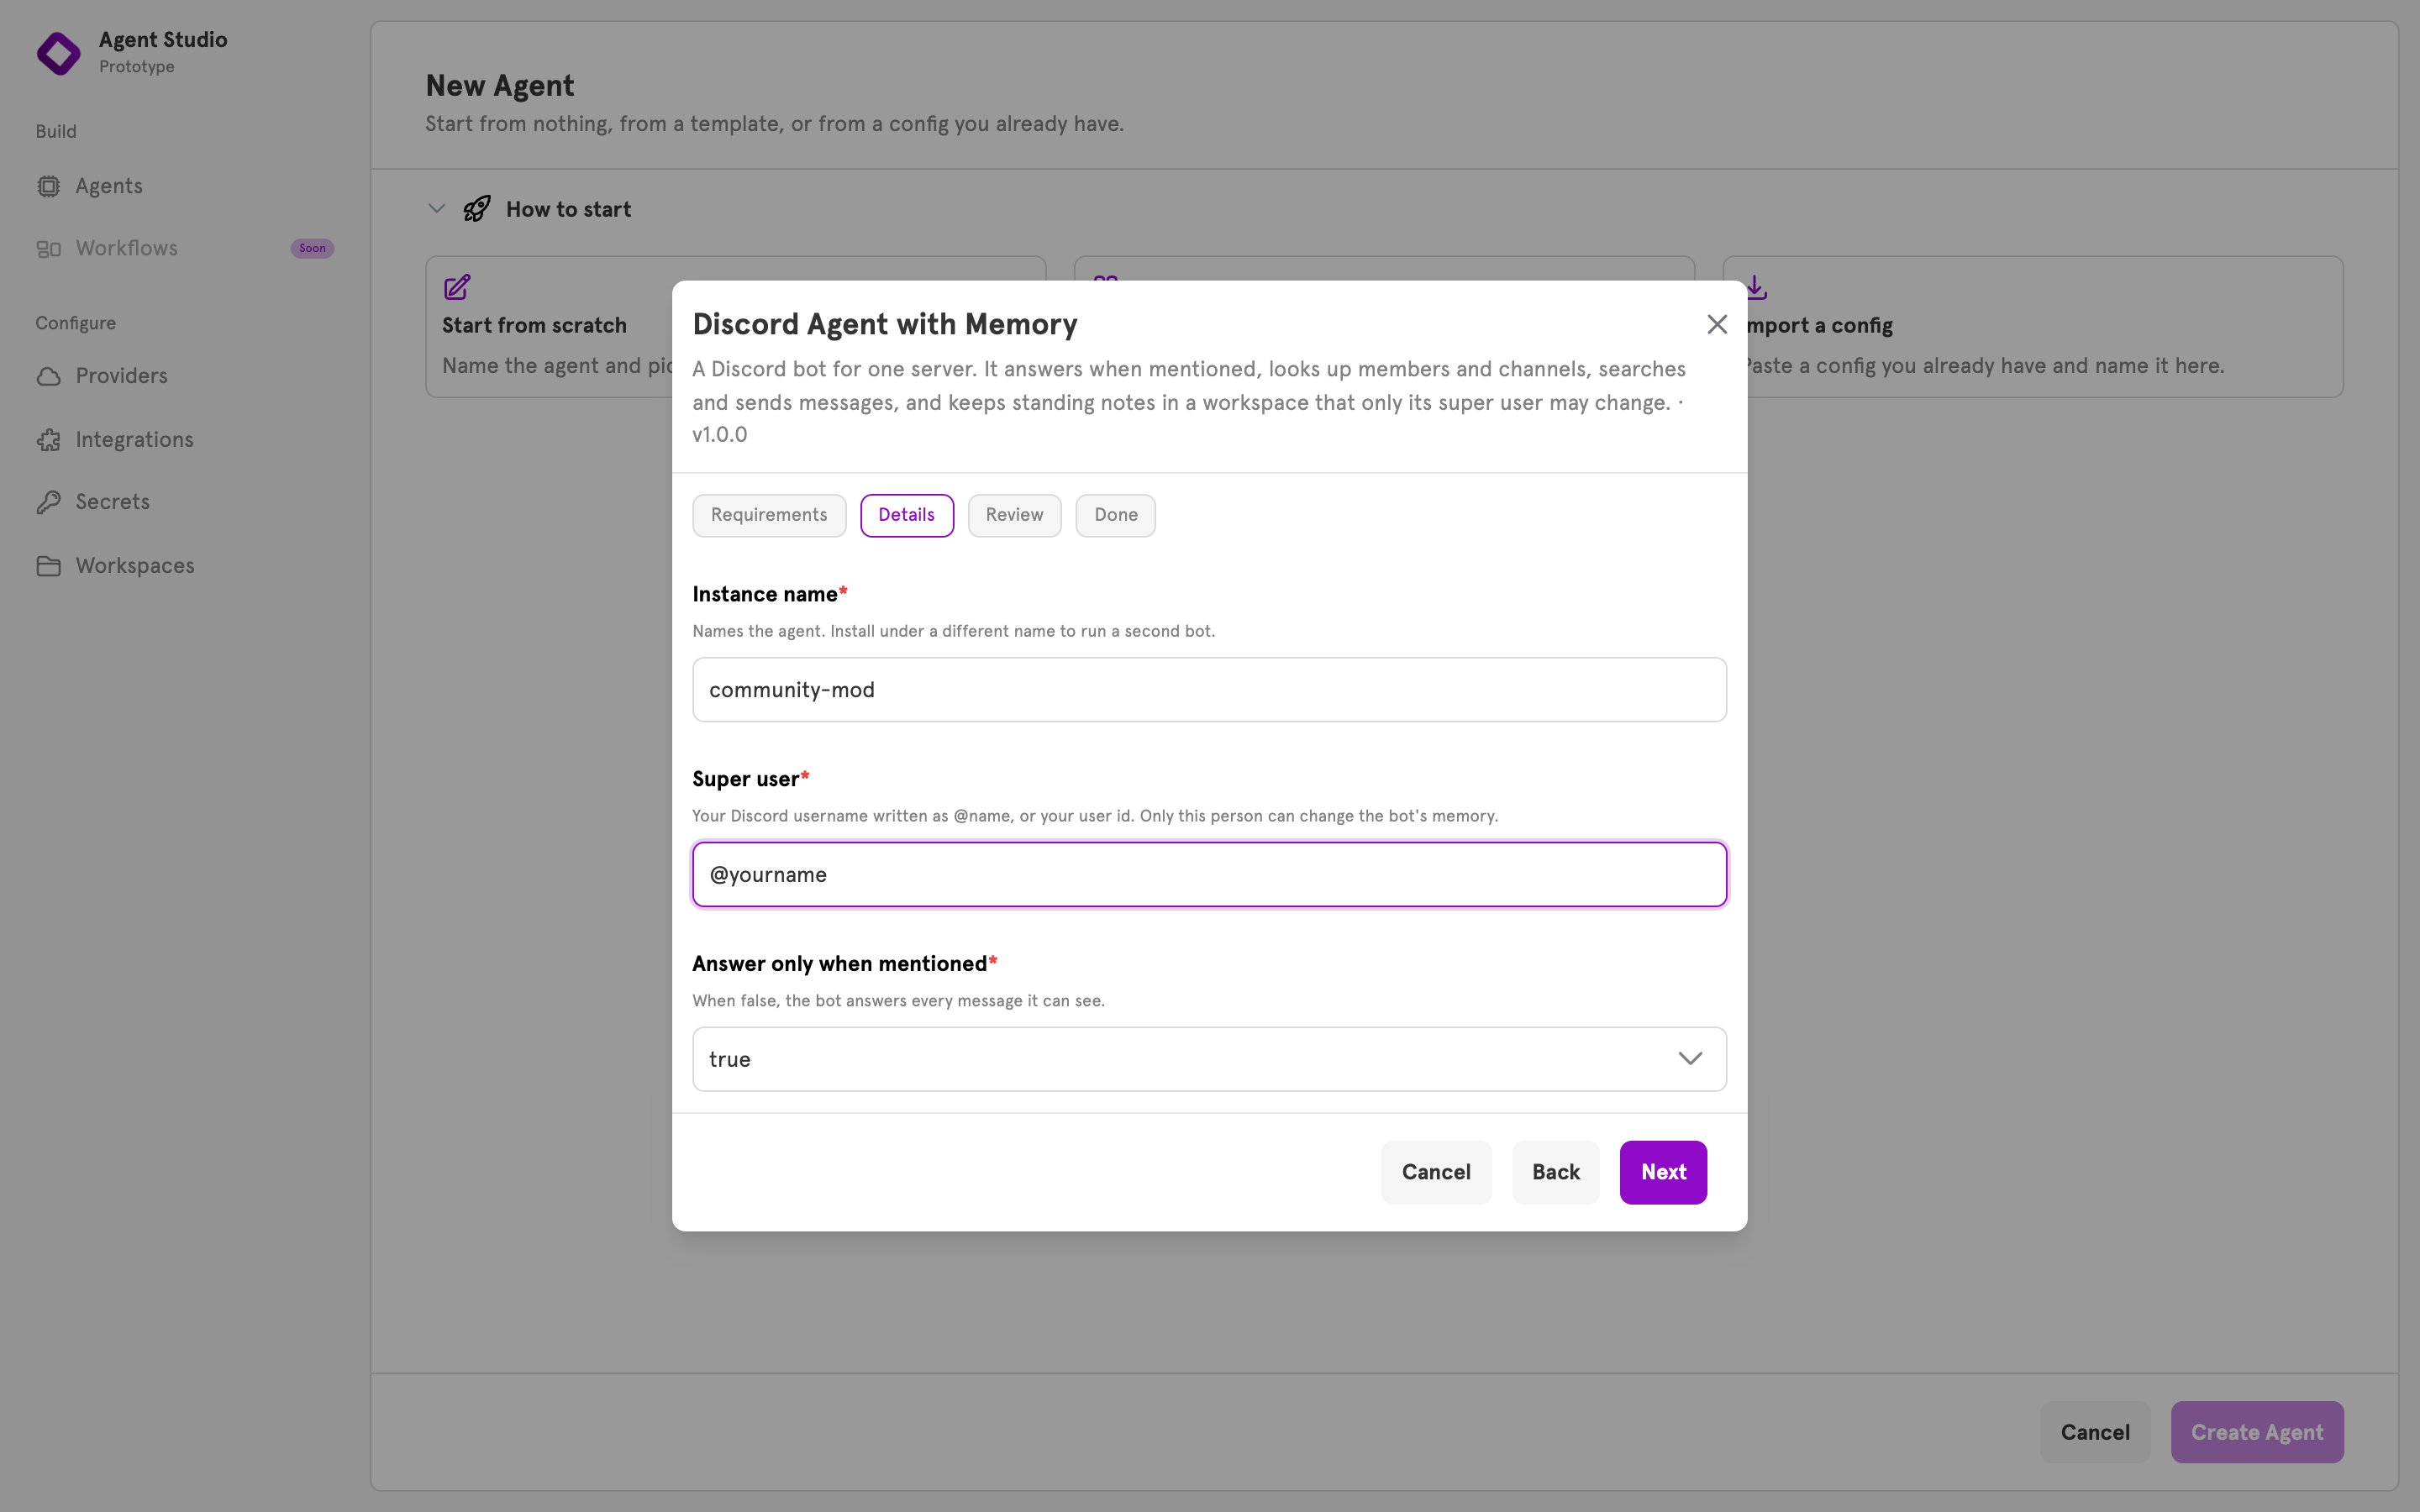
- Under Details, enter
community-modas the Instance name. Under Super user, enter your own Discord username as@name. Under Answer only when mentioned, choosetrue. Click Next.
- Check the Review step and install.
community-mod, and you can open it in the editor like any other agent. It has one sub-agent, Understand request, with tools for looking up members and channels, searching messages, and sending messages.
Step 6: Say hello
- Open the
community-modagent and make sure it is enabled. In Discord, the bot now shows as online. - In any channel the bot can see, type
@YourBot hello, what can you do?
Step 7: Give it a rule to remember
- In Discord, type
@YourBot remember that self-promotion is only allowed in #showcase. The bot confirms. - In ServFlow, open Workspaces and open
Community notes. A file namedmemory.mdis in the list. Click it. Your rule is in it.
Step 8: See what it remembers, and whom it listens to
- In a different channel, type
@YourBot can I post my project here?The bot answers from the rule, although the rule was given in another channel. - From a second account, or with a friend’s help, type
@YourBot forget the self-promotion rule. The bot should decline. Its instructions tell it to change its notes only for you, the super user.
What you built
- An integration holds your bot’s token, and is how the agent receives messages and replies as your bot. See Integrations.
- A Discord bot entry decides which messages start the agent. Yours answers only when mentioned. See Entries and entry handlers.
- Two kinds of memory. The bot remembers a conversation within one channel on its own. The rule you gave it works in every channel because it is in a file. See Workspaces and files.
- Tools let the bot look things up and send messages. See Add a tool to an agent.
Next steps
- Limit the channels the bot answers in, under Runs when in the agent’s entry. See Connect an agent to Discord.
- Stop anyone but you from making the bot send messages, with a guard on its sending tools:
{{ .discord.is_super_user }}. See Guard rails. - Change how the bot talks, in the System prompt of Understand request.
- Put an agent you built yourself on Discord. See Connect an agent to Discord.
If the bot stays offline
- Message Content is turned off in the Discord Developer Portal. Turn it on, then save the agent again.
- The agent is not enabled.
- The token was reset in Discord after you stored it. Replace the value of
discord-bot-token, then open the agent and click Save.